Love this? Save it for later!
Share the inspiration with your friends
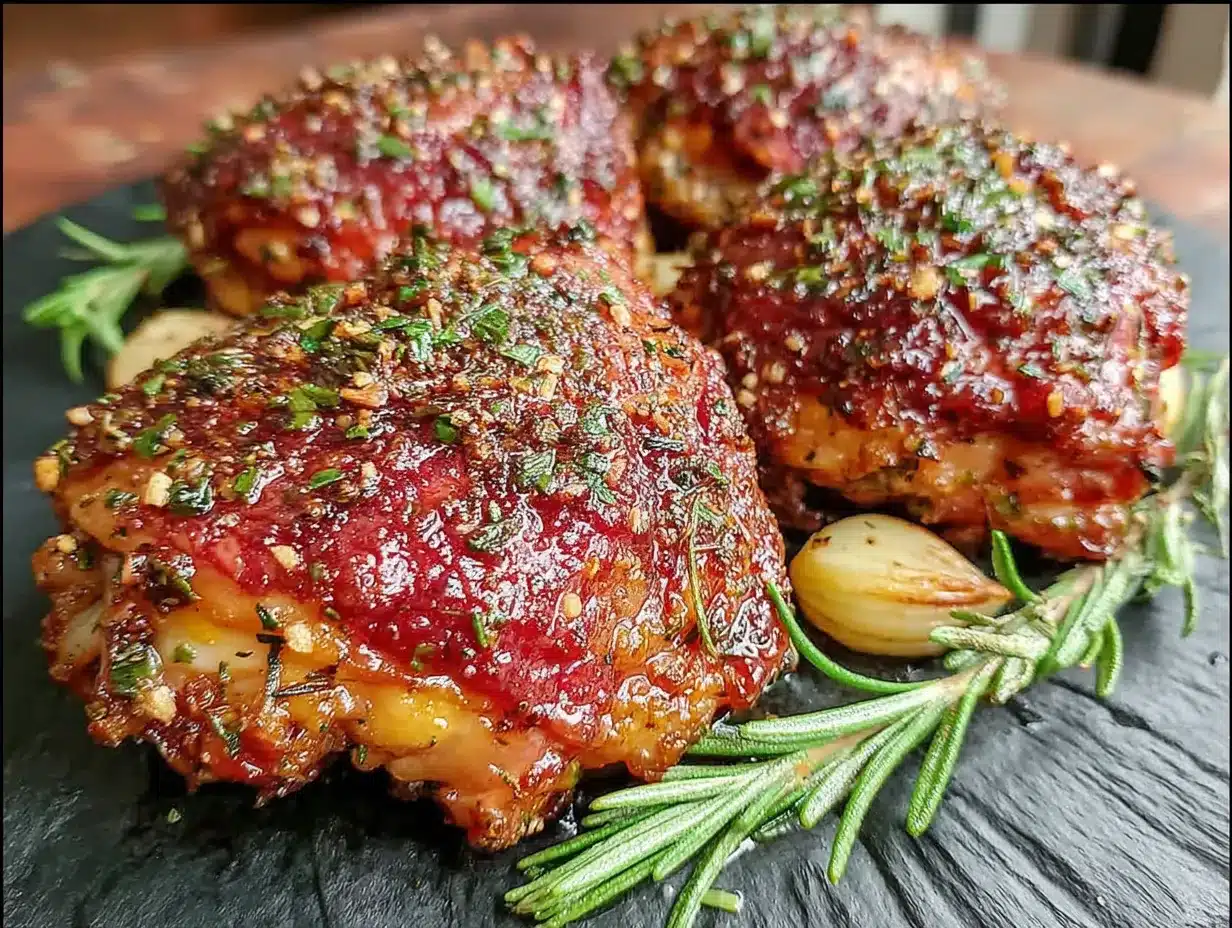
Listen, I’ve made a lot of chicken in my day. Baked chicken, pan-seared chicken, slow-cooker chicken that falls apart—you name it. But these crispy air fryer chicken thighs with garlic herb rub? They’re the ones I keep coming back to. Honestly, they’ve ruined other cooking methods for me. Let me tell you why this isn’t just another chicken recipe.
- Quick & Easy: From prep to plate in under 30 minutes. No marinating overnight, no complicated steps. Perfect for those weeknights when you’re staring at the fridge wondering what’s for dinner.
- Simple Ingredients: You probably have most of this stuff already. Garlic powder, dried herbs, salt, pepper—pantry staples that come together for something seriously good.
- Perfect for Meal Prep: Make a batch on Sunday, and you’ve got protein ready for salads, grain bowls, or quick lunches all week. They reheat beautifully, which is rare for chicken.
- Crowd-Pleaser: I’ve served these to picky eaters, health-conscious friends, and straight-up chicken connoisseurs. Empty plates every single time.
- Unbelievably Crispy: Here’s the thing—air fryer chicken thighs get this skin that crackles when you bite into it. The kind of crispy that makes you close your eyes for a second. No deep frying required.
What makes this recipe different? It’s the garlic herb rub. I spent weeks testing ratios—too much garlic and it gets bitter, too many herbs and it tastes like a salad. This version? Balanced. Savory. The herbs toast in the hot air, releasing their oils right onto the chicken. Plus, the air fryer circulates heat so perfectly that you get even browning without flipping halfway through. I mean, that’s a game-changer right there.
These crispy air fryer chicken thighs are comfort food reimagined—healthier, faster, but with the same soul-soothing satisfaction. Perfect for impressing guests without stress, or turning a simple Tuesday dinner into something you actually look forward to.
What Ingredients You Will Need
This recipe uses simple, wholesome ingredients to deliver bold flavor and satisfying crunch without the fuss. Most of these are pantry staples, which makes this one of those recipes you can pull together without a special trip to the store.
For the Garlic Herb Rub
- Bone-in, skin-on chicken thighs – 4 to 6 thighs (about 1.5 to 2 pounds total). The skin is non-negotiable here—it’s what gets that incredible crispy texture. Look for thighs that are similar in size so they cook evenly.
- Garlic powder – 2 teaspoons. Not garlic salt, garlic powder. It coats the chicken more evenly and doesn’t burn as quickly as fresh minced garlic in the air fryer.
- Onion powder – 1 teaspoon. Adds that savory depth that makes you wonder what’s in the rub.
- Dried thyme – 1 teaspoon. I prefer dried here over fresh—it concentrates the flavor and doesn’t turn soggy.
- Dried rosemary – 1 teaspoon. Crush it between your fingers before adding to release the oils. Trust me on this.
- Dried oregano – 1/2 teaspoon. Just a hint—it’s strong and you don’t want it to take over.
- Smoked paprika – 1 teaspoon. This is my secret weapon. Regular paprika works too, but smoked adds this subtle campfire note that pairs beautifully with the crispy skin.
- Salt – 1 teaspoon. I use kosher salt. If you’re using table salt, cut back to 3/4 teaspoon.
- Black pepper – 1/2 teaspoon, freshly ground if you can.
- Olive oil or avocado oil – 1 tablespoon. Just enough to help the rub stick and encourage browning. Avocado oil has a higher smoke point, which is great for the air fryer.
Optional but Recommended
- Fresh parsley – For garnish. It makes the dish look finished, you know?
- Lemon wedges – A squeeze of lemon right before eating cuts through the richness. I never skip this.
Ingredient Selection Tip: I’ve tried this with different brands of chicken thighs, and honestly, the quality of the chicken matters. Look for thighs that are plump and have even fat distribution. If you can find air-chilled chicken, grab it—it has less moisture, which means crispier skin.
Substitution Guidance: No dried rosemary? Use 1 teaspoon of dried Italian seasoning instead. Need it dairy-free? It already is—no swaps needed. Want to use boneless thighs? You can, but reduce cooking time to about 12-15 minutes and expect slightly less crispy skin since there’s less fat rendering.
Equipment Needed
The beauty of this recipe is that it doesn’t require much gear. Here’s what you’ll need:
- Air fryer – Any brand works. I use a 5.8-quart basket-style air fryer, which fits 4 to 6 thighs comfortably without overcrowding. If yours is smaller, cook in batches.
- Mixing bowl – Medium-sized, for tossing the chicken with the rub. Glass or stainless steel works fine.
- Tongs – For flipping the chicken. Silicone-tipped ones won’t scratch your air fryer basket.
- Meat thermometer – This is non-negotiable for me. Chicken needs to reach 165°F (74°C) internally. I’ve learned the hard way that guessing doesn’t work.
- Paper towels – For patting the chicken dry. This step is more important than you think.
- Cutting board and knife – For optional garnishes like parsley or lemon wedges.
Personal Note: I bought my first air fryer on a whim during a sale, and honestly, I wasn’t sure I’d use it. Now I can’t imagine cooking chicken thighs any other way. If you’re new to air frying, don’t overthink it—just make sure yours has a basket, not a tray, for the best air circulation.
Preparation Method
Alright, let’s get cooking. I’ve broken this down step by step so you don’t miss anything. Follow along, and you’ll have the crispiest air fryer chicken thighs of your life.
- Prep the chicken. Take your chicken thighs out of the fridge about 15 minutes before cooking. This helps them cook more evenly. Pat each thigh dry with paper towels—really get in there. Moisture is the enemy of crispy skin. If the chicken feels wet, use more paper towels.
- Make the garlic herb rub. In a small bowl, combine the garlic powder, onion powder, dried thyme, dried rosemary, dried oregano, smoked paprika, salt, and black pepper. Stir with a fork to break up any clumps. Smell it—that’s what your kitchen is about to smell like.
- Season the chicken. Place the dried chicken thighs in a mixing bowl. Drizzle with the olive oil and toss to coat. Then sprinkle the garlic herb rub over the chicken. Use your hands to massage the rub into every surface—under the skin if you can, but at least all over the top and bottom. Don’t forget the edges.
- Preheat the air fryer. Set your air fryer to 380°F (193°C) and let it preheat for 3-5 minutes. Preheating ensures the chicken starts cooking immediately, which helps the skin crisp up.
- Arrange the thighs. Place the seasoned chicken thighs in the air fryer basket, skin side down. Make sure they’re in a single layer with a little space between each one. Overcrowding traps steam and gives you soggy skin. If your basket is small, cook in two batches.
- Cook the first side. Air fry at 380°F (193°C) for 12 minutes. Don’t open the basket during this time—let the hot air do its job. You’ll hear sizzling, which is a good sign.
- Flip and finish. Using tongs, carefully flip the chicken thighs so the skin side is up. Cook for another 10-12 minutes at 380°F (193°C). The skin should be deep golden brown and crispy. If it needs more color, add 2-3 minutes.
- Check the temperature. Insert a meat thermometer into the thickest part of a thigh, avoiding the bone. You’re looking for 165°F (74°C). If it’s not there yet, cook in 2-minute increments.
- Rest before serving. Remove the chicken from the air fryer and let it rest on a plate for 5 minutes. This lets the juices redistribute so every bite is moist. I know it’s hard to wait, but it makes a difference.
- Garnish and serve. Sprinkle with fresh parsley and serve with lemon wedges if you like. The brightness from the lemon really wakes up all those herb flavors.
Sensory Cue: When you flip the chicken at step 7, the skin should look golden and feel firm to the touch. If it still looks pale or feels soft, give it more time on the first side before flipping.
Troubleshooting Tip: If your chicken is browning too fast but isn’t cooked through, lower the temperature to 360°F (182°C) and add a few minutes. Every air fryer runs a little differently—mine runs hot, so I’ve learned to adjust.
Cooking Tips & Techniques
I’ve made this recipe more times than I can count, and I’ve learned a few things along the way. Let me save you some trouble.
Dry the chicken thoroughly. This is the number one tip for crispy skin. I use three or four paper towels per batch. If the chicken feels damp after drying, grab another towel. Extra moisture creates steam, and steam is the enemy of crunch.
Don’t skip the oil. I know some air fryer recipes skip oil altogether, but for crispy skin, you need a thin coating. It helps the rub stick and promotes browning. One tablespoon is plenty—too much oil makes the skin greasy instead of crispy.
Let the rub sit. If you have time, let the seasoned chicken sit at room temperature for 10-15 minutes before cooking. The salt draws out some moisture, which then evaporates, concentrating the flavor. I do this while the air fryer preheats.
Flip at the right time. Starting skin side down lets the fat render and the skin begin crisping against the hot basket. Flipping to skin side up finishes the job. Don’t flip more than once—each time you open the basket, heat escapes.
Learn your air fryer. Here’s the thing—every air fryer is a little different. My friend’s air fryer cooks faster than mine. Your first batch might need some tweaking. Keep notes on what works for your specific model.
One mistake I made: The first time I made these, I didn’t preheat the air fryer. The chicken came out okay, but the skin wasn’t as crispy. Preheating makes a noticeable difference—don’t skip it just to save a few minutes.
Variations & Adaptations
Once you’ve mastered the basic recipe, try one of these variations. Each one changes the flavor profile while keeping that perfect crispy texture.
Spicy Buffalo Version
Add 1 teaspoon of cayenne pepper to the garlic herb rub, and toss the cooked chicken thighs in 2 tablespoons of melted butter mixed with 3 tablespoons of hot sauce. Serve with ranch or blue cheese dip. I made this for game day once, and they disappeared in minutes.
Lemon Pepper Twist
Replace the dried herbs with 2 teaspoons of lemon pepper seasoning and add the zest of one lemon to the rub. Squeeze fresh lemon juice over the finished chicken. It’s bright, zesty, and perfect for spring dinners.
Honey Garlic Glaze
After cooking, brush the thighs with a mixture of 2 tablespoons honey, 1 tablespoon soy sauce, and 1 minced garlic clove. Return to the air fryer for 2 minutes to caramelize. Sweet, savory, sticky—so good.
Dietary Adaptations
This recipe is naturally gluten-free and dairy-free. For a lower-sodium version, reduce the salt to 1/2 teaspoon and add extra herbs for flavor. If you’re watching fat intake, you can remove the skin after cooking—the meat underneath is still moist and flavorful from the rub.
Change the Cooking Method
No air fryer? Bake the chicken thighs at 425°F (218°C) on a wire rack set over a baking sheet for 35-40 minutes. The wire rack lets air circulate underneath, helping the skin crisp. It’s not quite as good as the air fryer, but it’s close.
Serving & Storage Suggestions
These crispy air fryer chicken thighs are versatile. Here’s how to serve them and keep them for later.
Serving Temperature: Serve hot, right after resting. The skin stays crispy for about 10-15 minutes after cooking, so don’t let them sit too long. If you’re serving a crowd, keep them warm in a 200°F oven on a wire rack—not on a plate where they’ll steam.
What Goes Well with Them: I love these with roasted vegetables—broccoli, asparagus, or Brussels sprouts all work. A simple green salad with lemon vinaigrette cuts through the richness. For a heartier meal, serve with mashed potatoes or rice pilaf. The juices from the chicken are amazing drizzled over grains.
Storage Instructions: Store leftover chicken thighs in an airtight container in the refrigerator for up to 4 days. The skin will soften in the fridge, but don’t worry—you can fix that.
Reheating Methods: The air fryer is the best way to revive crispy skin. Reheat at 375°F (190°C) for 3-4 minutes. An oven at 400°F (200°C) for 5-7 minutes works too. Avoid the microwave—it makes the skin rubbery and sad. I learned that the hard way.
How Flavors Develop: Honestly, these are even better the next day. The herbs and garlic meld into the meat overnight, so the flavor is deeper. If you’re meal prepping, cook the chicken, store it, and reheat it when you’re ready.
Freezer Tips: Freeze cooked chicken thighs in a single layer on a baking sheet, then transfer to a freezer bag. They’ll keep for up to 3 months. Thaw in the fridge overnight and reheat in the air fryer.
Nutritional Information & Benefits
Here’s a rough breakdown per serving (one chicken thigh):
| Nutrient | Amount |
|---|---|
| Calories | 280-320 |
| Protein | 24g |
| Fat | 20g |
| Saturated Fat | 5g |
| Carbohydrates | 2g |
| Fiber | 0g |
| Sodium | 450-550mg |
These values are estimates and will vary based on the size of your chicken thighs and exact ingredients used.
Health Benefits: Chicken thighs are a great source of protein, which supports muscle health and keeps you feeling full. They also provide B vitamins, particularly B6 and B12, which help with energy metabolism. The herbs in the rub—thyme, rosemary, oregano—are rich in antioxidants and anti-inflammatory compounds. Using the air fryer means you need less oil than traditional frying, so you’re getting that crispy texture with fewer calories.
Dietary Considerations: This recipe is naturally low-carb and keto-friendly. It’s also gluten-free and dairy-free. If you’re watching your sodium, reduce the salt in the rub or use a salt-free herb blend.
FAQs
Can I use boneless, skinless chicken thighs?
You can, but the texture will be different. Boneless, skinless thighs cook faster—about 10-12 minutes total—and won’t get as crispy since there’s no skin. If you go this route, reduce the cooking time and check the internal temperature early.
Why isn’t my chicken skin getting crispy?
Most likely, the chicken wasn’t dried well enough before seasoning. Moisture is the biggest culprit. Also, make sure you’re not overcrowding the air fryer basket. If the pieces are touching, they’ll steam instead of crisp. Try cooking in batches if needed.
Can I use fresh herbs instead of dried?
You can, but fresh herbs have more moisture and can make the rub clumpy. If using fresh, use about three times the amount of dried herbs listed, and be careful not to over-season. I’ve found dried herbs work better for this recipe since they concentrate flavor without adding moisture.
How do I reheat leftovers without losing crispiness?
The air fryer is your best friend here. Reheat at 375°F (190°C) for 3-4 minutes. If you don’t have an air fryer, use the oven at 400°F (200°C) for 5-7 minutes. Skip the microwave—it turns crispy skin into sad, chewy leather.
Can I cook frozen chicken thighs in the air fryer?
Yes, but you’ll need to adjust the time. Cook frozen thighs at 380°F (193°C) for 18-20 minutes, flip, then cook for another 10-15 minutes until the internal temperature reaches 165°F (74°C). The skin won’t be as crispy as with thawed chicken, but it’s still good in a pinch.
Conclusion
These crispy air fryer chicken thighs with garlic herb rub have become a staple in my kitchen for good reason. They’re quick, they’re forgiving, and they deliver that satisfying crunch we all crave without the mess of deep frying. Honestly, I make them at least once a week now, and I’m still not tired of them.
I hope you give this recipe a try. Play around with the herbs—add more rosemary if that’s your thing, or kick up the heat with extra paprika. The best part about cooking is making a recipe your own. Maybe you’ll discover a variation that becomes your family’s favorite.
If you make these, I’d love to hear how they turned out. Drop a comment below or tag me in your photos. Did you try a different herb combination? Did you serve them with something unexpected? Share your wins—and your learning moments too. That’s how we all get better in the kitchen.
Now go make some crispy chicken. You’ve got this.
Pin This Recipe!
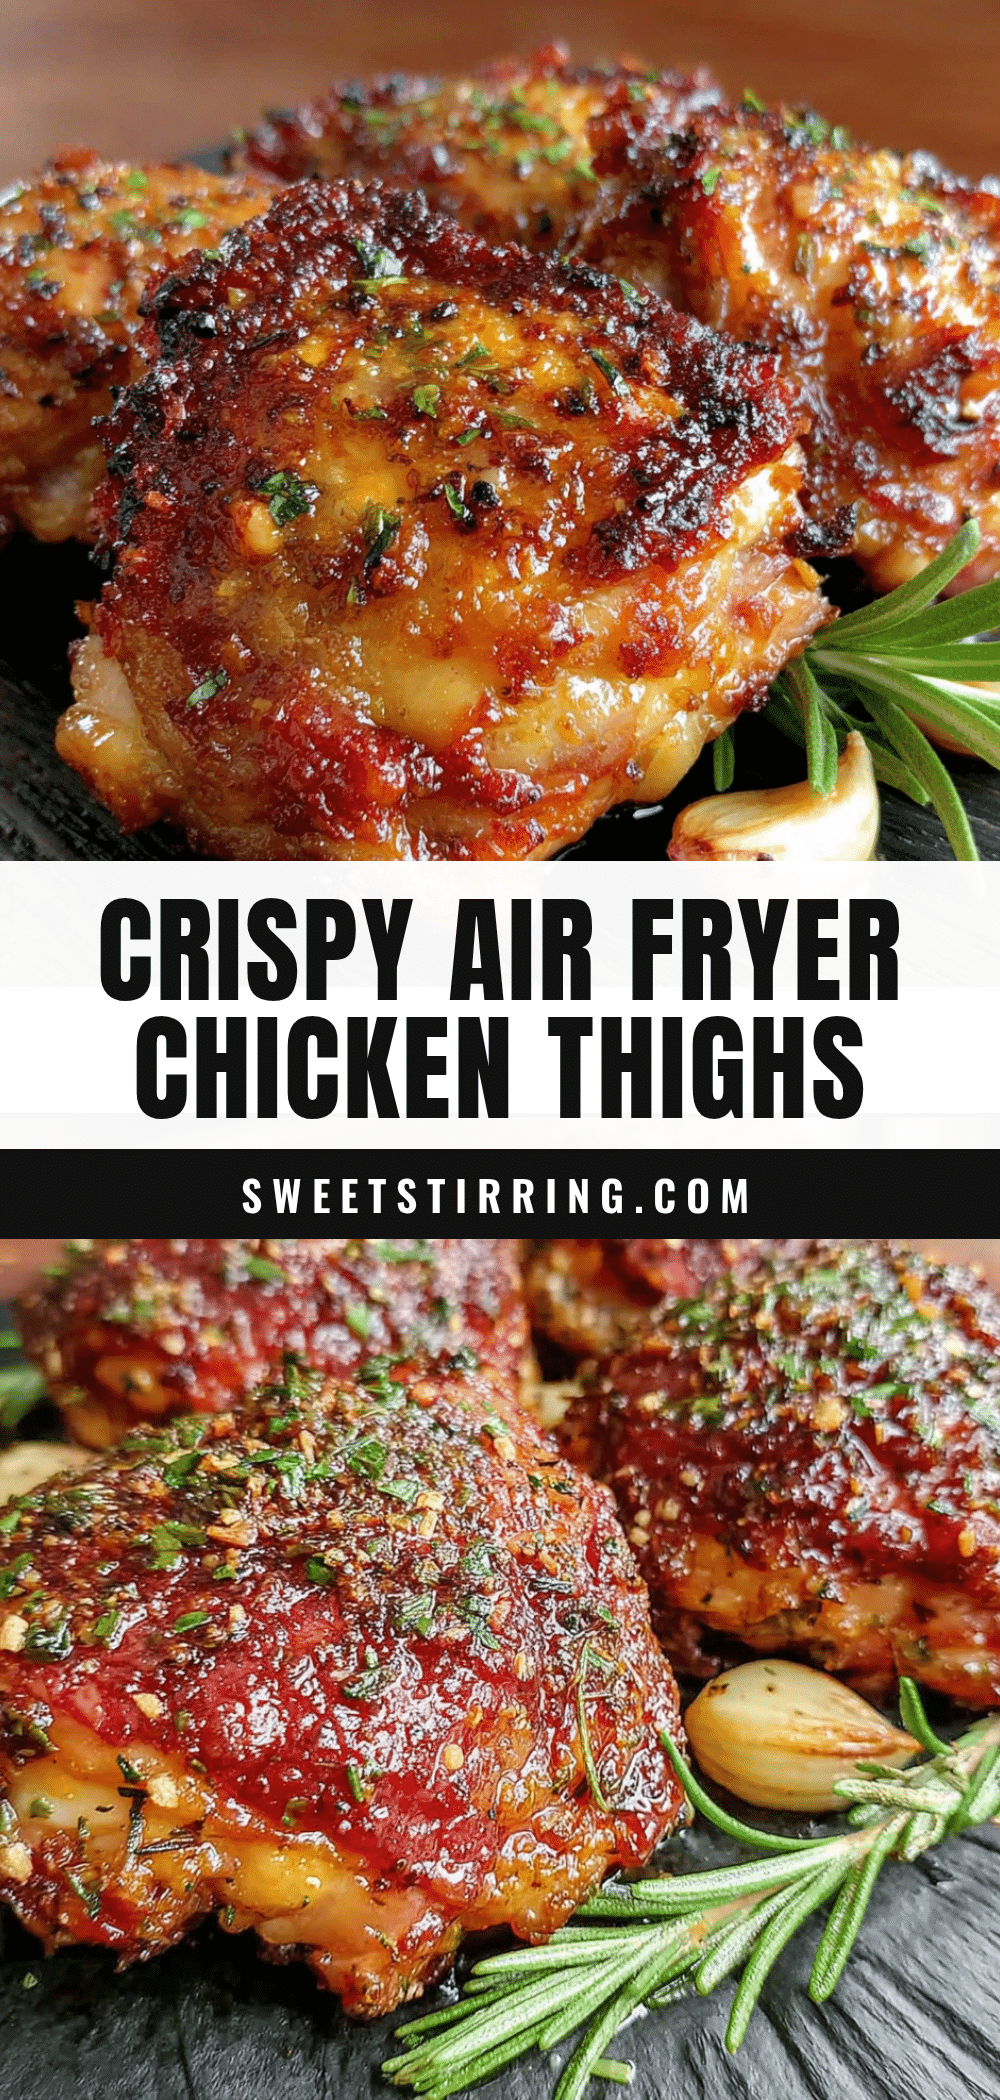
Crispy Air Fryer Chicken Thighs with Garlic Herb Rub (Best Easy Recipe)

These crispy air fryer chicken thighs with garlic herb rub are quick, easy, and deliver unbelievably crispy skin without deep frying. Perfect for weeknight dinners or meal prep, they’re a crowd-pleaser that comes together in under 30 minutes.
- Prep Time: 10 minutes
- Cook Time: 22-24 minutes
- Total Time: 32-34 minutes
- Yield: 4 servings 1x
- Category: Main Course
- Cuisine: American
Ingredients
- 4 to 6 bone-in, skin-on chicken thighs (about 1.5 to 2 pounds total)
- 2 teaspoons garlic powder
- 1 teaspoon onion powder
- 1 teaspoon dried thyme
- 1 teaspoon dried rosemary, crushed
- 1/2 teaspoon dried oregano
- 1 teaspoon smoked paprika
- 1 teaspoon kosher salt (or 3/4 teaspoon table salt)
- 1/2 teaspoon black pepper, freshly ground
- 1 tablespoon olive oil or avocado oil
- Fresh parsley for garnish (optional)
- Lemon wedges for serving (optional)
Instructions
- Take the chicken thighs out of the fridge about 15 minutes before cooking. Pat each thigh dry thoroughly with paper towels.
- In a small bowl, combine garlic powder, onion powder, dried thyme, dried rosemary, dried oregano, smoked paprika, salt, and black pepper. Stir to break up any clumps.
- Place the dried chicken thighs in a mixing bowl. Drizzle with olive oil and toss to coat. Sprinkle the garlic herb rub over the chicken and massage into all surfaces.
- Preheat the air fryer to 380°F (193°C) for 3-5 minutes.
- Arrange the seasoned chicken thighs in the air fryer basket in a single layer, skin side down, with space between each.
- Air fry at 380°F (193°C) for 12 minutes without opening the basket.
- Using tongs, flip the chicken thighs so the skin side is up. Cook for another 10-12 minutes at 380°F (193°C) until deep golden brown and crispy.
- Check the internal temperature with a meat thermometer; it should reach 165°F (74°C) in the thickest part. If not, cook in 2-minute increments.
- Remove the chicken from the air fryer and let rest on a plate for 5 minutes.
- Garnish with fresh parsley and serve with lemon wedges if desired.
Notes
Dry the chicken thoroughly for crispiest skin. Preheat the air fryer for best results. If chicken browns too fast but isn’t cooked through, lower temperature to 360°F (182°C) and add a few minutes. For boneless thighs, reduce cooking time to 12-15 minutes. Leftovers reheat best in the air fryer at 375°F (190°C) for 3-4 minutes.
Nutrition
- Serving Size: 1 chicken thigh
- Calories: 300
- Sodium: 500
- Fat: 20
- Saturated Fat: 5
- Carbohydrates: 2
- Protein: 24
Keywords: air fryer chicken thighs, crispy chicken thighs, garlic herb chicken, easy chicken recipe, quick dinner, meal prep chicken