Love this? Save it for later!
Share the inspiration with your friends
This was supposed to be a standard batch of fried chicken for a game day party. I had it all planned out—classic buttermilk soak, seasoned flour, the whole nine yards. But somewhere between the grocery store and my kitchen, I grabbed a jar of honey that was almost empty and a stick of butter that was way too soft. The power went out in my building for about twenty minutes right when I was about to start frying, which threw off my entire timing. I was already running late, my neighbor was texting me asking if I was still bringing food, and honestly, I was this close to just ordering pizza.
When I finally got the chicken in the oil, I realized I had accidentally dumped half the honey butter mixture into the flour instead of saving it all for the glaze. I stood there, spatula in hand, staring at the clumpy, sweet flour like it had personally betrayed me. Let me tell you, I was ready to scrap the whole thing. But I had already promised to bring something, and the chicken was already seasoned and battered in that weird honey-butter-flour situation. So I fried it anyway, figuring I’d just call it “experimental” and hope for the best.
What came out of that oil was nothing like the plan—and better. The honey in the flour caramelized just enough to create these crispy, almost candied edges on the chicken. The butter gave it this rich, golden crust that I had never managed to get with my regular recipe. I tossed the hot chicken in a quick honey butter glaze anyway, slapped it onto some soft slider buns with pickles, and brought it to the party feeling like I was bringing a science experiment.
You know that feeling when you take a bite of something you made and you’re genuinely shocked it came from your own hands? That was me, standing in my neighbor’s kitchen, a slider in each hand, just staring at the plate. People were asking for the recipe before the first game even started. I mean, I had to write it down on a napkin for three different people that day. This recipe stayed with me because it taught me something—sometimes the best dishes come from the moments when you think you’ve messed everything up. And honestly, maybe you’ve been there too, standing over a hot stove wondering if you should just give up and order takeout. Don’t. Keep going. You might end up with something worth sharing.
Why You’ll Love These Crispy Honey Butter Fried Chicken Tailgate Sliders
I’ve tested this recipe about a dozen times since that first accidental batch, tweaking the flour ratio and the glaze consistency until it was just right. As someone who has burned more than a few batches of fried chicken in my day, I can tell you with confidence—these sliders are the real deal. They’ve been family-approved at three different gatherings and even got a nod from my friend who is a former line cook, which is basically a Michelin star in my world.
- Quick & Easy: Comes together in under 45 minutes, perfect for last-minute game day cravings or when you need to bring something impressive fast.
- Simple Ingredients: No fancy grocery trips needed. You likely already have chicken, flour, butter, honey, and slider buns in your kitchen right now.
- Perfect for Tailgating: These sliders are portable, easy to eat standing up, and they hold up well even after sitting out for a bit. Great for parties, picnics, or just a fun dinner.
- Crowd-Pleaser: Always gets rave reviews from both kids and adults. The sweet and savory combo hits that universal comfort food spot.
- Unbelievably Delicious: The texture and flavor combo is next-level comfort food. Crispy, sticky, buttery, and just a little bit sweet—it’s the kind of slider you dream about.
What makes this recipe different from the rest is that tiny bit of honey in the flour. It’s not a lot—just enough to create that caramelized crunch without making the coating sweet or burnt. I’ve tried making these without that step, and trust me, it’s not the same. This isn’t just another fried chicken slider recipe. It’s the version you’ll keep coming back to, the one you’ll text your friends about, the one that makes you close your eyes after the first bite. It’s comfort food reimagined—faster, crispier, and with the same soul-soothing satisfaction you want from a good fried chicken sandwich.
What Ingredients You Will Need
This recipe uses simple, everyday ingredients to deliver that bold, crispy, sweet-and-savory flavor without any fuss. Most of these are pantry staples, and the ones that aren’t are easy to find at any grocery store.
- For the Chicken:
- 1.5 pounds boneless, skinless chicken thighs (about 6-8 thighs) (I prefer thighs for extra juiciness, but you can use breasts if you cut them into smaller pieces)
- 1 cup buttermilk (for tenderizing and adding tang)
- 1 teaspoon salt
- 1/2 teaspoon black pepper
- 1/2 teaspoon garlic powder
- For the Honey Butter Flour Coating:
- 1.5 cups all-purpose flour
- 2 tablespoons cornstarch (this is my secret for extra crispiness)
- 1 teaspoon paprika
- 1/2 teaspoon cayenne pepper (optional, for a little heat)
- 1 teaspoon salt
- 1/2 teaspoon black pepper
- 2 tablespoons unsalted butter, melted and slightly cooled
- 1 tablespoon honey
- For the Honey Butter Glaze:
- 1/4 cup unsalted butter
- 1/4 cup honey
- 1 tablespoon hot sauce (like Frank’s RedHot) (optional, for balance)
- A pinch of salt
- For the Sliders:
- 8-10 slider buns (I recommend brioche buns for extra richness)
- 1/2 cup dill pickle slices
- Optional: shredded lettuce, sliced red onion, or coleslaw for topping
- For Frying:
- Vegetable oil or peanut oil (enough for about 2 inches of oil in your pot or deep fryer)
When it comes to the honey, I recommend using a good quality, runny honey—not the crystallized stuff. The brand I usually grab is Nature Nate’s, but any pure honey works. For the butter, I always use unsalted so I can control the salt level myself. If you only have salted butter, just reduce the added salt in the flour by a pinch. Also, look for chicken thighs that are roughly the same size so they cook evenly. If you’re using chicken breasts, pound them to an even thickness first.
For the buttermilk, you can absolutely make your own by adding a tablespoon of lemon juice or white vinegar to a cup of regular milk and letting it sit for five minutes. I do it all the time when I forget to buy buttermilk at the store. And if you want a gluten-free option, swap the all-purpose flour with a good gluten-free flour blend that includes xanthan gum. I’ve tested it with Bob’s Red Mill 1-to-1 Baking Flour and it works beautifully.
Equipment Needed
You don’t need a professional kitchen to make these sliders, but having the right tools makes the process smoother and safer. Here’s what you’ll need:
- Large heavy-bottomed pot or Dutch oven: I use my trusty 6-quart Dutch oven for frying. It holds heat well and prevents the oil from cooling down too much when you add the chicken.
- Deep-fry thermometer: This is non-negotiable. You need to keep the oil at a steady 350°F (175°C) for perfectly crispy chicken. I’ve ruined batches by guessing the temperature—trust me on this one.
- Tongs or a slotted spoon: For safely lowering the chicken into the oil and removing it.
- Wire rack set over a baking sheet: This keeps the fried chicken crispy instead of soggy. Paper towels work in a pinch, but they trap steam and soften the crust.
- Mixing bowls: One for the buttermilk soak, one for the flour coating, and one for the glaze.
- Whisk and fork: For mixing the honey butter into the flour. A fork works better than a whisk for breaking up the clumps.
- Small saucepan: For making the honey butter glaze.
- Cutting board and sharp knife: For trimming any excess fat from the chicken.
If you don’t have a Dutch oven, a deep fryer or even a sturdy cast-iron skillet works great. I’ve used a cast-iron skillet for years before I got my Dutch oven, and it does the job perfectly. Just be careful with the oil level—don’t fill it more than halfway to prevent overflow. Also, a splatter screen is a lifesaver if you have one. It keeps the stovetop clean and prevents burns. I learned that the hard way after a grease burn on my arm that took weeks to heal.
Preparation Method
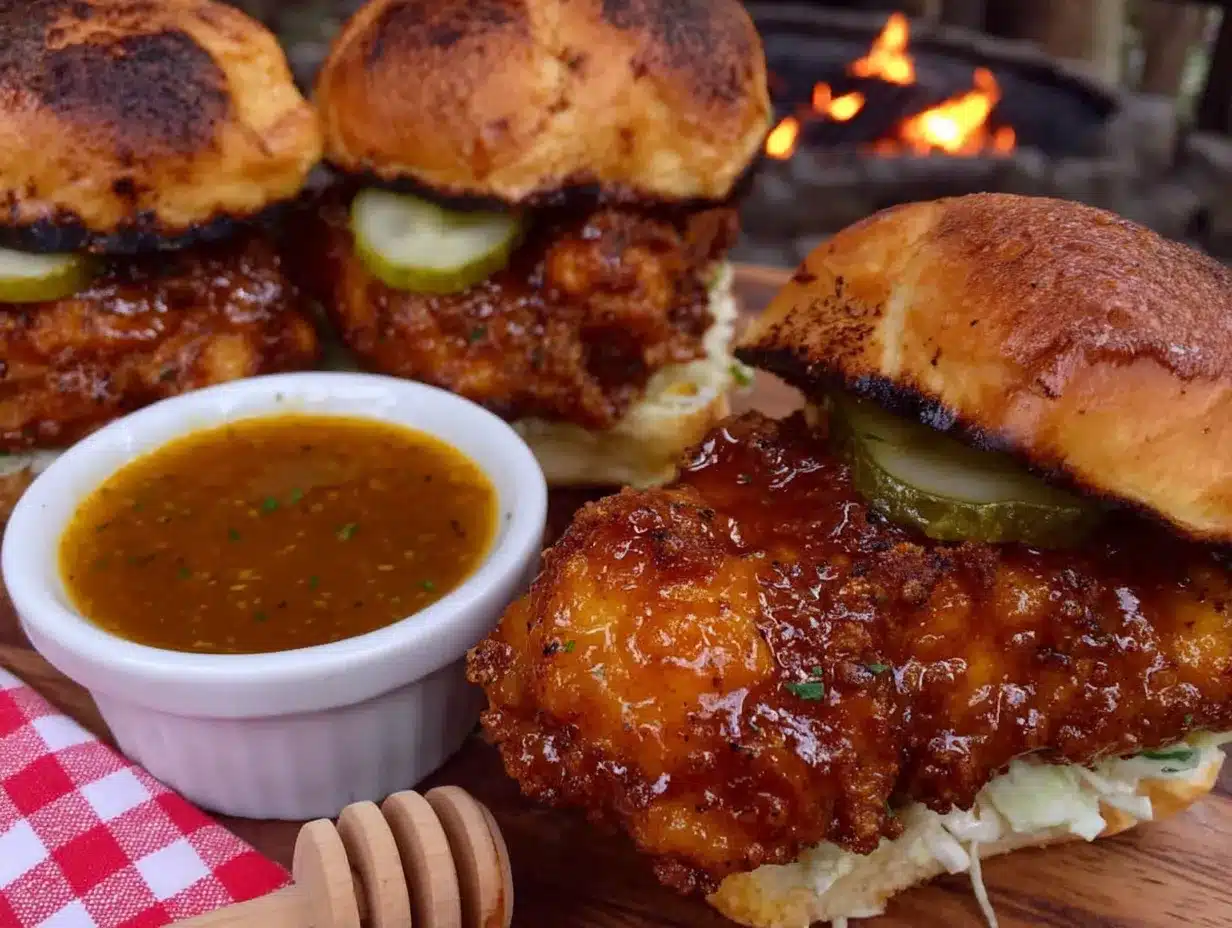
Alright, let’s get cooking. This recipe comes together in about 45 minutes, and most of that time is hands-off while the chicken marinates. Here’s the step-by-step breakdown:
- Marinate the chicken (15 minutes minimum): Start by trimming any excess fat from the chicken thighs. Place them in a bowl and pour the buttermilk over them. Add the salt, pepper, and garlic powder. Toss everything together, making sure each piece is coated. Let this sit at room temperature for at least 15 minutes while you prepare the rest. If you have more time, you can let it marinate in the fridge for up to 4 hours—the buttermilk tenderizes the meat and adds flavor.
- Make the honey butter flour coating: In a separate shallow bowl, whisk together the all-purpose flour, cornstarch, paprika, cayenne (if using), salt, and black pepper. In a small bowl, mix the melted butter and honey together until smooth. Drizzle this mixture into the flour and use a fork to mix it in. It will form small clumps—that’s exactly what you want. Those clumps create extra crispy bits on the chicken. Set aside.
- Heat the oil: Pour about 2 inches of vegetable or peanut oil into your heavy-bottomed pot. Heat it over medium-high heat until it reaches 350°F (175°C). Use your deep-fry thermometer to monitor it. While the oil heats, set up your wire rack over a baking sheet nearby.
- Dredge the chicken: Remove the chicken thighs from the buttermilk, letting any excess drip off. Don’t shake them dry—you want that buttermilk to help the flour stick. Place each piece into the honey butter flour mixture, pressing firmly so the coating adheres. Flip and press again. Shake off any excess flour and place the coated chicken on a clean plate. The coating should look a little uneven and clumpy—that’s the good stuff.
- Fry the chicken in batches: Carefully lower 3-4 pieces of chicken into the hot oil using tongs. Don’t overcrowd the pot—this lowers the oil temperature and makes the chicken greasy. Fry for 5-6 minutes per side, or until the internal temperature reaches 165°F (74°C) and the coating is deep golden brown and crispy. The honey in the flour will make it look slightly darker than regular fried chicken—that’s normal. Transfer the cooked chicken to the wire rack and sprinkle with a tiny pinch of salt while it’s still hot. Repeat with the remaining chicken.
- Make the honey butter glaze: While the last batch of chicken is frying, melt the butter, honey, hot sauce (if using), and a pinch of salt in a small saucepan over low heat. Stir until smooth and combined. Keep it warm on the lowest setting.
- Glaze the chicken: Once all the chicken is fried and resting on the wire rack, brush each piece generously with the warm honey butter glaze. Don’t drown it—just a nice, even coat. Let it sit for a minute so the glaze sets slightly.
- Assemble the sliders: Split the slider buns and toast them lightly if you want (I like to do this on a dry skillet for about 30 seconds). Place a glazed piece of chicken on each bottom bun. Top with a couple of pickle slices and any other toppings you like. Close the bun and press down gently. Serve immediately.
A quick note: if the chicken is browning too fast but isn’t cooked through, your oil is too hot. Lower the heat a bit and let the oil come back to 325°F (163°C) before continuing. Also, the honey in the flour can cause the oil to darken faster than usual, so keep an eye on it. If the oil starts looking too dark or smells burnt, start fresh with new oil for the remaining batches.
Cooking Tips & Techniques
I’ve made this recipe enough times to know where things can go wrong. Let me save you the trouble. First, don’t skip the cornstarch in the flour. It’s the difference between a crust that shatters and one that just sits there. I learned this after a particularly sad batch of fried chicken that had all the crunch of a wet paper towel.
Another thing—when you mix the honey and butter into the flour, don’t overmix. You want clumps, not a paste. If you stir it too much, the honey melts the butter into the flour and creates a dough-like texture. Just use a fork and break it up until you have small, pea-sized clumps throughout. It looks weird, but trust the process.
Temperature control is everything with fried chicken. I keep a thermometer clipped to the pot at all times and adjust the heat as needed. When you add cold chicken, the oil temperature drops instantly. That’s why I fry in small batches and let the oil come back to 350°F between batches. If you rush this, you’ll end up with greasy, soggy chicken. I’ve done it, and it’s heartbreaking.
One more tip—let the glazed chicken rest for a minute before assembling the sliders. If you put it on the bun immediately, the glaze can make the bun soggy. A minute on the wire rack lets the glaze set just enough to stay on the chicken instead of soaking into the bread. Also, if you’re making these for a party, keep the glazed chicken on the wire rack in a warm oven (200°F) for up to 30 minutes. Just don’t stack them or they’ll lose their crunch.
Variations & Adaptations
One of the best things about this recipe is how easy it is to tweak. Here are some variations I’ve tried and loved:
- Spicy Honey Butter Version: Add an extra teaspoon of cayenne pepper to the flour and double the hot sauce in the glaze. I made this for a friend who loves heat, and he said it was the best thing I’ve ever cooked. The sweetness of the honey balances the spice perfectly.
- Baked Version: If you want to skip the deep frying, you can bake the chicken. Coat the chicken as directed, then place it on a greased wire rack set over a baking sheet. Spray generously with cooking oil and bake at 400°F for 20-25 minutes, flipping halfway through. The crust won’t be as crispy as fried, but it’s still delicious. I’ve done this on nights when I didn’t want to deal with hot oil, and it works well.
- Gluten-Free Adaptation: Use a gluten-free all-purpose flour blend in place of regular flour. I’ve tested this with Bob’s Red Mill 1-to-1 Baking Flour and the texture was surprisingly good. Just make sure your blend includes xanthan gum for structure.
- Chicken Tender Version: Cut chicken breasts into strips instead of using thighs. Reduce the frying time to 3-4 minutes per side. These are perfect for kids or for serving with dipping sauces like ranch or blue cheese.
- Air Fryer Version: Preheat your air fryer to 375°F. Spray the coated chicken with oil and air fry for 10-12 minutes, flipping halfway through. The crust gets nice and crispy without all the oil. I’ve done this for a lighter version and it’s surprisingly good.
I once tried a version with maple syrup instead of honey, and honestly, it was pretty great too. The maple flavor is more subtle, but it adds a nice woodsy sweetness. If you’re out of honey, give that a try.
Serving & Storage Suggestions
These sliders are best served immediately while the chicken is still hot and crispy. I like to serve them on a large platter with extra pickles on the side and maybe some coleslaw for a crunchy contrast. They’re perfect for tailgating because they’re easy to eat standing up and they don’t require any utensils. If you’re hosting a party, set up a slider bar with different toppings—lettuce, tomato, sliced red onion, pickled jalapeños, and various sauces like ranch, blue cheese, or sriracha mayo.
For drinks, these sliders pair beautifully with a cold beer—something light like a lager or pilsner cuts through the richness. If you’re not drinking beer, a sweet iced tea or a lemonade works just as well. The acidity helps balance the sweet and savory flavors.
If you have leftovers (which is rare in my house), store the chicken separately from the buns and toppings. Place the chicken in an airtight container and refrigerate for up to 3 days. The buns should be stored in a sealed bag at room temperature. To reheat, place the chicken on a wire rack over a baking sheet and warm it in a 350°F oven for about 10 minutes. This helps restore some of the crispiness. Avoid microwaving—it will make the coating soggy and sad.
The honey butter glaze can be made ahead and stored in the fridge for up to a week. Just reheat it gently on the stove or in the microwave before using. I’ve also frozen the fried chicken (without glaze) for up to a month. Thaw it in the fridge overnight, then reheat in the oven and glaze fresh. The flavor holds up surprisingly well.
Nutritional Information & Benefits
Here’s a rough estimate for one slider (using chicken thigh, bun, pickles, and glaze):
- Calories: 420-480
- Protein: 28g
- Fat: 22g
- Carbohydrates: 35g
- Fiber: 1g
- Sugar: 12g
These numbers will vary depending on the size of your chicken pieces and how much glaze you use. If you’re watching your calories, you can use chicken breast instead of thighs and reduce the glaze to a light brush. The baked or air fryer versions will also significantly lower the fat content.
On the health side, chicken thighs are a good source of protein, iron, and B vitamins. The honey provides antioxidants and natural sweetness, while the buttermilk adds calcium and probiotics (if you use real cultured buttermilk). This recipe is not gluten-free in its standard form, but as mentioned, you can easily adapt it. It contains dairy from the butter and buttermilk, but you can use dairy-free alternatives like vegan butter and almond milk with lemon juice for the buttermilk.
I personally love that this recipe feels indulgent but uses real, whole ingredients. There’s nothing fake or processed here—just good food that happens to taste amazing. It’s the kind of meal that makes you feel satisfied, not weighed down.
FAQs
Can I use chicken breasts instead of thighs?
Yes, absolutely. Just pound the breasts to an even thickness (about 1/2 inch) so they cook evenly. Reduce the frying time to 4-5 minutes per side. Chicken breasts can dry out faster than thighs, so keep an eye on the internal temperature.
Why is my coating falling off the chicken?
This usually happens when the chicken isn’t dry enough before coating. Make sure to let the excess buttermilk drip off before dredging. Also, press the flour firmly into the chicken and let it rest for 5 minutes before frying. This helps the coating adhere better.
Can I make these sliders ahead of time for a party?
You can fry the chicken and make the glaze up to a day ahead. Store the chicken and glaze separately in the fridge. Reheat the chicken in a 350°F oven for 10 minutes, then glaze and assemble just before serving. The buns should be toasted fresh for the best texture.
How do I keep the sliders from getting soggy?
Toast the buns lightly before assembling, and let the glazed chicken rest on a wire rack for a minute before putting it on the bun. If you’re serving them buffet-style, keep the chicken on a warm platter and let people assemble their own sliders. This prevents the buns from sitting in the glaze too long.
Can I use an air fryer instead of deep frying?
Yes! Preheat your air fryer to 375°F, spray the coated chicken with cooking oil, and air fry for 10-12 minutes, flipping halfway through. The crust won’t be quite as crispy as deep frying, but it’s a great lighter option. Brush with the glaze while still warm.
Conclusion
These Crispy Honey Butter Fried Chicken Tailgate Sliders started as a mistake, but they’ve become one of my most requested recipes. There’s something about that sweet, buttery glaze combined with the crunchy, caramelized coating that just works. It’s the kind of food that makes people gather around a table and forget about everything else for a few minutes. Whether you’re hosting a game day party, feeding a hungry family, or just treating yourself to something special, these sliders deliver.
I hope you give this recipe a try and make it your own. Maybe you’ll add extra spice, swap the pickles for coleslaw, or even try it with maple syrup like I did. The best recipes are the ones that evolve with you. So go ahead—get a little messy in the kitchen, trust the process, and enjoy every bite. And if you make these, I’d love to hear about it. Drop a comment below and let me know how they turned out, or share your own twist on the recipe. Happy cooking, friends!
Pin This Recipe!
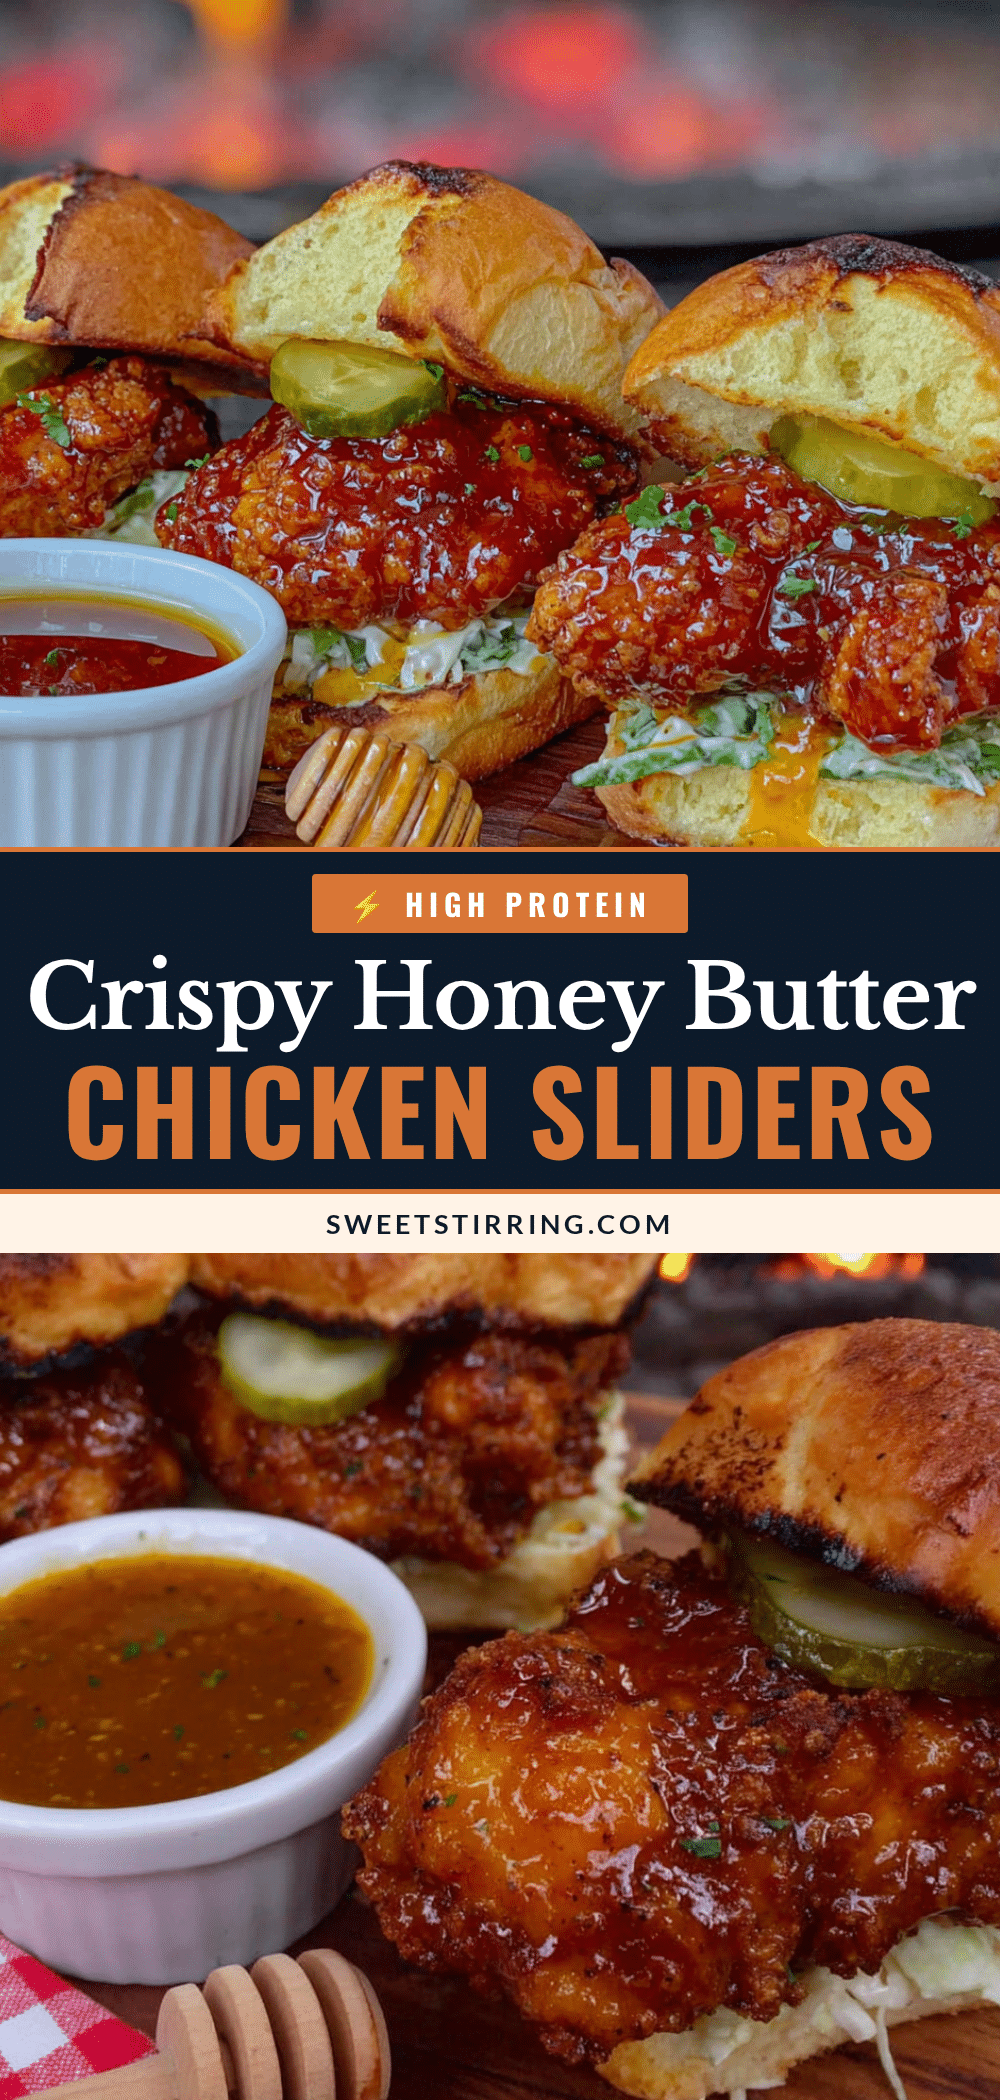
Crispy Honey Butter Fried Chicken Tailgate Sliders

Crispy, sweet, and savory fried chicken sliders with a honey butter glaze, perfect for tailgating or game day parties. This accidental recipe turned into a crowd-pleasing favorite with a caramelized, crunchy coating.
- Prep Time: 15 minutes
- Cook Time: 25 minutes
- Total Time: 40 minutes
- Yield: 8-10 sliders 1x
- Category: Main Course
- Cuisine: American
Ingredients
- 1.5 pounds boneless, skinless chicken thighs (about 6–8 thighs)
- 1 cup buttermilk
- 1 teaspoon salt
- 1/2 teaspoon black pepper
- 1/2 teaspoon garlic powder
- 1.5 cups all-purpose flour
- 2 tablespoons cornstarch
- 1 teaspoon paprika
- 1/2 teaspoon cayenne pepper (optional)
- 1 teaspoon salt
- 1/2 teaspoon black pepper
- 2 tablespoons unsalted butter, melted and slightly cooled
- 1 tablespoon honey
- 1/4 cup unsalted butter
- 1/4 cup honey
- 1 tablespoon hot sauce (like Frank’s RedHot) (optional)
- A pinch of salt
- 8–10 slider buns (brioche recommended)
- 1/2 cup dill pickle slices
- Optional: shredded lettuce, sliced red onion, or coleslaw for topping
- Vegetable oil or peanut oil (enough for 2 inches depth in pot)
Instructions
- Marinate the chicken: Trim excess fat from chicken thighs. Place in a bowl with buttermilk, salt, pepper, and garlic powder. Toss to coat. Let sit at room temperature for at least 15 minutes (or refrigerate up to 4 hours).
- Make the honey butter flour coating: In a shallow bowl, whisk together flour, cornstarch, paprika, cayenne (if using), salt, and black pepper. In a small bowl, mix melted butter and honey until smooth. Drizzle into flour mixture and use a fork to mix until small clumps form.
- Heat oil: Pour about 2 inches of oil into a heavy-bottomed pot. Heat over medium-high heat to 350°F (175°C). Set a wire rack over a baking sheet nearby.
- Dredge the chicken: Remove chicken from buttermilk, letting excess drip off. Press each piece into the honey butter flour mixture, coating evenly. Shake off excess and place on a clean plate.
- Fry the chicken: Carefully lower 3-4 pieces into hot oil. Fry for 5-6 minutes per side, until internal temperature reaches 165°F (74°C) and coating is deep golden brown. Transfer to wire rack and sprinkle with a pinch of salt. Repeat with remaining chicken.
- Make the honey butter glaze: In a small saucepan over low heat, melt butter, honey, hot sauce (if using), and a pinch of salt. Stir until smooth. Keep warm.
- Glaze the chicken: Brush each fried piece generously with warm honey butter glaze. Let rest on wire rack for 1 minute.
- Assemble sliders: Split and lightly toast slider buns. Place glazed chicken on bottom bun, top with pickle slices and any other toppings. Close bun and serve immediately.
Notes
Don’t skip the cornstarch for extra crispiness. When mixing honey and butter into flour, create small clumps for crispy bits. Monitor oil temperature carefully; honey in flour can cause faster darkening. Let glazed chicken rest 1 minute before assembling to prevent soggy buns. For parties, keep glazed chicken on wire rack in warm oven (200°F) for up to 30 minutes.
Nutrition
- Serving Size: 1 slider
- Calories: 420480
- Sugar: 12
- Sodium: 650
- Fat: 22
- Saturated Fat: 8
- Carbohydrates: 35
- Fiber: 1
- Protein: 28
Keywords: fried chicken sliders, honey butter chicken, tailgate food, game day recipe, crispy chicken, slider recipe, comfort food



