Love this? Save it for later!
Share the inspiration with your friends
I wasn’t expecting a lesson in snack strategy from a high school sophomore, but there I was, standing in my kitchen at 10 PM on a Tuesday, listening to my friend’s daughter explain exactly how to make what she called “locker snack boxes.” She’d been crashing at our place for a week while her parents were out of town, and I’d noticed this kid—who usually lived on gas station chips and energy drinks—had suddenly become weirdly organized about food.
She pulled out this beat-up plastic container from her backpack and showed me. It wasn’t fancy. I mean, it was literally a repurposed takeout container with a lid that didn’t quite close right. But inside? Pure gold. Little compartments of crackers, cheese cubes, apple slices that hadn’t turned brown, and a tiny packet of almond butter she’d saved from somewhere. She told me she makes five of these every Sunday and keeps them in her school locker. “The vending machine is a scam,” she said, dead serious. “And the cafeteria pizza tastes like regret.”
Honestly, I laughed. But then I thought about my own kid who was about to start high school and had already asked me for money for the snack machine three times in one week. Maybe you’ve been there—that feeling of sending your teenager off with a lunchbox they’ll never open because it’s not cool, or worse, watching them blow their lunch money on junk. That conversation stuck with me. These easy high school locker snack boxes for teens aren’t just about saving money. They’re about giving kids something they’ll actually eat, something that won’t get smooshed in a backpack, and something that makes them feel like they’ve got their act together.
So here we are. I’ve spent the last six months testing and tweaking these boxes with my own teenager and a focus group of his friends (who were surprisingly honest about what sucked and what didn’t). This recipe for locker snack boxes has become our Sunday ritual, and I keep making them because, honestly, they work. No more hangry text messages. No more uneaten lunches coming home. Just good, practical food that fits in a locker.
Why You’ll Love This Recipe
Let me tell you why these snack boxes have basically saved our school year sanity. First off, they’re quick to assemble. We’re talking 15 minutes on a Sunday afternoon, and you’ve got snacks for the whole week. No complicated meal prep, no fancy containers required.
- Budget-Friendly: Buying snacks in bulk and portioning them yourself costs way less than those pre-packaged lunchbox packs. We’re saving about $15 a week compared to what I used to spend on individual snack packs.
- Locker-Approved: These are designed to survive a high school locker. No refrigeration needed for most combinations, and everything stays fresh from morning until lunch.
- Teen-Tested: My son and his friends have been brutally honest about what works. If it didn’t pass the “would I actually eat this at school” test, it got cut.
- Endlessly Customizable: Picky eater? Food allergies? No problem. You can swap pretty much everything based on what your teen actually likes.
- No Cooking Required: Seriously. If you can open packages and wash fruit, you can make these boxes.
What makes these different from every other snack box idea you’ve seen? It’s the practicality. I’ve tried those cute bento boxes with the little silicone cups and adorable cookie cutters. You know what happened? My teenager rolled his eyes so hard I thought they’d get stuck. These boxes are designed for real teens in real high schools—they’re discreet, easy to eat during a 5-minute class break, and won’t make weird noises when opened. Plus, the combinations are balanced enough that they’ll actually keep a growing teenager full until lunch. This isn’t Pinterest-perfect food. It’s real food for real kids.
What Ingredients You Will Need
Here’s the thing about locker snack boxes—they work best with ingredients that can sit at room temperature for a few hours without getting sad. I’ve tested dozens of combinations, and these are the winners that actually hold up in a locker environment.
Base Components (Pick 2-3 per box)
- Whole grain crackers (I like the Everything-flavored ones from Trader Joe’s, but any sturdy cracker works—avoid thin ones that crumble in backpacks)
- Rice cakes (the mini ones are perfect for snack boxes and come in fun flavors like chocolate or apple cinnamon)
- Pretzel sticks or twists (they’re salty, satisfying, and don’t get stale as fast as chips)
- Cheese cubes or string cheese (babybel cheese wheels are ideal because they’re individually wrapped and don’t need refrigeration for a few hours)
- Hard-boiled eggs (peel them at home and they’re good in a locker for the morning—just don’t forget to pack them!)
Protein Options (Pick 1-2 per box)
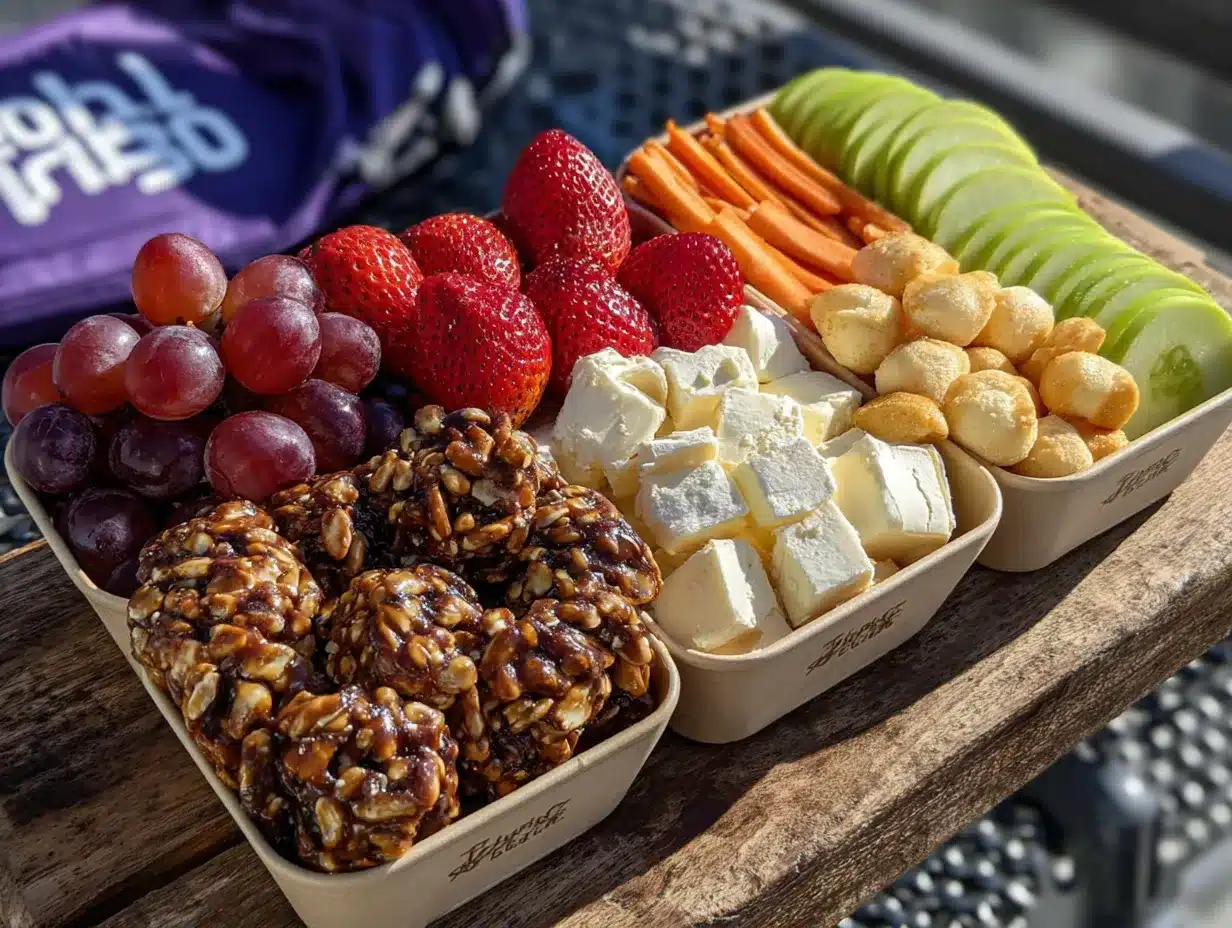
- Turkey or ham roll-ups (roll a slice around a cheese stick for a protein-packed bite)
- Pepperoni or salami slices (these are shelf-stable and super satisfying)
- Nut butter packets (Justin’s or RX brand make single-serve packets that don’t need refrigeration)
- Hummus cups (individual cups are perfect for dipping—look for ones without added sugar)
- Edamame (shelled) (the frozen shelled kind thaws by morning and is a great plant-based protein)
Fruits & Veggies (Pick 2 per box)
- Apple slices (toss them with a little lemon juice or buy pre-sliced apples that are treated to stay fresh)
- Baby carrots or snap peas (crunchy, hydrating, and they don’t get weird at room temperature)
- Grapes (wash and dry them thoroughly—wet grapes get sticky in containers)
- Dried fruit (apricots, mango slices, or raisins add sweetness without sugar crashes)
- Cherry tomatoes (they’re basically nature’s perfect snack—just rinse and pack)
Extras & Treats (Pick 1 per box)
- Dark chocolate chips or a small square (a little something sweet keeps it from feeling like a punishment)
- Popcorn (air-popped or lightly seasoned—skip the butter kind that gets greasy)
- Granola bar (cut it in half so it fits better in the box)
- Yogurt-covered raisins (my son’s friends went crazy for these)
- Mini rice krispie treat (homemade or store-bought, it’s a nostalgic win)
I recommend keeping a running list on your phone of what your teen actually eats. My son went through a phase where he only wanted savory snacks, then suddenly switched to sweet. The beauty of these boxes is you can adapt week by week without wasting food. Oh, and pro tip: buy the big boxes of crackers and portion them out yourself. Those little 100-calorie packs are convenient but expensive. A box of Triscuits costs the same as four single-serve packs.
Equipment Needed
You don’t need anything fancy for these snack boxes. Here’s what I’ve found actually works:
- Containers with compartments: I use the Sistema snack containers (about $12 for a set of three) because they have removable dividers and the lids actually stay closed. But honestly, any container with a tight-sealing lid works. I’ve used old takeout containers, cleaned yogurt tubs, and even those plastic containers from pre-made salads.
- Small silicone muffin cups: These are great for keeping wet ingredients separate from dry ones. A set of 12 costs about $8 and they’re reusable.
- Measuring cups and spoons: For portioning out snacks so you don’t overdo it on the crackers.
- Sharp knife and cutting board: For slicing fruits and veggies. I prefer a mandoline for uniform apple slices, but a good chef’s knife works fine.
- Small containers for dips: Those little 2-ounce glass jars with lids are perfect for hummus, ranch dressing, or yogurt dip. I save them from takeout sauces.
My first attempt at these boxes used a fancy bento box with like twelve compartments. It took forever to clean, and my teenager complained that “it looks like a toddler’s lunch.” Stick with simple containers. The less fuss, the more likely you’ll actually keep doing this.
Preparation Method
Okay, here’s the actual method. I’ve broken this down into steps that take about 15 minutes total. Once you get the hang of it, you’ll be able to do this in your sleep.
- Wash and prep all produce (5 minutes): Start by washing your grapes, cherry tomatoes, and any veggies. Dry them thoroughly with a clean kitchen towel—wet produce makes everything else soggy. If you’re using apples, slice them and toss with a splash of lemon juice or a little Fruit Fresh powder to prevent browning. Let them sit on a paper towel while you prep everything else.
- Portion out the proteins (3 minutes): If you’re using cheese, cut it into cubes or peel the string cheese. Roll up lunch meat slices (I do two slices per roll-up and secure them with a toothpick). Hard-boiled eggs should be peeled and cut in half—sprinkle a tiny bit of salt on them before packing.
- Divide crackers and crunchies (2 minutes): I use a 1/4 cup measuring cup to portion crackers so each box gets roughly the same amount. For pretzels, a small handful works. If you’re using popcorn, measure about 1 cup per box. The key is to not overfill—these boxes need to close easily.
- Assemble the boxes (3 minutes): Start with the heaviest items (fruit, cheese, eggs) and put them in first. Then add crackers and lighter items around them. If you’re using silicone cups, put wet items like grapes or cherry tomatoes in those so they don’t make the crackers soggy. Dips go in small containers with tight lids, placed in a corner of the box.
- Add the treat (1 minute): Tuck in whatever sweet or special item you’ve chosen. I put this in last so it doesn’t get crushed. A small square of dark chocolate, a few yogurt-covered raisins, or half a granola bar works perfectly.
- Label and store (1 minute): I write the day of the week on a piece of masking tape and stick it to the lid. This helps if you’re making multiple boxes at once. Store them in the refrigerator if they contain perishable items like cheese or hard-boiled eggs. If everything is shelf-stable, they can live in a cool pantry.
Here’s where I messed up the first few times: I tried to make each box completely different. That was exhausting and wasteful. Now I make three or four “base” boxes with the same crackers, cheese, and fruit, then add one or two varied items so my kid doesn’t get bored. Also, don’t pack the boxes too tightly. Air circulation helps keep things fresh. If the lid bulges, you’ve overdone it.
A quick sensory cue: when you open a properly assembled box, you should smell fresh fruit and maybe a little cheese, not stale crackers or sad vegetables. The crackers should still have a snap when you bite into them, not a soft bend. If things feel damp or smell off, you either didn’t dry the produce well enough or the container wasn’t fully sealed.
Cooking Tips & Techniques
I’ve learned some things the hard way so you don’t have to. Here are my best tips after months of trial and error:
The moisture problem: Wet ingredients are the enemy of crispy crackers. I learned this when my son opened a box at school and found soggy pretzels. Now I always put a paper towel in the bottom of the container if I’m including anything damp. It absorbs excess moisture and keeps everything fresh. Change the paper towel if you’re making boxes more than two days ahead.
The “I forgot I had this” problem: Teens are busy and forgetful. If you pack a box on Sunday for Friday, they might forget about it. I now only make boxes for Monday through Wednesday, then do a quick Thursday/Friday batch. Less food waste, and things stay fresher.
The temperature thing: Most locker snack boxes will be fine at room temperature for 4-5 hours. But if you’re including anything that needs refrigeration (like yogurt or fresh mozzarella), add a small ice pack. I bought a set of reusable gel packs that fit perfectly in lunch bags—they’re about $8 for a set of four on Amazon.
My biggest failure: I once packed an entire box with cut-up mango. You know what happens to cut mango after four hours in a locker? It turns into a slimy mess. My son texted me a photo with the caption “what is this.” Stick with firmer fruits that hold their shape—apples, pears, grapes, and berries work better than tropical fruits.
Batch prep like a pro: I wash and dry all produce the night before, then assemble in the morning when I’m more awake. If I try to do everything at once on Sunday evening, I get lazy and start skipping steps. Breaking it into two sessions makes it feel less like a chore.
Variations & Adaptations
One size definitely does not fit all when it comes to teen snack boxes. Here are some variations I’ve tried with success:
Nut-Free Version: Swap almond butter packets for sunflower seed butter or WowButter. Instead of trail mix with nuts, use pumpkin seeds and dried cranberries. My son’s school is nut-free, so this is our go-to. The kids actually prefer the sunflower butter packets because they’re less sweet.
Gluten-Free Option: Use rice cakes, gluten-free crackers (the ones from Schar are actually good), or veggie sticks. Skip the pretzels and granola bars unless they’re specifically labeled gluten-free. I’ve found that most cheese and meat options are naturally gluten-free, so that part is easy.
Vegetarian/Vegan Box: Load up on hummus cups, edamame, cheese (or vegan cheese), and fruit. Add some roasted chickpeas for crunch. My vegetarian friend’s daughter loves the “taco box” with black beans, corn, and avocado slices with lime juice—just pack the avocado separately and add it at school.
The “I Hate Vegetables” Box: I know this kid. Mine is this kid. Instead of fighting it, I include fruit as the produce component and hide veggies in other ways. Apple slices with peanut butter, dried mango, and fruit leather all count as produce. Sometimes I sneak in shredded carrots mixed into a yogurt dip, and he doesn’t even notice.
Breakfast-for-Snack Box: This was a happy accident. I had leftover pancakes one morning, cut them into strips, and packed them with syrup in a small container. My son said it was “actually fire.” Now we do mini pancakes, granola, yogurt dip, and berries. It feels like a treat but has real staying power.
Serving & Storage Suggestions
These boxes are designed to be eaten at room temperature, so they don’t need any special serving instructions. But here’s what I’ve learned about making them last:
Storage in the fridge: If you’re making boxes with perishable items (cheese, eggs, lunch meat), keep them in the refrigerator until your teen grabs them in the morning. They’ll stay fresh for up to three days. I don’t recommend making them more than three days ahead—the quality drops off noticeably after that.
Freezer option: You can freeze some components separately. I freeze grapes (they thaw by lunch and are like little slushies), cheese cubes, and hard-boiled eggs. Don’t freeze crackers or fresh veggies—they’ll get weird. Assemble the boxes with frozen items in the morning, and they’ll be thawed and cold by snack time.
How flavors develop: Honestly, these boxes are best eaten the day they’re made or the next day. By day three, crackers start losing their crunch and fruit gets softer. That’s why I only make three days worth at a time. The exception is dried fruit and nuts—those stay good for a week.
Reheating (if needed): These are cold snacks, so no reheating required. But if you’re packing something like a breakfast burrito or quesadilla, wrap it in foil and keep it separate from the cold items. My son’s friend brings a thermos of soup sometimes, which is genius for cold days.
Presentation matters: I know I said not to go overboard, but a small note or sticker on the lid makes a difference. My teenager pretends to be embarrassed by it, but I’ve seen him smile when he finds a note that says “you got this” or “don’t forget to drink water.” Little touches matter.
Nutritional Information & Benefits
Here’s an approximate breakdown for a typical snack box with crackers, cheese, apple slices, baby carrots, and a few dark chocolate chips:
- Calories: 350-450 (perfect for a mid-morning snack or light lunch)
- Protein: 12-15 grams (from cheese and any meat/egg additions)
- Carbohydrates: 35-45 grams (mostly complex carbs from crackers and fruit)
- Fiber: 5-7 grams (apples, carrots, and whole grain crackers add up)
- Fat: 15-20 grams (healthy fats from cheese, nuts, or avocado)
The real benefit here isn’t just the numbers—it’s what these boxes replace. When my son was buying snacks from the vending machine, he’d get a bag of chips (250 calories, mostly fat and sodium) and a soda (150 calories of sugar). That’s 400 calories of junk that left him hungry an hour later. These boxes have fiber, protein, and healthy fats that actually keep him full through third period. Plus, the fruit provides vitamins and antioxidants he wasn’t getting before.
If you’re watching sodium, choose unsalted nuts and low-sodium crackers. For a lower-carb option, swap crackers for cucumber rounds or bell pepper strips. And if your teen has any food allergies, just read labels carefully—many crackers and granola bars are processed in facilities that also process nuts or dairy.
Conclusion
Look, I’m not going to pretend these snack boxes will solve all your parenting problems. Your teenager will still roll their eyes at you, forget their homework, and somehow lose a hoodie you bought last week. But these boxes? They work. They save money, reduce food waste, and give your kid something nutritious to eat that they’ll actually want to open.
What I love most about this system is how flexible it is. You can start with the basic formula and tweak it based on what your teen actually eats. My son went from “this is dumb” to “did you get more of those cheese crackers?” in about two weeks. His friends started asking if they could have one too. Now we make extras for his buddy who forgets his lunch sometimes.
I’d love to hear what combinations your teens come up with. Drop a comment below and tell me what’s in your family’s favorite snack boxes. Do your kids prefer sweet or savory? Have you found any ingredients I should try? Let’s figure this out together—because feeding teenagers shouldn’t feel like a battlefield. Happy snacking, and may your containers always close properly!
Frequently Asked Questions
Can I make these snack boxes on Sunday for the whole week?
You can, but I don’t recommend it. Crackers start losing their crunch by day three, and fresh fruit gets soft. I make Monday-Wednesday boxes on Sunday, then do a quick Thursday-Friday batch on Wednesday night. It takes an extra 10 minutes but the quality is way better.
What if my teen doesn’t have a locker?
No problem! These boxes work great in backpacks too. Just make sure the container has a tight-sealing lid and isn’t too bulky. I recommend using a rectangular container that fits flat in the bottom of a backpack rather than a tall one that might tip over.
How do I keep apple slices from turning brown?
Toss them with a little lemon or lime juice, or use a product like Fruit Fresh that you can find in the baking aisle. You can also buy pre-sliced apples that are treated to stay fresh—they’re more expensive but super convenient. Another trick: pack the apple slices with a rubber band around them to keep air out.
My teen is embarrassed to bring snacks to school. Help?
Let them pick the container. Some kids prefer plain, grown-up looking containers over colorful kid ones. You can also use brown paper bags or small insulated lunch bags that look more like a regular lunch. The key is to make it feel normal, not like you’re packing a lunch for a kindergartner.
Can I use these boxes for after-school sports snacks?
Absolutely! Just add more protein and carbs for energy. I pack an extra box for after-school practice with a turkey sandwich (cut into quarters), an apple, and a granola bar. If it’s going to sit in a gym bag for hours, use an insulated container with an ice pack.
Pin This Recipe!
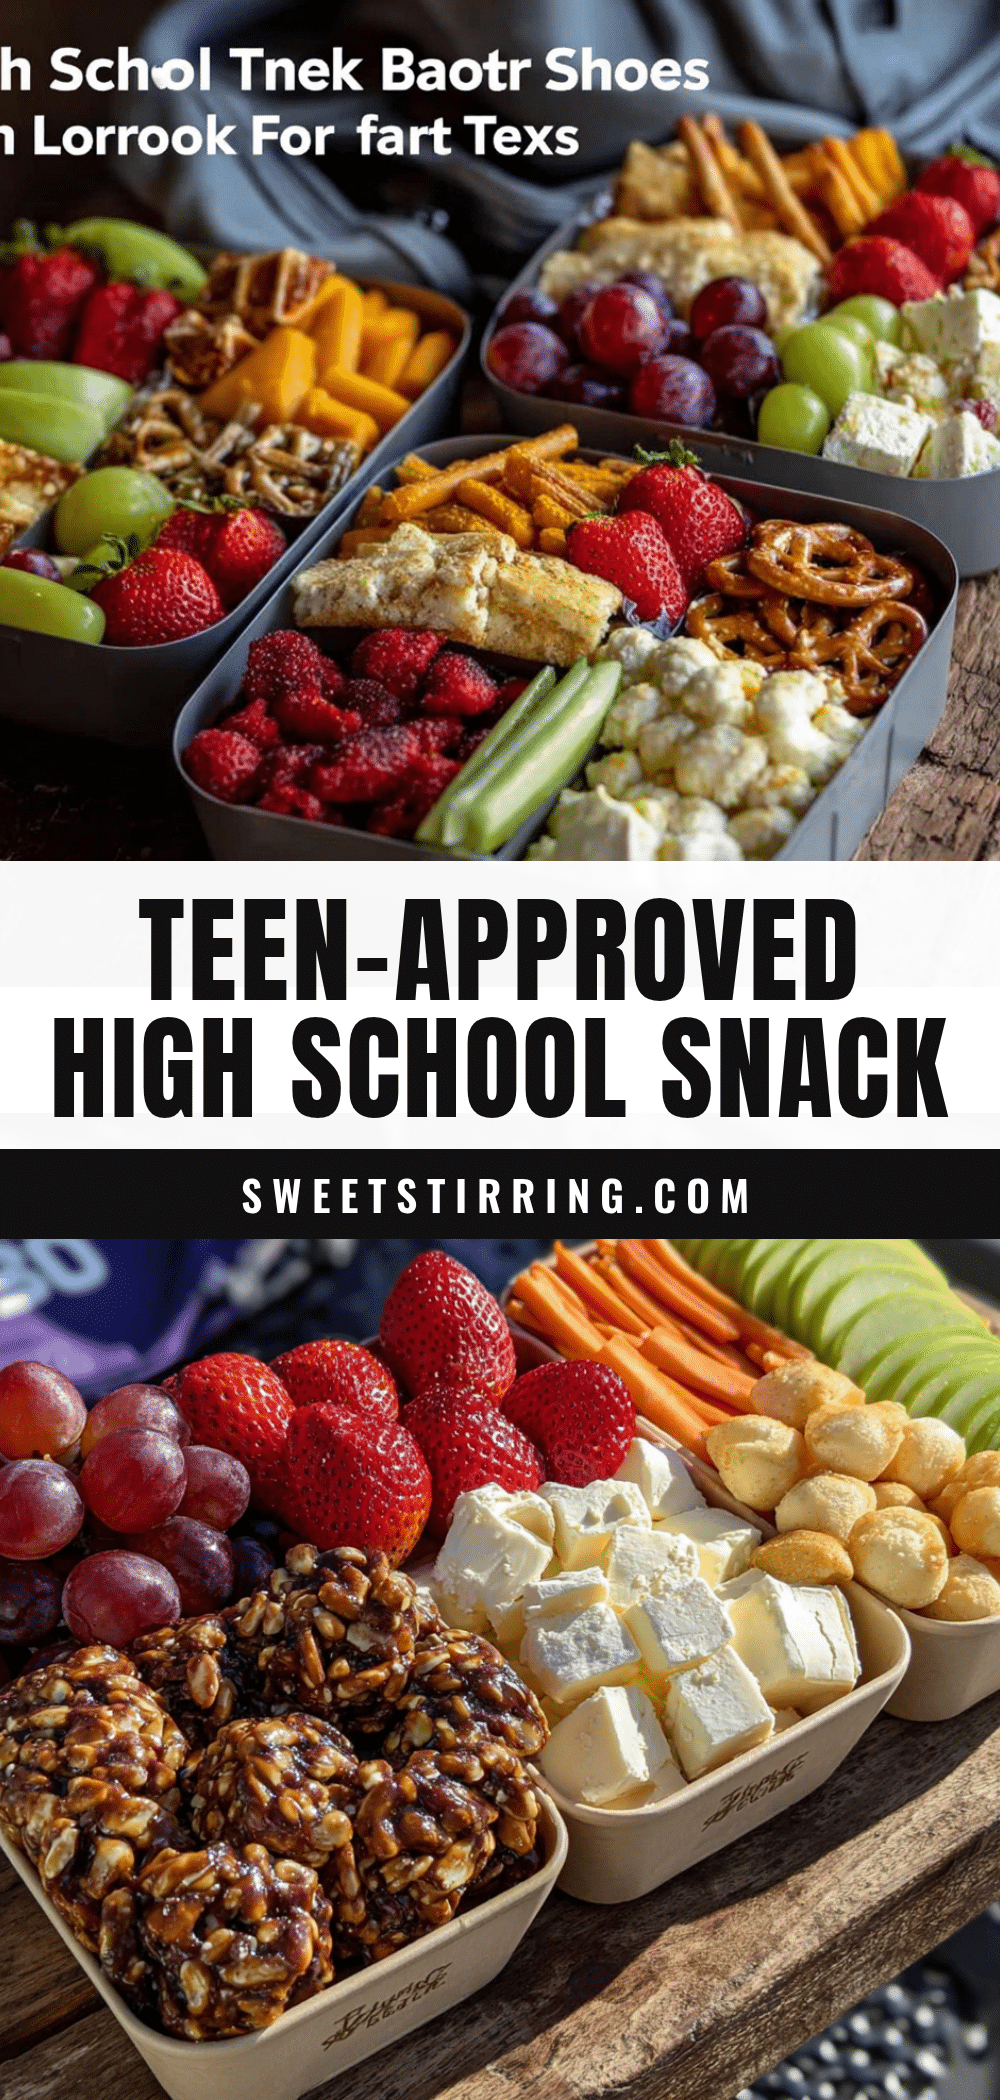
Easy High School Locker Snack Boxes for Teens

These easy high school locker snack boxes for teens are designed to survive a high school locker, with no refrigeration needed for most combinations. They’re budget-friendly, teen-tested, and endlessly customizable, making them a perfect solution for busy school days.
- Prep Time: 15 minutes
- Cook Time: 0 minutes
- Total Time: 15 minutes
- Yield: 5 servings
- Category: Snack
- Cuisine: American
Ingredients
- Whole grain crackers
- Rice cakes (mini)
- Pretzel sticks or twists
- Cheese cubes or string cheese (e.g., Babybel)
- Hard-boiled eggs
- Turkey or ham roll-ups
- Pepperoni or salami slices
- Nut butter packets (e.g., Justin’s or RX)
- Hummus cups
- Edamame (shelled)
- Apple slices
- Baby carrots or snap peas
- Grapes
- Dried fruit (apricots, mango slices, raisins)
- Cherry tomatoes
- Dark chocolate chips or small square
- Popcorn (air-popped)
- Granola bar
- Yogurt-covered raisins
- Mini rice krispie treat
Instructions
- Wash and prep all produce: Wash grapes, cherry tomatoes, and veggies. Dry thoroughly. If using apples, slice and toss with lemon juice or Fruit Fresh to prevent browning. Let sit on a paper towel.
- Portion out the proteins: Cut cheese into cubes or peel string cheese. Roll up lunch meat slices (two slices per roll-up, secure with toothpick). Peel and halve hard-boiled eggs; sprinkle with salt.
- Divide crackers and crunchies: Use a 1/4 cup measuring cup to portion crackers. For pretzels, a small handful. For popcorn, about 1 cup per box. Do not overfill.
- Assemble the boxes: Start with heaviest items (fruit, cheese, eggs) first. Add crackers and lighter items around them. Use silicone cups for wet items like grapes or cherry tomatoes. Place dips in small containers with tight lids.
- Add the treat: Tuck in sweet or special item last to avoid crushing. Options include dark chocolate, yogurt-covered raisins, or half a granola bar.
- Label and store: Write the day of the week on masking tape and stick to lid. Refrigerate if containing perishable items (cheese, eggs). Shelf-stable boxes can be stored in a cool pantry.
Notes
Wet ingredients are the enemy of crispy crackers; place a paper towel in the bottom of the container if including damp items. Only make boxes for Monday through Wednesday to maintain freshness, then do a quick Thursday/Friday batch. Most locker snack boxes are fine at room temperature for 4-5 hours; add a small ice pack for items needing refrigeration. Avoid cut tropical fruits like mango as they become slimy. Batch prep produce the night before to make assembly easier.
Nutrition
- Serving Size: 1 snack box
- Calories: 350450
- Sugar: 1015
- Sodium: 400600
- Fat: 1520
- Saturated Fat: 57
- Carbohydrates: 3545
- Fiber: 57
- Protein: 1215
Keywords: locker snack boxes, teen snacks, easy snack boxes, high school snacks, no-cook snacks, budget-friendly snacks, customizable snack boxes