Love this? Save it for later!
Share the inspiration with your friends
This was supposed to be my famous lemon shortbread. I had the butter softening on the counter, the lemons waiting to be zested, and a very specific vision of delicate, buttery rounds dusted with powdered sugar. Then the power flickered. And flickered again. And stayed off. By the time it came back an hour later, my butter was a puddle, my kids were bouncing off the walls from a sugar crash fueled by pre-trick-or-treating candy, and I was staring at a bag of Halloween sprinkles I’d bought on a whim. Honestly, I almost just ordered pizza.
But there I was, with overly soft butter and a sudden, desperate need to make something that would keep little hands busy for more than five minutes. So I tossed the lemon plan out the window, grabbed the vanilla extract, and made a batch of sugar cookie dough that was way too sticky and way too forgiving. I rolled it out, let the kids go wild with cookie cutters shaped like ghosts and pumpkins, and baked them up. They were good. Not great, but good. Then I remembered the royal icing I’d been meaning to try from a class I took last fall, and I thought, why not? I mean, what’s the worst that could happen? A sticky mess on top of an already chaotic afternoon?
Turns out, the worst that could happen was that I’d accidentally create the best Halloween sugar cookies I’d ever made. The royal icing spiderwebs were surprisingly easy to pipe, and the kids thought they were the coolest things ever. I mean, they actually stopped arguing over who got the bigger piece. That’s a Halloween miracle right there. Maybe you’ve had a similar kitchen disaster that turned into a win? That’s exactly what these cookies are—a happy accident that became a non-negotiable part of our October baking tradition.
Why You’ll Love This Recipe
These aren’t just any Halloween cookies. They’re the kind that make you look like you spent hours on them when really, you spent most of the time hiding the candy bowl from yourself. Here’s why they’ve become my go-to for spooky season:
- Quick & Easy: The dough comes together in about 15 minutes, and the chilling time is minimal—just 30 minutes. You can have cookies on the table in under an hour and a half, start to finish.
- Simple Ingredients: You probably have everything in your pantry right now. Butter, sugar, eggs, flour, vanilla—no weird specialty items required.
- Perfect for Halloween Parties: Whether it’s a school bake sale, a neighborhood gathering, or just a cozy night in watching Hocus Pocus, these cookies fit right in.
- Crowd-Pleaser: I’ve yet to meet a kid (or adult) who can resist a soft, buttery sugar cookie topped with a delicate spiderweb. They disappear fast.
- Unbelievably Delicious: The secret is in the slightly underbaked centers—they stay soft and tender while the edges get just a tiny bit golden. Paired with the sweet, crackly royal icing, it’s pure comfort.
What makes these different from every other Halloween sugar cookie recipe out there? It’s the method. I learned the hard way that overmixing the dough makes tough cookies, and overbaking makes dry ones. This recipe nails that perfect balance. Plus, the royal icing spiderwebs are way easier than they look—I promise. I’m not a professional baker by any stretch, so if I can do it, you definitely can.
This recipe is the one that makes you close your eyes after the first bite. It’s nostalgic and new all at once. It’s comfort food reimagined for the spookiest time of year—faster, simpler, but with the same soul-soothing satisfaction. Perfect for impressing guests without stress, or turning a simple Tuesday night into something memorable.
What Ingredients You Will Need
This recipe relies on a handful of pantry staples to create something truly special. The key is using quality ingredients where it counts—like real butter and pure vanilla extract—because they make a real difference in flavor and texture. Here’s everything you’ll need, broken down by component.
For the Sugar Cookies
- Unsalted butter, softened: 1 cup (2 sticks or 226g). I always use unsalted so I can control the salt level. Let it sit out for about 30-45 minutes—you want it soft but not melty.
- Granulated sugar: 1 cup (200g). Regular white sugar gives these cookies their classic sweetness and slightly crisp edges.
- Large egg: 1, at room temperature. This helps the dough come together smoothly.
- Pure vanilla extract: 2 teaspoons. I prefer Nielsen-Massey for the rich, floral flavor, but any good brand works.
- All-purpose flour: 2 ½ cups (312g). Spoon and level it—don’t scoop directly from the bag or you’ll end up with dry cookies.
- Baking powder: 1 teaspoon. This gives the cookies a little lift without making them puffy.
- Salt: ½ teaspoon. Balances the sweetness and enhances the buttery flavor.
For the Royal Icing Spiderwebs
- Powdered sugar: 3 cups (340g), sifted. Sifting is non-negotiable here—lumps will clog your piping tip.
- Meringue powder: 2 tablespoons. This stabilizes the icing and gives it that perfect glossy finish. I like Wilton brand for consistency.
- Warm water: 4-5 tablespoons. Add slowly—you’re looking for a thick, drizzly consistency.
- Black gel food coloring: 1 teaspoon (or more for a darker black). I use Americolor Super Black—it’s concentrated and doesn’t thin the icing out too much.
- Orange gel food coloring: A few drops (optional, for accent webs or dots).
Ingredient Tips & Substitutions
For a dairy-free version, you can substitute the butter with a high-quality vegan butter stick, like Earth Balance. Just make sure it’s softened to the same consistency. If you don’t have meringue powder, you can use 2 large egg whites and omit the water—but the icing won’t be as shelf-stable, so eat the cookies within a day or two. For a gluten-free option, swap the all-purpose flour with a 1:1 gluten-free baking flour blend. I’ve tested this with King Arthur Measure for Measure, and it works beautifully.
Equipment Needed
You don’t need a fancy bakery setup to make these cookies look professional. Here’s what I use and what you can substitute if you’re improvising.
- Stand mixer or hand mixer: A stand mixer makes creaming the butter and sugar effortless, but a hand mixer works just fine. You could even do it by hand with a wooden spoon—it’s just a good arm workout.
- Rolling pin: I use a standard wooden rolling pin. If you don’t have one, a wine bottle works in a pinch (just chill the dough extra first).
- Halloween cookie cutters: Ghosts, pumpkins, bats, and cats are my favorites. I found a set at Target for under $10 that has lasted years.
- Baking sheets: Two large, rimmed baking sheets. I line mine with parchment paper or silicone baking mats for easy cleanup.
- Wire cooling rack: Essential for cooling the cookies evenly before icing.
- Piping bags or zip-top bags: I use disposable piping bags with a #2 or #3 round tip for the spiderwebs. A small zip-top bag with the corner snipped off works perfectly too.
- Small bowls and spoons: For mixing the royal icing and testing the consistency.
Preparation Method
Let’s get baking. I’ve broken this down into clear steps so you don’t miss a thing. Take your time—especially with the icing part. It’s worth it.
Step 1: Make the Cookie Dough
In a large mixing bowl, beat the softened butter and granulated sugar together on medium speed for about 2-3 minutes, until it’s light and fluffy. Scrape down the sides of the bowl once or twice. Add the egg and vanilla extract, then beat until well combined. The mixture might look a little curdled—that’s okay, it’ll come together once you add the flour.
In a separate bowl, whisk together the flour, baking powder, and salt. Gradually add the dry ingredients to the wet mixture, mixing on low speed until just combined. Stop as soon as you don’t see any more streaks of flour. Overmixing here will make the cookies tough, so don’t walk away.
Step 2: Chill the Dough
Divide the dough in half, flatten each half into a disc about 1-inch thick, and wrap tightly in plastic wrap. Refrigerate for at least 30 minutes. This is crucial—chilled dough is much easier to roll out and holds its shape better during baking. I’ve skipped this step before, and let me tell you, the cookies spread into sad, blobby ghosts. Not cute.
Step 3: Roll and Cut
Preheat your oven to 350°F (175°C). Lightly flour your work surface and rolling pin. Roll one disc of dough to about ¼-inch thickness. Don’t go thinner than that or the cookies will be too crispy. Cut out your shapes and transfer them to a parchment-lined baking sheet, spacing them about 1 inch apart. Gather the scraps, re-roll, and cut again.
Step 4: Bake
Bake for 8-10 minutes, or until the edges are just barely golden. The centers should look set but not browned. I always pull them out at the 8-minute mark for soft cookies. Let them cool on the baking sheet for 5 minutes, then transfer to a wire rack to cool completely. Don’t even think about icing them while they’re warm—the icing will melt right off.
Step 5: Make the Royal Icing
In a medium bowl, combine the sifted powdered sugar and meringue powder. Add 4 tablespoons of warm water and whisk until smooth. The consistency should be thick but flowy—think honey. If it’s too thick, add more water a teaspoon at a time. Divide the icing into two bowls. Color one bowl black using the black gel food coloring, and leave the other white (or color it orange if you prefer).
Step 6: Pipe the Spiderwebs
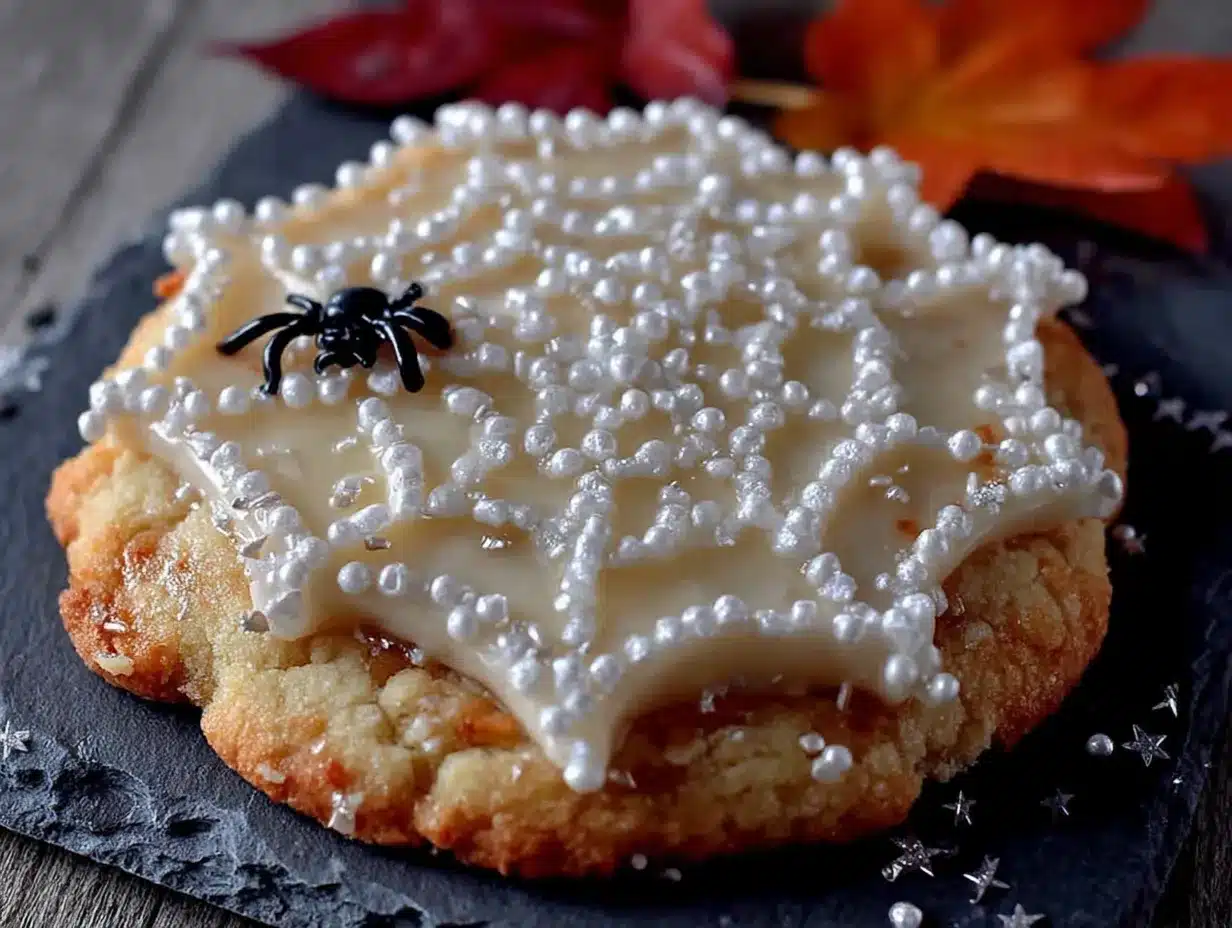
Transfer the black icing to a piping bag fitted with a small round tip. On each cooled cookie, pipe a small circle in the center. Then pipe 4-6 straight lines radiating outward from the center like spokes on a wheel. Starting from the center, pipe curved lines connecting each spoke to the next. Repeat, moving outward, until you reach the edge of the cookie. It’s that simple. Add a tiny white dot in the center for a spider if you’re feeling extra festive.
Cooking Tips & Techniques
I’ve made these cookies more times than I can count, and I’ve learned a few things the hard way. Here’s what I wish someone had told me.
Don’t skip the chill. I know it’s tempting, but warm dough spreads like crazy. Thirty minutes in the fridge makes all the difference. If your kitchen is warm, pop the cut-out shapes in the freezer for 10 minutes before baking.
Use a light hand with the flour. When rolling out the dough, use just enough flour to prevent sticking. Too much flour on the surface gets worked into the dough and makes the cookies dry. I keep a small bowl of flour nearby and dip my rolling pin in it between rolls.
Test your icing consistency. Before you start piping, do a quick test on a piece of parchment paper. The icing should hold its shape for a second before slowly settling into a smooth line. If it runs into a puddle, it’s too thin—add more powdered sugar. If it won’t pipe at all, add a few drops of water.
Work in batches. Don’t try to ice all the cookies at once. The icing can start to dry out, and you’ll end up with clumpy spiderwebs. Keep the icing covered with a damp paper towel when you’re not using it.
One time I forgot the meringue powder. I was halfway through mixing the icing when I realized I was out. I used an egg white instead, and honestly, it worked fine. The icing was a little softer, but the spiderwebs still looked great. So don’t panic if you have to improvise.
Variations & Adaptations
These cookies are a blank canvas. Here are some ways to make them your own.
- Gluten-Free Version: Swap the all-purpose flour with a 1:1 gluten-free baking blend. I’ve used Bob’s Red Mill and King Arthur, both with great results. The dough might be a little more delicate, so handle it gently.
- Vegan Adaptation: Use vegan butter and a flax egg (1 tablespoon ground flaxseed mixed with 3 tablespoons water). For the royal icing, replace the meringue powder with 2 tablespoons aquafaba (chickpea brine) and skip the water. It works surprisingly well.
- Different Flavors: Add 1 teaspoon of almond extract along with the vanilla for a nutty twist. Or add the zest of one orange to the dough for a citrusy Halloween cookie.
- No Royal Icing: If you’re short on time, skip the icing and press Halloween sprinkles into the dough before baking. They’ll stick and look festive without any fuss.
- Spiderweb Variations: Try using orange icing with black dots, or white icing with purple webs. You can even pipe little spiders on top using black icing for the body and tiny white dots for eyes.
Serving & Storage Suggestions
These cookies are best served at room temperature—the royal icing sets firm but softens slightly on the tongue. Arrange them on a platter with some candy corn or pretzel spiders for a spooky snack board. They pair wonderfully with a glass of cold milk, a warm apple cider, or even a mug of hot chocolate with marshmallows.
To store, place the iced cookies in a single layer in an airtight container. Separate layers with parchment paper to prevent the spiderwebs from smudging. They’ll stay fresh for up to 5 days at room temperature. If you want to freeze them, do it before icing. Freeze the baked, cooled cookies in a freezer-safe container for up to 3 months. Thaw at room temperature, then ice as directed.
The flavors actually deepen after a day or two. The cookies get slightly softer, and the royal icing sets into a perfect crackly shell. I’ve been known to hide a few in the back of the pantry for a late-night treat—don’t judge.
Nutritional Information & Benefits
Let’s be real: these are a treat. But I’ve done the math so you can plan accordingly. Per cookie (based on a 3-inch ghost shape, iced), here’s the approximate breakdown:
- Calories: 180-200
- Fat: 8g
- Carbohydrates: 28g
- Protein: 2g
- Sugar: 18g
The butter provides a small amount of vitamin A, and the egg adds a bit of protein. The royal icing is mostly sugar, so it’s not a health food—but that’s okay. Halloween is about indulgence and fun. If you’re looking to cut back, you can reduce the sugar in the cookie dough by a quarter cup without affecting the texture too much. For a lower-sugar version, use a sugar substitute like Swerve in the cookie dough (the icing is harder to modify).
These cookies are not gluten-free, dairy-free, or vegan as written, but the substitutions I mentioned above work well for those dietary needs. Always check your ingredients for potential allergens if you’re baking for a crowd.
Conclusion
These Halloween sugar cookies with royal icing spiderwebs are proof that the best recipes often come from the most chaotic moments. They’re forgiving, foolproof, and genuinely fun to make. Whether you’re baking with kids, hosting a party, or just want to get into the spooky spirit, this recipe delivers every time.
I’d love to see how yours turn out. Did you try a different color scheme? Add sprinkles? Pipe a spider on top? Drop a comment below and tell me about it—or share a photo on social media and tag me. Your version might just inspire someone else’s Halloween baking adventure.
So go ahead. Preheat that oven, grab your cookie cutters, and make a little kitchen magic. And if something goes wrong? Embrace it. You might just end up with a new favorite tradition.
Frequently Asked Questions
Can I make the dough ahead of time?
Absolutely. You can refrigerate the dough discs for up to 3 days, or freeze them for up to 3 months. Just thaw in the fridge overnight before rolling and cutting.
Why did my cookies spread too much?
Most likely the dough wasn’t chilled enough, or your butter was too soft. Next time, chill the cut-out shapes on the baking sheet for 10 minutes before baking.
Can I use store-bought royal icing?
You can, but it won’t be as stable or glossy. I’ve tried it, and the spiderwebs tend to blur together. Homemade is worth the extra few minutes.
How do I get the royal icing to set faster?
Add a tiny bit more meringue powder (up to 3 tablespoons total) or let the cookies sit in a cool, dry place. A fan nearby can help speed up the drying process.
Can I use a different color for the spiderwebs?
Of course! Purple, orange, or even neon green would look amazing. Just use gel food coloring to avoid thinning the icing too much.
Pin This Recipe!
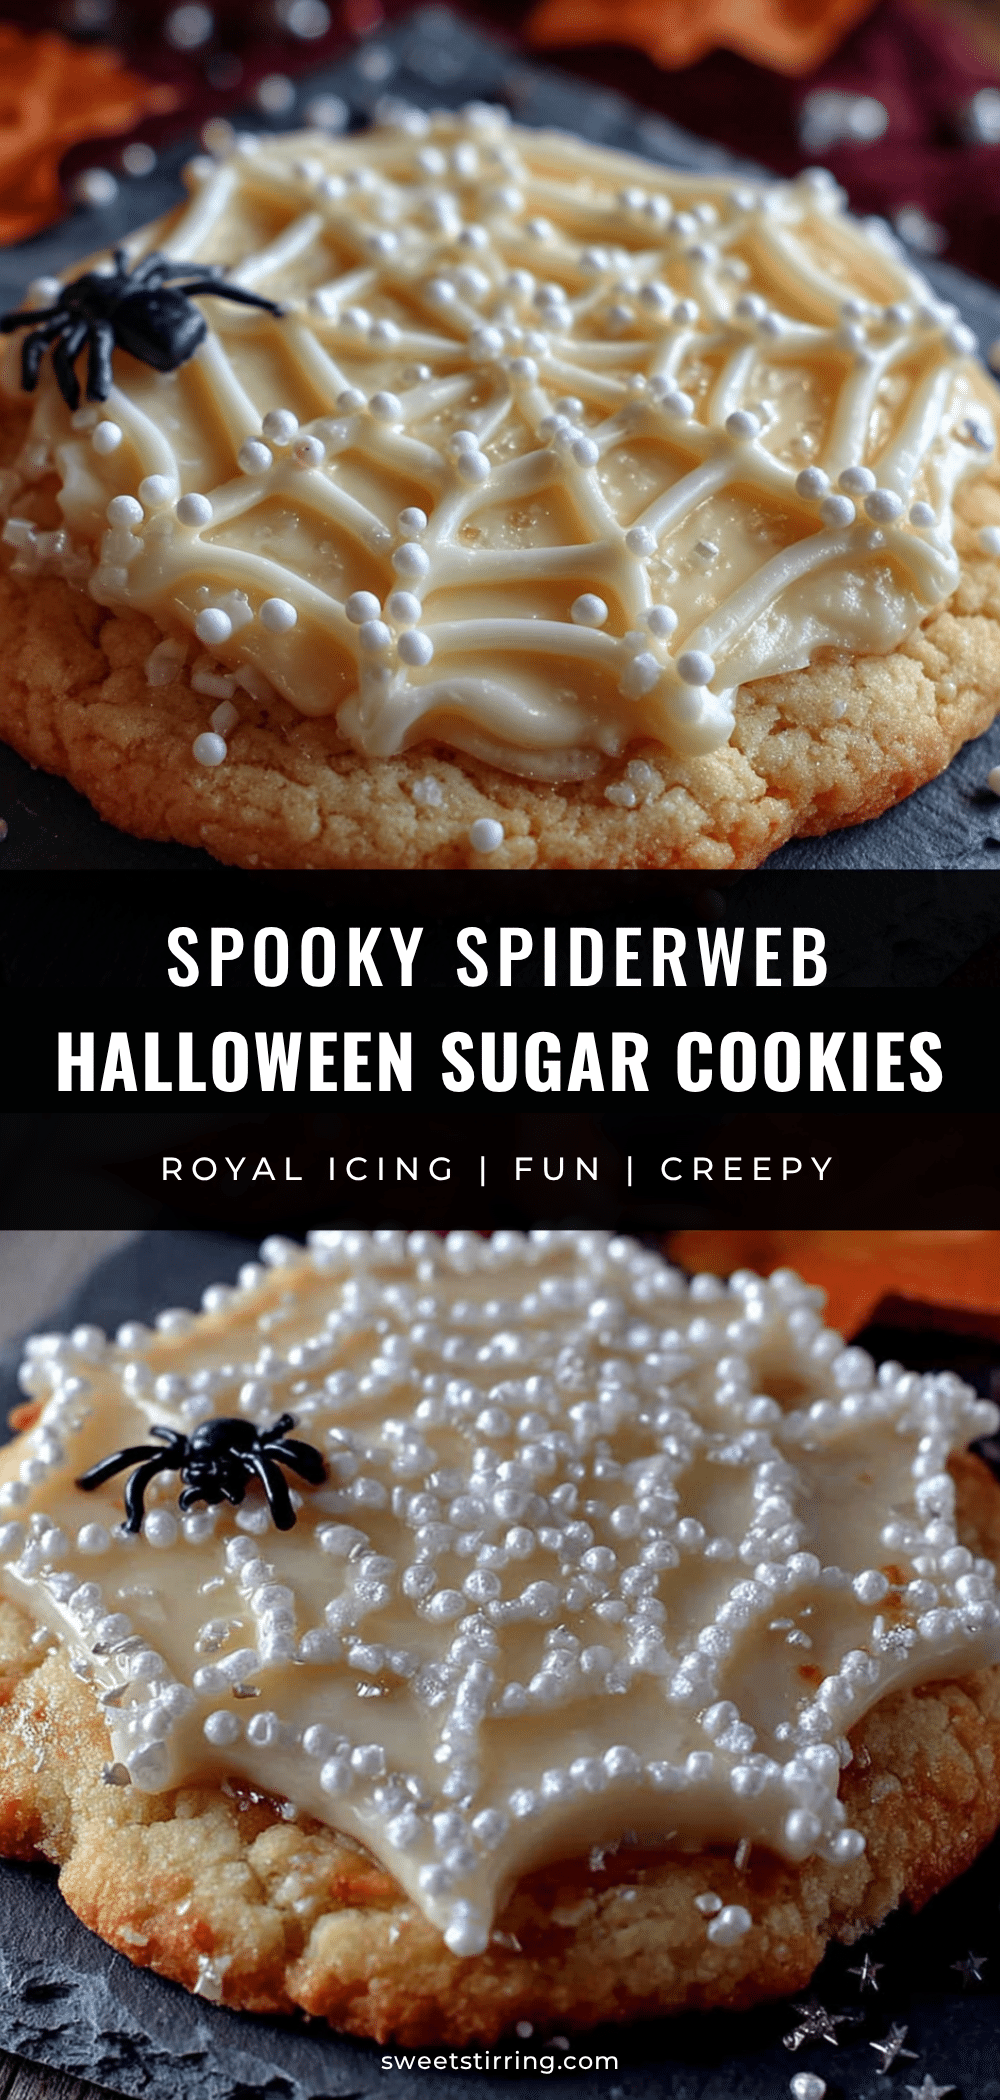
Best Halloween Sugar Cookies with Royal Icing Spiderwebs
These soft, buttery sugar cookies are topped with easy-to-pipe royal icing spiderwebs, making them the perfect spooky treat for Halloween parties, bake sales, or a fun family activity.
- Prep Time: 15 minutes
- Cook Time: 10 minutes
- Total Time: 1 hour 25 minutes (including chilling)
- Yield: 24 servings 1x
- Category: Dessert
- Cuisine: American
Ingredients
- 1 cup (2 sticks or 226g) unsalted butter, softened
- 1 cup (200g) granulated sugar
- 1 large egg, at room temperature
- 2 teaspoons pure vanilla extract
- 2 ½ cups (312g) all-purpose flour
- 1 teaspoon baking powder
- ½ teaspoon salt
- 3 cups (340g) powdered sugar, sifted
- 2 tablespoons meringue powder
- 4–5 tablespoons warm water
- 1 teaspoon black gel food coloring (or more for darker black)
- A few drops orange gel food coloring (optional, for accent webs or dots)
Instructions
- In a large mixing bowl, beat the softened butter and granulated sugar together on medium speed for about 2-3 minutes, until light and fluffy. Scrape down the sides of the bowl once or twice.
- Add the egg and vanilla extract, then beat until well combined. The mixture might look a little curdled—that’s okay.
- In a separate bowl, whisk together the flour, baking powder, and salt. Gradually add the dry ingredients to the wet mixture, mixing on low speed until just combined. Do not overmix.
- Divide the dough in half, flatten each half into a disc about 1-inch thick, and wrap tightly in plastic wrap. Refrigerate for at least 30 minutes.
- Preheat oven to 350°F (175°C). Lightly flour your work surface and rolling pin. Roll one disc of dough to about ¼-inch thickness.
- Cut out shapes using Halloween cookie cutters and transfer to a parchment-lined baking sheet, spacing them about 1 inch apart. Gather scraps, re-roll, and cut again.
- Bake for 8-10 minutes, or until the edges are just barely golden. Let cool on the baking sheet for 5 minutes, then transfer to a wire rack to cool completely.
- In a medium bowl, combine the sifted powdered sugar and meringue powder. Add 4 tablespoons of warm water and whisk until smooth. The consistency should be thick but flowy—like honey. Add more water a teaspoon at a time if needed.
- Divide the icing into two bowls. Color one bowl black using the black gel food coloring, and leave the other white (or color it orange if preferred).
- Transfer the black icing to a piping bag fitted with a small round tip. On each cooled cookie, pipe a small circle in the center. Then pipe 4-6 straight lines radiating outward from the center like spokes on a wheel.
- Starting from the center, pipe curved lines connecting each spoke to the next. Repeat, moving outward, until you reach the edge of the cookie. Add a tiny white dot in the center for a spider if desired.
Notes
Chill the dough for at least 30 minutes to prevent spreading. For softer cookies, bake at the 8-minute mark. Test icing consistency on parchment before piping. Keep icing covered with a damp paper towel when not in use. Cookies can be stored in an airtight container for up to 5 days at room temperature.
Nutrition
- Serving Size: 1 cookie (3-inch gho
- Calories: 190
- Sugar: 18
- Sodium: 80
- Fat: 8
- Saturated Fat: 5
- Carbohydrates: 28
- Protein: 2
Keywords: Halloween sugar cookies, royal icing spiderwebs, spooky cookies, easy Halloween cookies, soft sugar cookies



