Love this? Save it for later!
Share the inspiration with your friends
This was supposed to be a simple weeknight dinner. I had ground beef thawed, some sad-looking buns in the bread basket, and a vague plan for something resembling burgers. But I got distracted—honestly, when am I not?—and grabbed the wrong pan. Instead of the flat skillet for patties, I pulled out my deep baking dish. And instead of forming patties, I just pressed the seasoned meat into the dish like some sort of meatloaf situation. The oven was already preheating, the kids were hangry, and I was already mentally kicking myself for ruining dinner. What came out of that oven was nothing like the plan—and honestly, it was so much better. The meat cooked up juicy and perfectly seasoned in one big sheet, and I just sliced it into squares, stacked them on those tiny buns with cheese and pickles, and watched my family devour every last one. I mean, I stood there in my messy kitchen, fork in hand, eating one over the sink, and had that quiet moment of vindication. This was it. These were the best loaded cheeseburger sliders I had ever made, born from a mistake I almost didn’t make.
Why You’ll Love This Recipe
Let me tell you, these sliders aren’t just good—they’re the kind of food that makes you close your eyes after the first bite. I’ve tested this recipe more times than I care to admit, tweaking the seasoning, the cheese ratio, and that special sauce until it was absolutely perfect. You know that feeling when you bite into a slider and the bun is too big or the meat is dry? Not here. Not ever.
- Quick & Easy: From fridge to table in under 30 minutes. Perfect for those nights when you need dinner on the table yesterday.
- Simple Ingredients: No fancy grocery trips needed. Ground beef, cheese, slider buns, and pantry staples—you probably have everything right now.
- Perfect for Game Day: These sliders are made for feeding a crowd. Super Bowl, backyard barbecue, or just a Tuesday—they disappear fast.
- Crowd-Pleaser: Kids love them, adults sneak extras, and I’ve never had a single complaint. Ever.
- Unbelievably Delicious: The combination of juicy seasoned beef, melty cheese, and that tangy special sauce is next-level comfort food.
What makes this version different from every other slider recipe? It’s the method. Baking the meat as one solid sheet instead of individual patties keeps every bite incredibly moist and evenly cooked. No dry edges, no undercooked centers. Plus, that special sauce—I spent weeks perfecting the balance of tangy, creamy, and slightly sweet. It’s not just another burger sauce. It’s the sauce.
This recipe isn’t just good for a busy weeknight. It’s the kind of food that makes you feel like you’re getting away with something. Comfort food reimagined—faster, easier, but with the same soul-soothing satisfaction.
What Ingredients You Will Need
This recipe uses simple, honest ingredients to deliver big flavor without any fuss. Most of these are pantry staples, and the ones that aren’t are easy to find at any grocery store.
For the Sliders
- Ground beef (2 lbs, 80/20 blend) – The 20% fat is key for juicy sliders. Leaner beef will dry out. I prefer 80/20 for the best flavor and texture.
- Slider buns (12-pack) – Look for soft, slightly sweet buns. Hawaiian rolls are my go-to, but any soft slider bun works beautifully.
- Sharp cheddar cheese (8 slices or 2 cups shredded) – Sharp cheddar cuts through the richness. You can use American cheese for extra meltiness if you prefer.
- Yellow onion (1 medium, finely diced) – Adds sweetness and texture. Don’t skip it—it caramelizes slightly as the meat bakes.
- Garlic (3 cloves, minced) – Fresh garlic is non-negotiable here. The jarred stuff just doesn’t hit the same.
- Worcestershire sauce (2 tablespoons) – Adds that deep, savory umami note that makes these taste like they’ve been simmering all day.
- Salt and black pepper (to taste) – Simple seasoning lets the beef shine.
- Garlic powder (1 teaspoon) – A little extra savory punch.
- Onion powder (1 teaspoon) – Rounds out the flavor profile.
For the Special Sauce
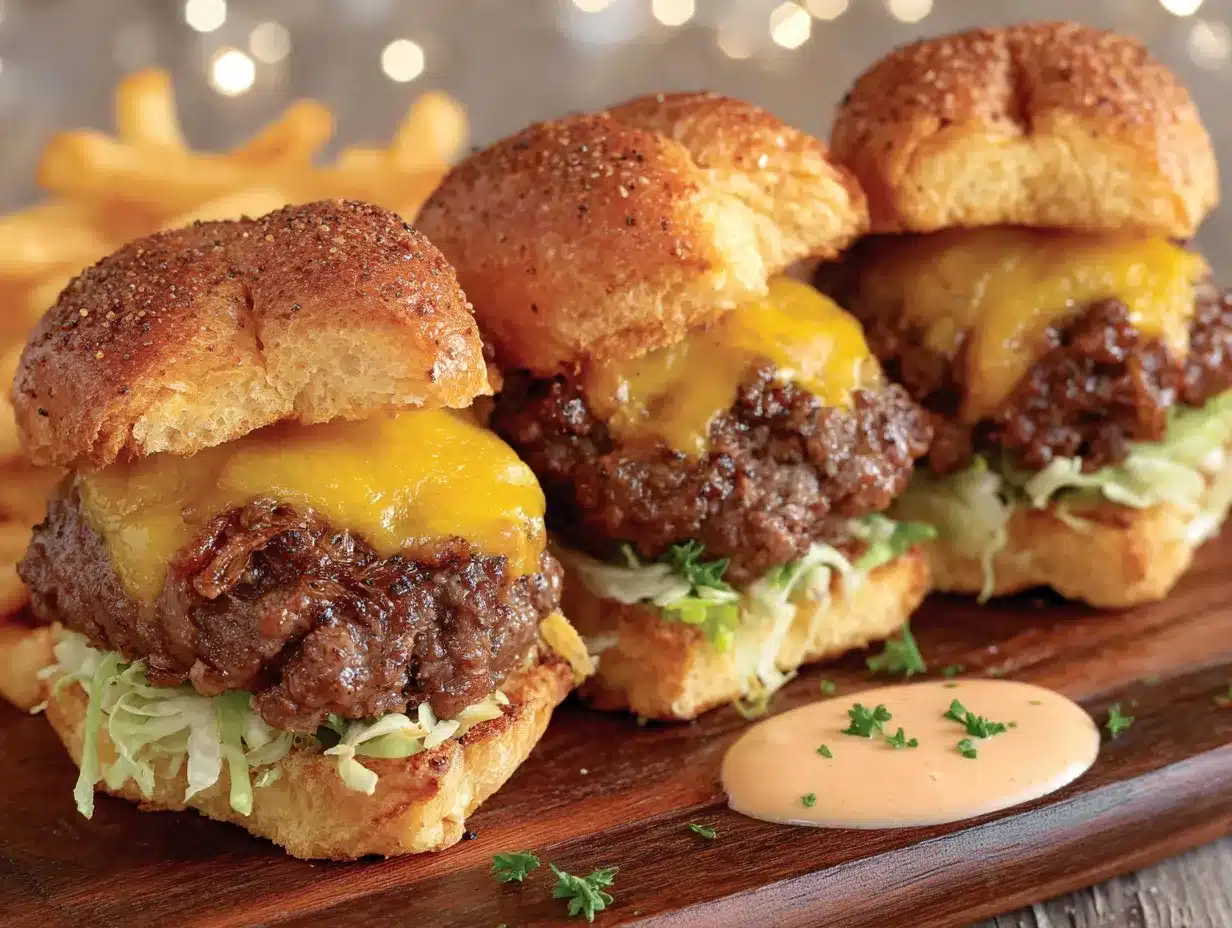
- Mayonnaise (½ cup) – Full-fat mayo gives the best creamy base. I use Hellmann’s or Duke’s.
- Ketchup (2 tablespoons) – Adds tang and color.
- Sweet pickle relish (1 tablespoon) – The secret ingredient. It adds sweetness and crunch.
- Yellow mustard (1 teaspoon) – A little tangy kick.
- Smoked paprika (½ teaspoon) – Adds a subtle smoky depth. Regular paprika works too.
- Garlic powder (¼ teaspoon) – Because more garlic is always better.
- Onion powder (¼ teaspoon) – Balances the flavors.
- White vinegar (1 teaspoon) – Brightens everything up.
Optional Toppings
- Pickle slices (dill or bread-and-butter) – Adds crunch and acidity.
- Lettuce (shredded) – For freshness.
- Tomato (sliced thin) – Only if they’re in season.
- Cooked bacon (crumbled) – Because bacon makes everything better.
Equipment Needed
You don’t need a fancy kitchen to make these sliders. Here’s what you’ll need:
- 9×13 baking dish – This is perfect for pressing the meat into an even layer. A rimmed baking sheet works too.
- Large mixing bowl – For combining the beef with seasonings.
- Chef’s knife and cutting board – For dicing the onion and mincing garlic.
- Small bowl – For mixing the special sauce.
- Aluminum foil – For covering the sliders while they bake to keep the buns soft.
- Spatula – For flipping or transferring the meat.
I’ve made these in a cast iron skillet before when my baking dish was dirty, and it worked great. If you don’t have a 9×13 dish, any oven-safe pan roughly that size will do. Just make sure the meat is pressed into an even layer so it cooks uniformly.
Preparation Method
- Preheat your oven to 375°F (190°C). While it’s heating, take your ground beef out of the fridge and let it sit on the counter for about 10 minutes. Cold meat is harder to mix evenly, and we want every bite perfectly seasoned.
- In a large mixing bowl, combine the ground beef, finely diced onion, minced garlic, Worcestershire sauce, salt, pepper, garlic powder, and onion powder. Use your hands to mix everything together—I know it’s messy, but it’s the best way to ensure even distribution. Don’t overmix, though. Overworking the meat can make it tough. Just mix until everything is combined, about 30 seconds.
- Press the seasoned beef into your 9×13 baking dish in an even layer. This is important—if the meat is thicker in some spots than others, it won’t cook evenly. Use your fingers or the back of a spatula to press it down firmly. The meat should be about ½ inch thick.
- Bake the meat for 20-25 minutes, or until it reaches an internal temperature of 160°F (71°C). You’ll see the fat rendering and the edges getting brown and crispy. That’s exactly what we want. If you like a little char on top, switch the oven to broil for the last 2 minutes. Keep an eye on it—broilers work fast.
- While the meat bakes, make the special sauce. In a small bowl, whisk together the mayonnaise, ketchup, sweet pickle relish, yellow mustard, smoked paprika, garlic powder, onion powder, and white vinegar. Taste it. Add a pinch more salt or a dash more vinegar if you want. Set it aside. The flavors will meld while the meat cooks.
- When the meat is done, remove it from the oven and let it rest for 5 minutes. This is crucial—if you slice it immediately, all those juices will run out and you’ll have dry sliders. Patience, my friend.
- Slice the slider buns in half horizontally. Place the bottom half of the buns on a large baking sheet or back in the 9×13 dish. I like to toast them lightly under the broiler for 1-2 minutes first, but that’s optional.
- Carefully lift the cooked meat from the baking dish and place it on top of the bottom buns. It should come out in one solid sheet. If it sticks, run a spatula underneath to loosen it. Trim the edges if needed to fit the buns.
- Layer the cheese slices over the hot meat. The residual heat will melt the cheese beautifully. If you want extra gooey cheese, pop the whole thing back in the oven for 2-3 minutes.
- Spread a generous amount of special sauce on the cut side of the top buns. Place the top buns over the cheese-covered meat. Press down gently.
- Use a sharp knife to cut between the individual sliders. A serrated knife works best for clean cuts through the buns. Cut straight down—don’t saw back and forth.
- Serve immediately with extra special sauce on the side. Add your favorite toppings—pickles, lettuce, tomato, bacon—and watch them disappear.
Cooking Tips & Techniques
I’ve made these sliders at least a dozen times, and I’ve learned a few things the hard way so you don’t have to.
Don’t skip the resting time. I know, I know—you’re hungry and they smell incredible. But cutting into that meat too soon will release all the juices, and you’ll end up with dry sliders. Five minutes. Set a timer if you have to.
Use a meat thermometer. Honestly, this is the best investment you can make for cooking meat. Guessing doneness by color is unreliable. 160°F (71°C) for ground beef is the sweet spot—safe to eat but still juicy.
Press the meat evenly. This was my biggest failure the first time. I had thick spots that were undercooked and thin edges that were overdone. Take the extra 30 seconds to press that meat into a uniform layer. Your future self will thank you.
Toast the buns if you have time. It only takes 1-2 minutes under the broiler, and it makes a huge difference. The slight crunch keeps the buns from getting soggy from the sauce and meat juices.
Double the special sauce. Trust me on this. Everyone wants extra, and it keeps in the fridge for up to a week. I’ve been known to put it on everything from fries to grilled chicken.
Variations & Adaptations
These sliders are incredibly versatile. Here are a few ways I’ve adapted them over the years:
Spicy Jalapeño Popper Sliders
Add ¼ cup diced pickled jalapeños and 4 oz cream cheese (softened) to the beef mixture. Top with pepper jack cheese instead of cheddar. The creamy, spicy combination is absolutely addictive.
BBQ Bacon Cheddar Sliders
Swap the special sauce for your favorite BBQ sauce. Mix ½ cup cooked, crumbled bacon into the beef before baking. Top with smoked gouda or sharp cheddar. These taste like a backyard barbecue in slider form.
Turkey Sliders (Lighter Option)
Use 2 lbs of ground turkey (93/7) instead of beef. Add 2 tablespoons of olive oil to the turkey mixture to keep it moist. Cook to 165°F (74°C). The special sauce works beautifully with turkey, too.
Keto/Low-Carb Sliders
Skip the buns entirely and serve the meat and toppings over a bed of lettuce or in lettuce wraps. The special sauce is already low-carb. I’ve done this for myself on low-carb days, and it’s surprisingly satisfying.
Breakfast Sliders
Yes, really. Make the beef patty as directed, but top it with a fried egg and American cheese. Serve on toasted English muffins. I made these for a brunch once, and they were gone in minutes.
Serving & Storage Suggestions
These sliders are best served hot, right after assembly. The cheese is perfectly melty, the buns are soft but not soggy, and the meat is at its juiciest. I like to set them out on a platter with a bowl of extra special sauce for dipping and a pile of pickle spears on the side.
For a full meal, serve them with crispy french fries, sweet potato tots, or a simple coleslaw. They also pair beautifully with a cold beer or a tall glass of iced tea. If you’re feeding a crowd, set up a topping bar with lettuce, tomato, pickles, bacon, and extra sauce so everyone can customize their own.
Storage: Leftover sliders (if you have any) can be stored in an airtight container in the refrigerator for up to 3 days. The buns will soften slightly, but the flavor is still fantastic.
Reheating: The best way to reheat these is in a 350°F (175°C) oven for about 10 minutes, covered with foil. This warms them through without drying out the meat. You can also use the microwave in a pinch—30 seconds on high should do it—but the buns will be softer.
Freezing: You can freeze the cooked meat sheet (without buns) for up to 3 months. Wrap it tightly in plastic wrap and then foil. Thaw overnight in the fridge, then reheat and assemble fresh buns. The special sauce does not freeze well, so make that fresh.
Nutritional Information & Benefits
These sliders are indulgent, but here’s the breakdown per slider (based on 12 sliders, with bun and sauce, without optional toppings):
| Nutrient | Amount |
|---|---|
| Calories | 385 |
| Protein | 22g |
| Fat | 24g |
| Carbohydrates | 18g |
| Fiber | 1g |
| Sugar | 6g |
| Sodium | 620mg |
Ground beef is an excellent source of protein, iron, and B vitamins. The onions and garlic add antioxidants and anti-inflammatory compounds. And honestly? Sometimes food is just about joy, and these sliders deliver that in spades. If you’re watching your intake, one slider is plenty satisfying, especially with a side of veggies.
This recipe contains dairy (cheese, mayonnaise) and gluten (buns). For a dairy-free version, use dairy-free cheese and vegan mayo. For gluten-free, use gluten-free slider buns or lettuce wraps.
Frequently Asked Questions
Can I make these sliders ahead of time?
Absolutely. You can bake the meat sheet up to 2 days in advance, store it in the fridge, and then reheat and assemble when you’re ready to serve. The special sauce can also be made ahead and stored in the fridge for up to a week.
Can I use a different type of cheese?
Yes! Sharp cheddar is my favorite, but provolone, mozzarella, pepper jack, or American cheese all work beautifully. Just make sure it’s a good melting cheese.
How do I prevent the sliders from getting soggy?
Toast the buns lightly before assembling, and don’t overload them with sauce. Also, let the meat rest for 5 minutes after baking so excess moisture can redistribute or evaporate.
Can I cook these on the grill instead of the oven?
You can! Press the meat into a foil-lined baking sheet and grill over medium heat for about 15-20 minutes with the lid closed. The flavor will be even smokier. Just watch the bottom so it doesn’t burn.
What if I don’t have Worcestershire sauce?
You can substitute soy sauce or coconut aminos in a pinch. The flavor will be slightly different, but still delicious. You could also just add a little extra salt and a dash of balsamic vinegar for depth.
Conclusion
These best loaded cheeseburger sliders with special sauce are the kind of recipe that becomes a staple. They’re quick enough for a busy Tuesday, impressive enough for game day, and delicious enough that everyone asks for the recipe. I’ve made them more times than I can count, and they never disappoint.
I hope you give them a try and make them your own. Add your favorite toppings, tweak the sauce to your taste, and don’t be afraid to experiment. That’s what cooking is all about. And if you accidentally grab the wrong pan? Well, maybe that’s how your next favorite recipe is born.
Let me know in the comments how yours turn out! I’d love to hear what variations you come up with. Happy cooking, friends!
Pin This Recipe!
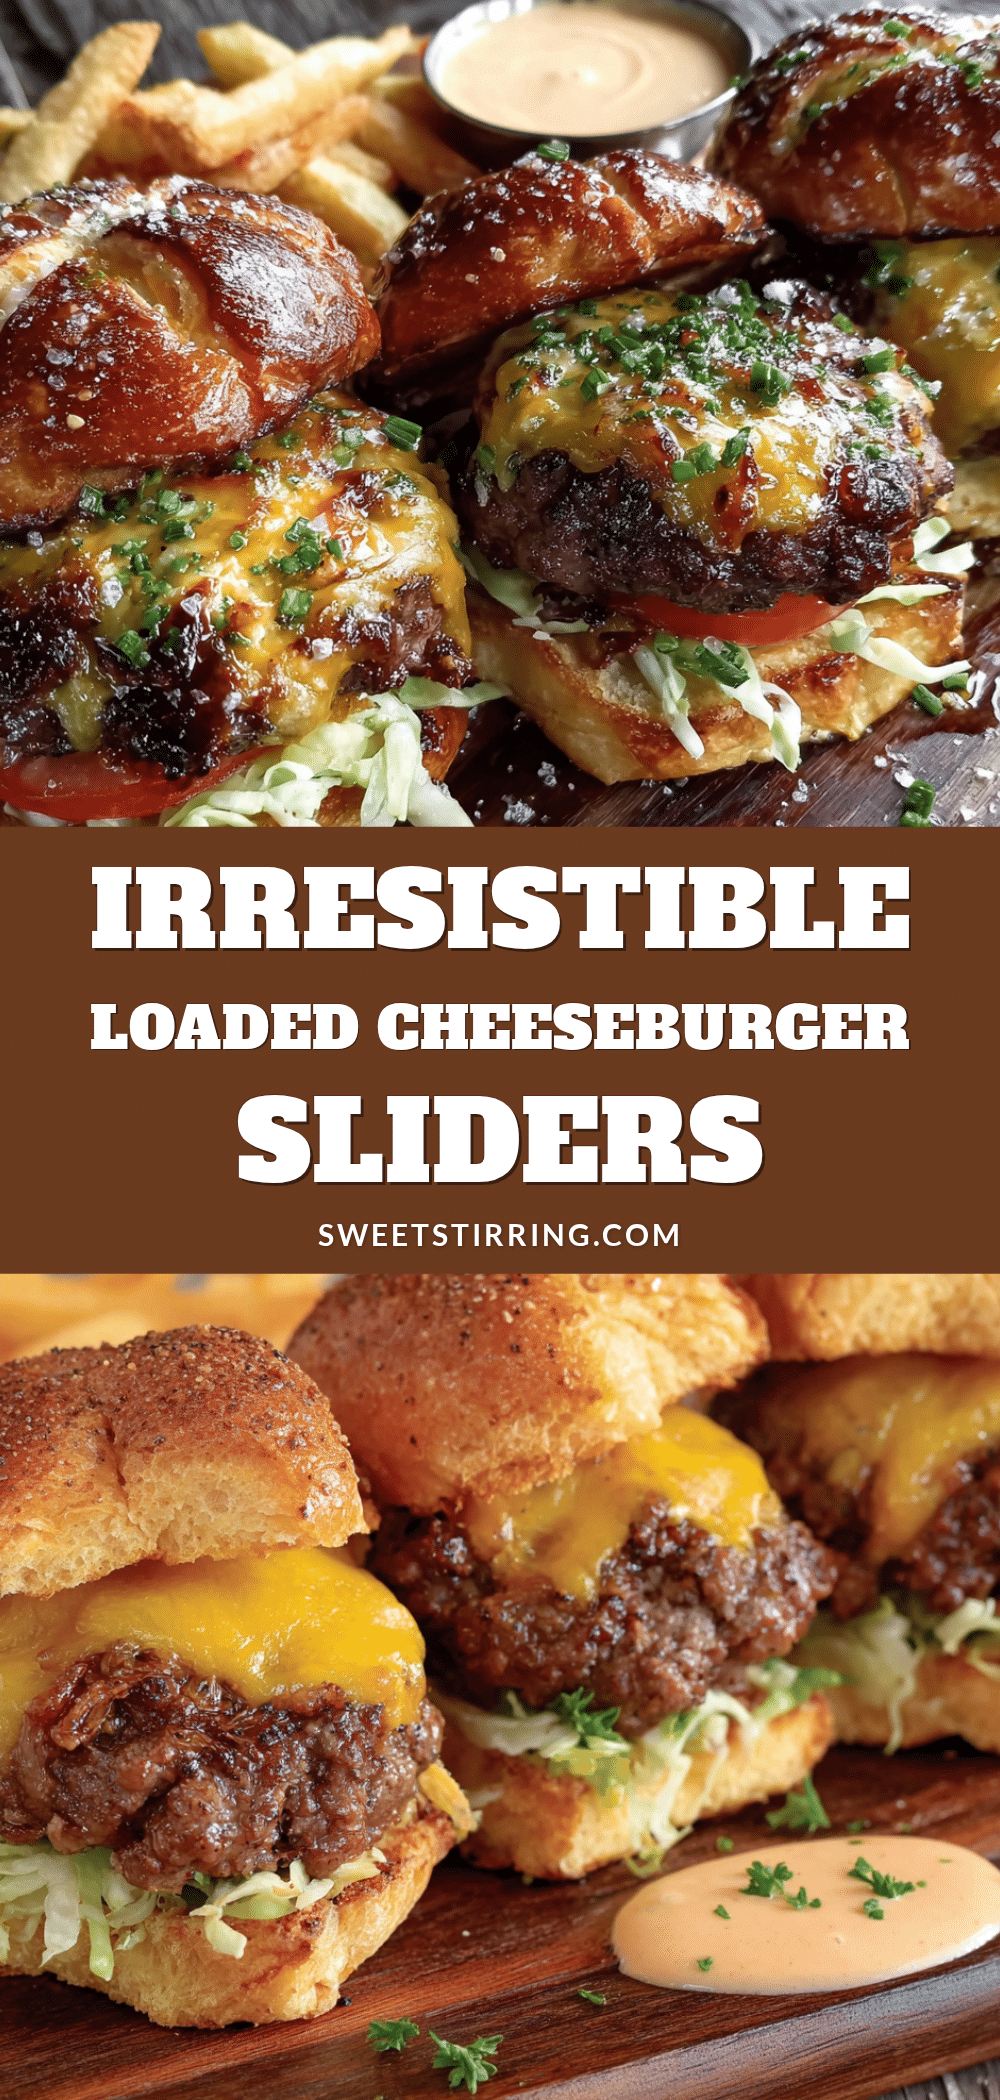
Best Loaded Cheeseburger Sliders with Special Sauce
Juicy, perfectly seasoned ground beef baked as one sheet, sliced into squares, and stacked on soft slider buns with melty cheese and a tangy special sauce. Born from a happy kitchen accident, these sliders are quick, easy, and absolutely irresistible.
- Prep Time: 15 minutes
- Cook Time: 25 minutes
- Total Time: 40 minutes
- Yield: 12 sliders 1x
- Category: Main Course
- Cuisine: American
Ingredients
- 2 lbs ground beef (80/20 blend)
- 12 slider buns (Hawaiian rolls recommended)
- 8 slices sharp cheddar cheese (or 2 cups shredded)
- 1 medium yellow onion, finely diced
- 3 cloves garlic, minced
- 2 tablespoons Worcestershire sauce
- Salt and black pepper to taste
- 1 teaspoon garlic powder
- 1 teaspoon onion powder
- ½ cup mayonnaise
- 2 tablespoons ketchup
- 1 tablespoon sweet pickle relish
- 1 teaspoon yellow mustard
- ½ teaspoon smoked paprika
- ¼ teaspoon garlic powder
- ¼ teaspoon onion powder
- 1 teaspoon white vinegar
- Pickle slices (optional, for serving)
- Shredded lettuce (optional, for serving)
- Sliced tomato (optional, for serving)
- Cooked bacon, crumbled (optional, for serving)
Instructions
- Preheat oven to 375°F (190°C). Let ground beef sit at room temperature for 10 minutes.
- In a large bowl, combine ground beef, diced onion, minced garlic, Worcestershire sauce, salt, pepper, garlic powder, and onion powder. Mix with your hands until just combined (about 30 seconds). Do not overmix.
- Press the seasoned beef into a 9×13 baking dish in an even layer, about ½ inch thick.
- Bake for 20-25 minutes, or until internal temperature reaches 160°F (71°C). Optional: broil for 2 minutes at the end for extra char.
- While meat bakes, make the special sauce: whisk together mayonnaise, ketchup, sweet pickle relish, yellow mustard, smoked paprika, garlic powder, onion powder, and white vinegar in a small bowl. Set aside.
- Remove meat from oven and let rest for 5 minutes.
- Slice slider buns in half horizontally. Optionally toast cut sides under broiler for 1-2 minutes.
- Carefully lift the cooked meat sheet and place it on the bottom buns. Trim edges if needed.
- Layer cheese slices over the hot meat. Return to oven for 2-3 minutes if extra melting is desired.
- Spread special sauce on the cut side of the top buns. Place top buns over the cheese-covered meat and press gently.
- Use a sharp knife (serrated works best) to cut between individual sliders.
- Serve immediately with extra sauce and optional toppings.
Notes
Don’t skip the resting time after baking—it keeps the meat juicy. Press the meat evenly for uniform cooking. Toasting the buns prevents sogginess. Double the special sauce for extra dipping; it keeps in the fridge for up to a week.
Nutrition
- Serving Size: 1 slider
- Calories: 385
- Sugar: 6
- Sodium: 620
- Fat: 24
- Saturated Fat: 9
- Carbohydrates: 18
- Fiber: 1
- Protein: 22
Keywords: cheeseburger sliders, loaded sliders, special sauce, ground beef, game day food, easy dinner, comfort food, baked sliders



