Love this? Save it for later!
Share the inspiration with your friends
My friend Jen asked why I couldn’t just dump everything into one bowl and call it a day. We were standing in her kitchen, me with a recipe card covered in my cramped handwriting, explaining the “proper” way to layer pumpkin bars — wet ingredients first, then dry, fold gently, don’t overmix. She looked at me like I was speaking a foreign language. “But what if you just… didn’t?”
I started to explain why that wouldn’t work — then stopped. Honestly, I had no good reason. I’d been making pumpkin bars the same way for years because that’s how my grandmother did it, and she learned from someone else, and nobody ever questioned the method. So I shrugged, handed her the bowl, and said, “Go for it.”
She threw everything in — canned pumpkin, melted butter, sugar, eggs, vanilla, flour, spices, and a whole bag of chocolate chips — stirred it with a wooden spoon until it looked like a thick, glorious mess, and scraped it into a pan. I was mentally preparing my “I told you so” speech for when they came out dense and gummy. Let me tell you, I’m glad I kept my mouth shut.
Those bars came out of the oven looking like they belonged on a bakery shelf. The edges were perfectly set, the center was soft and almost fudgy, and every single bite had at least two chocolate chips. I stood there eating one straight from the pan — burned my tongue, didn’t care — and realized I’d been overcomplicating this recipe for years. Jen just smiled and grabbed another one.
That moment stuck with me. Not because it was some profound culinary revelation, but because it reminded me that sometimes the best recipes come from letting go of the rules we think matter. These pumpkin chocolate chip cookie bars are the result of that afternoon — a one-bowl, no-fuss dessert that tastes like you spent hours in the kitchen. Maybe you’ve been there, holding onto a method just because it’s what you’ve always done. Trust me, you can let go. The results speak for themselves.
Why You’ll Love This Recipe
These pumpkin chocolate chip cookie bars aren’t just another fall dessert. They’re the kind of recipe that makes you wonder why you ever bothered with complicated methods. I’ve tested this exact formula at least seven times — once with a friend who’s a pastry chef, once for a picky group of kids, and once just for myself at midnight when I needed something sweet. Every single time, they disappeared faster than I expected.
- Quick & Easy: From bowl to oven in under 15 minutes. No mixer required, no chilling time, no rolling dough into individual balls. Just stir, spread, and bake. Perfect for those days when you need dessert now.
- Simple Ingredients: You probably have everything in your pantry right now. Canned pumpkin, flour, sugar, butter, eggs, chocolate chips, and basic spices. No specialty items, no trips to three different stores.
- Perfect for Fall Gatherings: These bars are ideal for Thanksgiving dessert tables, potlucks, Halloween parties, or just a cozy weekend at home. They travel well, slice cleanly, and everyone reaches for them first.
- Crowd-Pleaser: I’ve yet to meet someone who doesn’t like these. Kids love the chocolate chip cookie vibe, adults appreciate the pumpkin spice warmth, and nobody complains about the texture — soft, chewy edges with a tender center.
- Unbelievably Delicious: The combination of earthy pumpkin, warm cinnamon, and rich chocolate is next-level comfort food. The edges get slightly crisp while the center stays almost brownie-like. It’s the texture contrast that keeps you coming back for “just one more.”
What makes this recipe different from every other pumpkin bar out there? It’s the ratio. Most recipes use too much pumpkin, which makes the bars gummy and wet. I’ve dialed in the exact amount so you get moisture without sogginess, and the chocolate chips stay suspended in the batter instead of sinking to the bottom. Plus, the one-bowl method means less cleanup and more time enjoying the results.
This is the recipe you’ll make when you want to impress without the stress. It’s comfort food reimagined — faster, simpler, but with the same soul-soothing satisfaction that makes fall baking so special.
What Ingredients You Will Need
This recipe uses simple, wholesome ingredients to deliver bold flavor and satisfying texture without any fuss. Most of these are pantry staples, especially if you do any amount of fall baking. Here’s what you need and why each one matters:
- 1 ¾ cups all-purpose flour (spooned and leveled — don’t scoop directly from the bag or you’ll pack in too much)
- 1 teaspoon baking soda (helps the bars rise and gives them that soft, cake-like texture)
- 2 teaspoons ground cinnamon (the backbone of pumpkin spice flavor; I use McCormick for consistent quality)
- ½ teaspoon ground nutmeg (freshly grated if you have it, but pre-ground works perfectly)
- ½ teaspoon ground ginger (adds warmth without being overpowering)
- ¼ teaspoon ground cloves (just a pinch — it’s strong but essential for that classic pumpkin pie vibe)
- ½ teaspoon salt (balances the sweetness and enhances the chocolate)
- ½ cup unsalted butter, melted and slightly cooled (I prefer unsalted so I can control the salt level; salted butter works if you reduce the added salt to ¼ teaspoon)
- 1 cup light brown sugar, packed (dark brown sugar works too and gives a deeper molasses flavor)
- ¼ cup granulated sugar (adds just enough sweetness without making the bars cloying)
- 1 large egg, at room temperature (cold egg can seize the melted butter; let it sit out for 15 minutes)
- 1 teaspoon vanilla extract (pure vanilla, not imitation — it makes a difference in the depth of flavor)
- ¾ cup canned pumpkin purée (not pumpkin pie filling — make sure you grab 100% pumpkin. Libby’s is my go-to brand because it’s consistently thick and not watery)
- 1 ½ cups semi-sweet chocolate chips (I use Ghirardelli for the best melt and flavor; you can also use dark chocolate or milk chocolate depending on your preference)
Ingredient Selection Tips: Look for canned pumpkin that’s thick and not watery. If your pumpkin purée seems loose, pat it dry with paper towels before adding it to the batter. For the chocolate chips, I’ve tested this with both standard grocery store brands and higher-end ones, and the difference is noticeable — better chocolate means better bars. But honestly, even with budget chocolate chips, these are still amazing.
Substitution Guidance: You can swap the all-purpose flour with a 1:1 gluten-free baking blend if needed. For a dairy-free version, use melted coconut oil or vegan butter instead of regular butter, and make sure your chocolate chips are dairy-free. If you don’t have all the individual spices, use 3 teaspoons of pumpkin pie spice instead of the cinnamon, nutmeg, ginger, and cloves. Easy.
Equipment Needed
You don’t need a fancy kitchen to make these bars. Here’s what you’ll actually use:
- 9×13-inch baking pan (glass or metal both work; I prefer metal for more even browning on the edges)
- Parchment paper (non-negotiable — it makes lifting the bars out so much easier and cleanup is a breeze)
- Large mixing bowl (any bowl big enough to hold everything without spilling)
- Wooden spoon or silicone spatula (for mixing — no electric mixer needed)
- Measuring cups and spoons (dry measuring cups for flour and sugar, liquid measuring cup for pumpkin)
- Cooling rack (helps the bars cool evenly so the bottom doesn’t get soggy)
- Sharp knife (for clean slices; a serrated knife works great too)
If you don’t have parchment paper, you can grease the pan well with butter or non-stick spray. Just be prepared for slightly more effort getting the first piece out. I learned that the hard way — my first batch crumbled into a delicious but ugly mess. Parchment paper is worth the small investment.
For the mixing bowl, any large bowl works. I use a ceramic one because it’s heavy and doesn’t slide around, but glass or stainless steel is fine too. The wooden spoon is my preference because it’s sturdy and doesn’t scratch the bowl, but a silicone spatula works just as well.
Preparation Method
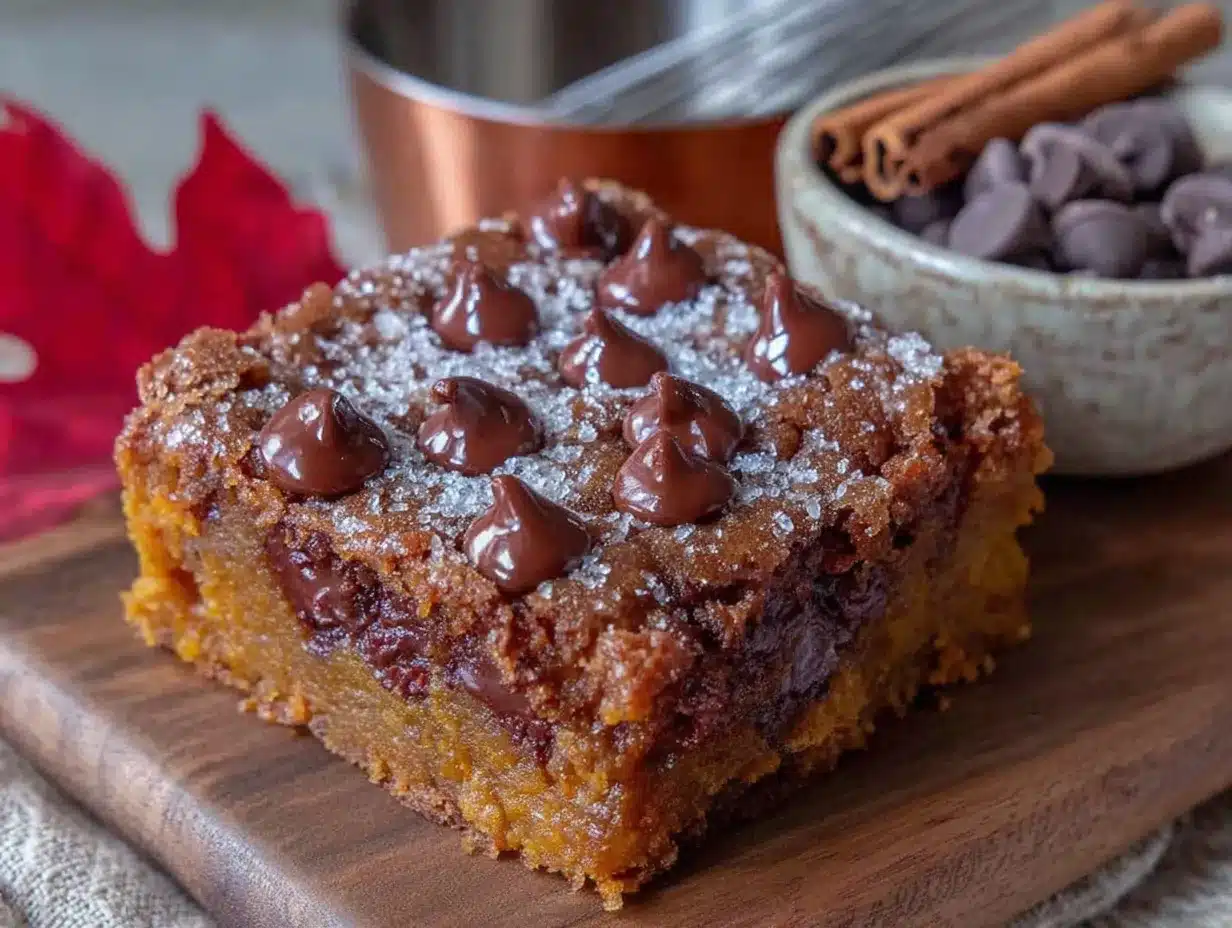
These pumpkin chocolate chip cookie bars come together in about 15 minutes of active prep time. The oven does the rest. Here’s exactly how to make them:
- Preheat your oven to 350°F (175°C). Line a 9×13-inch baking pan with parchment paper, leaving some overhang on the long sides. This creates “handles” that let you lift the entire batch out later. Lightly grease the parchment if you want extra insurance against sticking.
- In a small bowl, whisk together the dry ingredients: 1 ¾ cups all-purpose flour, 1 teaspoon baking soda, 2 teaspoons cinnamon, ½ teaspoon nutmeg, ½ teaspoon ginger, ¼ teaspoon cloves, and ½ teaspoon salt. Set this aside. Whisking ensures the spices are evenly distributed — nobody wants a bite with all the ginger and none of the cinnamon.
- In your large mixing bowl, combine the wet ingredients: ½ cup melted unsalted butter (slightly cooled), 1 cup packed light brown sugar, and ¼ cup granulated sugar. Stir with your wooden spoon until smooth and well combined. The mixture should look like wet sand — no lumps of brown sugar remaining.
- Add the egg and vanilla: Crack in 1 large room-temperature egg and add 1 teaspoon vanilla extract. Stir until fully incorporated. The batter will look glossy and smooth. If your egg was cold, the butter might seize slightly and look a bit lumpy — don’t panic, it’ll come together once you add the pumpkin.
- Add the pumpkin purée: Stir in ¾ cup canned pumpkin purée until completely combined. The batter will turn a beautiful golden-orange color and smell amazing already. It should be thick but scoopable, like a soft cookie dough.
- Fold in the dry ingredients: Add the flour mixture to the wet ingredients. Stir gently with your wooden spoon or spatula until just combined. A few streaks of flour are okay — overmixing will make the bars tough. Stop as soon as you don’t see any more dry flour.
- Fold in the chocolate chips: Add 1 ½ cups semi-sweet chocolate chips. Fold them in gently, distributing them evenly throughout the batter. Reserve about ¼ cup of chips to sprinkle on top if you want a prettier presentation — this is optional but makes the bars look bakery-quality.
- Spread the batter into the prepared pan: Scrape the batter into your lined pan and spread it evenly. The batter is thick, so use a spatula or the back of a spoon to push it into the corners. Don’t worry if it looks uneven — it will level out as it bakes. Try to make the thickness as uniform as possible for even baking.
- Bake for 22-25 minutes: Place the pan on the middle rack of your preheated oven. Bake until the edges are golden brown and set, and the center looks just barely firm. A toothpick inserted into the center should come out with a few moist crumbs — not wet batter. The top should spring back lightly when touched.
- Cool completely before slicing: Transfer the pan to a cooling rack and let the bars cool for at least 30 minutes in the pan. Then use the parchment paper handles to lift the entire block out onto the cooling rack. Let cool completely — about 1 hour total — before slicing. This is crucial. Cutting them warm will give you a crumbly mess, no matter how careful you are. I know it’s tempting, but trust me on this one.
Sensory Cues: During baking, your kitchen will smell like a fall candle factory — warm cinnamon, nutty pumpkin, and rich chocolate. The edges will pull away from the pan slightly when done. The top should look set and matte, not shiny. If the center still jiggles, give it another 2-3 minutes.
Personal Tip for Efficiency: While the bars are cooling, wash your mixing bowl and spoon immediately. The pumpkin batter dries like cement if you let it sit, and scrubbing it later is a pain. Trust me, I’ve learned this the hard way more times than I’d like to admit.
Cooking Tips & Techniques
After making these pumpkin chocolate chip cookie bars more times than I can count, I’ve picked up a few tricks that make a real difference. Here’s what I wish someone had told me from the start:
Don’t skip the parchment paper overhang. I made that mistake exactly once. The first batch I made without it required a spatula, a butter knife, and a lot of swearing to get out of the pan. The parchment handles let you lift the entire block out in one piece, which means clean, beautiful slices every time.
Room temperature ingredients matter. I know, it sounds like one of those fussy baking rules you can ignore. But adding a cold egg to melted butter will make the butter solidify into tiny lumps. The batter will still work, but the texture won’t be as smooth. Just let your egg sit on the counter for 15 minutes — that’s all it takes.
Watch the baking time closely. Every oven runs differently. My first attempt using a friend’s oven came out overbaked because hers runs hot. Start checking at 20 minutes. If the edges are browning too fast, tent the pan loosely with foil for the last 5 minutes. The bars are done when a toothpick comes out with moist crumbs, not wet batter. If it comes out clean, you’ve gone too far — the bars will be dry.
Cool completely before slicing. I cannot stress this enough. I once cut into a pan after only 20 minutes of cooling because I had guests arriving and wanted to plate them nicely. The bars fell apart into a delicious but ugly heap. They tasted fine, but presentation-wise, it was a disaster. Give them the full hour. Your patience will be rewarded with clean, perfect squares.
The chocolate chip distribution trick. If you fold all the chips into the batter, some will sink to the bottom during baking. To fix this, reserve about ¼ cup of chips and press them gently into the top of the batter after spreading it in the pan. This ensures every bar has visible chocolate on top, which makes them look more appetizing and ensures every bite gets some chocolate.
Variations & Adaptations
One of the best things about this recipe is how flexible it is. Here are some variations I’ve tried and loved:
Gluten-Free Version: Substitute the all-purpose flour with a 1:1 gluten-free baking blend that contains xanthan gum. I’ve tested this with Bob’s Red Mill 1-to-1 Baking Flour and the results were nearly identical to the original — slightly more tender, but just as delicious. No other adjustments needed.
Dairy-Free Version: Use melted coconut oil or a plant-based butter stick instead of regular butter. Make sure your chocolate chips are dairy-free — Enjoy Life makes great ones. The texture will be slightly different (coconut oil gives a barely noticeable coconut flavor that pairs surprisingly well with pumpkin), but the bars will still be soft and satisfying.
Spice It Up: If you love a stronger pumpkin spice flavor, add an extra ½ teaspoon of cinnamon and a pinch of cardamom. I tried this last fall and it gave the bars a more complex, almost chai-like warmth. My sister-in-law, who claims she’s “not a pumpkin person,” asked for the recipe after trying this version.
White Chocolate Cranberry: Swap the semi-sweet chocolate chips for white chocolate chips and add ½ cup dried cranberries. The tartness of the cranberries cuts through the sweetness beautifully. This version looks especially festive for holiday gatherings — the orange pumpkin, white chocolate, and red cranberries make a gorgeous color combination.
Nutty Addition: Fold in ½ cup chopped pecans or walnuts along with the chocolate chips. Toast the nuts first in a dry pan over medium heat for 3-4 minutes until fragrant — this brings out their flavor and keeps them crunchy in the bars. I did this for a Thanksgiving potluck and they were the first thing to disappear.
Healthier Twist: Reduce the brown sugar to ¾ cup and use dark chocolate chips (which have less sugar). You can also replace half the all-purpose flour with whole wheat flour for added fiber. The texture will be slightly denser, but still delicious. I’ve made this version for my own weekday treat and honestly, I barely notice the difference.
Serving & Storage Suggestions
These pumpkin chocolate chip cookie bars are incredibly versatile when it comes to serving. Here’s how I recommend enjoying them:
Serving Temperature: Room temperature is ideal — the texture is soft and the chocolate chips are set but not hard. If you want a warm treat, microwave individual bars for 10-15 seconds. The chocolate gets slightly melty and the pumpkin flavor becomes more pronounced. For a fun twist, serve them slightly warm with a scoop of vanilla ice cream on top. The temperature contrast is heavenly.
Presentation Tips: Cut into 24 squares for a standard serving size, or 12 larger bars if you want something more substantial. For a cleaner cut, wipe your knife clean between slices. Dust the tops with a light sprinkle of powdered sugar or cinnamon for a bakery-style finish. Arrange on a rustic wooden board or a simple white platter to let the golden-orange color stand out.
Complementary Pairings: These bars pair beautifully with coffee — a hot latte, cold brew, or even a simple cup of black coffee balances the sweetness. For a fall-themed dessert board, serve them alongside apple slices, caramel dip, and spiced nuts. A glass of cold milk is always a classic choice, especially if kids are involved.
Storage Instructions: Store the bars in an airtight container at room temperature for up to 5 days. Layer them with parchment paper between each layer to prevent sticking. They actually get better on day two — the flavors meld together and the texture becomes even more tender. If your kitchen is warm, you can store them in the refrigerator, but let them come to room temperature before serving for the best texture.
Freezer Instructions: These freeze beautifully. Wrap individual bars tightly in plastic wrap, then place them in a freezer-safe bag or container. They’ll keep for up to 3 months. To thaw, leave them at room temperature for about 30 minutes, or microwave for 20-30 seconds for that fresh-from-the-oven taste. I always keep a stash in my freezer for unexpected guests or late-night cravings.
Flavor Development Note: The pumpkin and spice flavors become more pronounced after a day or two. If you can resist eating them all immediately, you’ll be rewarded with an even better bar on day three. Not that they’ll last that long in most households.
Nutritional Information & Benefits
Here’s the approximate nutritional breakdown for one bar (based on 24 servings):
| Nutrient | Amount Per Serving |
|---|---|
| Calories | 195 |
| Total Fat | 9g |
| Saturated Fat | 5g |
| Cholesterol | 25mg |
| Sodium | 120mg |
| Total Carbohydrates | 28g |
| Dietary Fiber | 2g |
| Sugars | 18g |
| Protein | 3g |
Health Benefits of Key Ingredients: Pumpkin is packed with vitamin A (great for eye health) and fiber (keeps you full longer). The cinnamon in this recipe has anti-inflammatory properties and may help regulate blood sugar. Dark chocolate contains antioxidants called flavonoids, which support heart health. So yes, these bars are technically a treat, but they’re not empty calories — they offer some real nutritional value.
Dietary Considerations: This recipe contains gluten, dairy, and eggs. As mentioned in the variations section, it can be adapted for gluten-free and dairy-free diets. It’s nut-free as written (unless you add nuts), which makes it safe for school lunches and gatherings where allergies are a concern.
Personal Wellness Perspective: I believe in balance. These bars aren’t health food, but they’re made with real ingredients and no preservatives or artificial flavors. One bar satisfies my sweet tooth without sending me into a sugar coma. I feel good about serving them to my family because I know exactly what’s in them. And honestly, the pumpkin adds enough moisture that I can use slightly less butter than in a standard cookie bar — a small win that adds up.
Conclusion
These pumpkin chocolate chip cookie bars are everything I want in a fall dessert — easy to make, packed with warm spices, studded with melty chocolate, and soft enough to make you close your eyes after the first bite. They’ve become my go-to recipe for every autumn gathering, and I don’t see that changing anytime soon.
What I love most about this recipe is how forgiving it is. You don’t need to be a skilled baker to nail it. You don’t need fancy equipment or hard-to-find ingredients. You just need a bowl, a spoon, and about 15 minutes of your time. The oven does the rest, and the result is something that tastes like you spent hours in the kitchen.
I encourage you to make this recipe your own. Add extra cinnamon if that’s your thing. Throw in some white chocolate chips. Top them with a sprinkle of flaky sea salt before baking — trust me, that salty-sweet combo is incredible. The beauty of this recipe is that it’s a solid foundation that welcomes your personal touch.
So go ahead, preheat that oven, and give these bars a try. I’d love to hear how they turn out for you. Did you try a variation? Did your family devour them in record time? Drop a comment below and let me know — your feedback makes this community what it is. And if you’re looking for more fall baking inspiration, check out my pumpkin spice latte cookies or these apple cider donut cake for another seasonal treat. Happy baking, friends!
Frequently Asked Questions
Can I use fresh pumpkin instead of canned?
Yes, you can use fresh pumpkin purée, but it’s important to drain it well first. Fresh pumpkin tends to be more watery than canned, which can make the bars soggy. After making your purée, let it sit in a fine-mesh strainer lined with cheesecloth for about 30 minutes to remove excess liquid. Then measure out ¾ cup and proceed with the recipe. Honestly, canned pumpkin is more consistent and saves time, so I usually stick with it.
Why did my bars turn out dry?
Dry bars usually mean they were overbaked or the flour was measured incorrectly. Make sure you’re spooning the flour into your measuring cup and leveling it off — scooping directly from the bag packs in too much flour. Also, check your oven temperature with an oven thermometer if you suspect it runs hot. Start checking for doneness at 20 minutes to avoid overbaking.
Can I make these bars ahead of time?
Absolutely. These bars actually taste better the next day after the flavors have had time to meld. You can bake them up to 2 days in advance and store them in an airtight container at room temperature. They also freeze beautifully for up to 3 months — just wrap individual bars in plastic wrap and store in a freezer bag. Thaw at room temperature for about 30 minutes before serving.
Can I use pumpkin pie spice instead of individual spices?
Yes, this is an easy swap. Use 3 teaspoons of pumpkin pie spice in place of the cinnamon, nutmeg, ginger, and cloves. The flavor will be slightly different — pumpkin pie spice typically includes allspice and sometimes cardamom — but it’s still delicious and saves you from having to measure four separate spices. I’ve done this many times when I’m in a hurry.
Can I make these into cookies instead of bars?
You can, but the texture will be different. The batter is quite soft and sticky, so you’ll need to chill it for at least 30 minutes before scooping. Drop rounded tablespoons onto a parchment-lined baking sheet and bake at 350°F for 10-12 minutes. They won’t spread as much as traditional cookies, so flatten them slightly with the back of a spoon before baking. The result is a softer, cakier cookie — still delicious, just not the same as the bars.
Pin This Recipe!
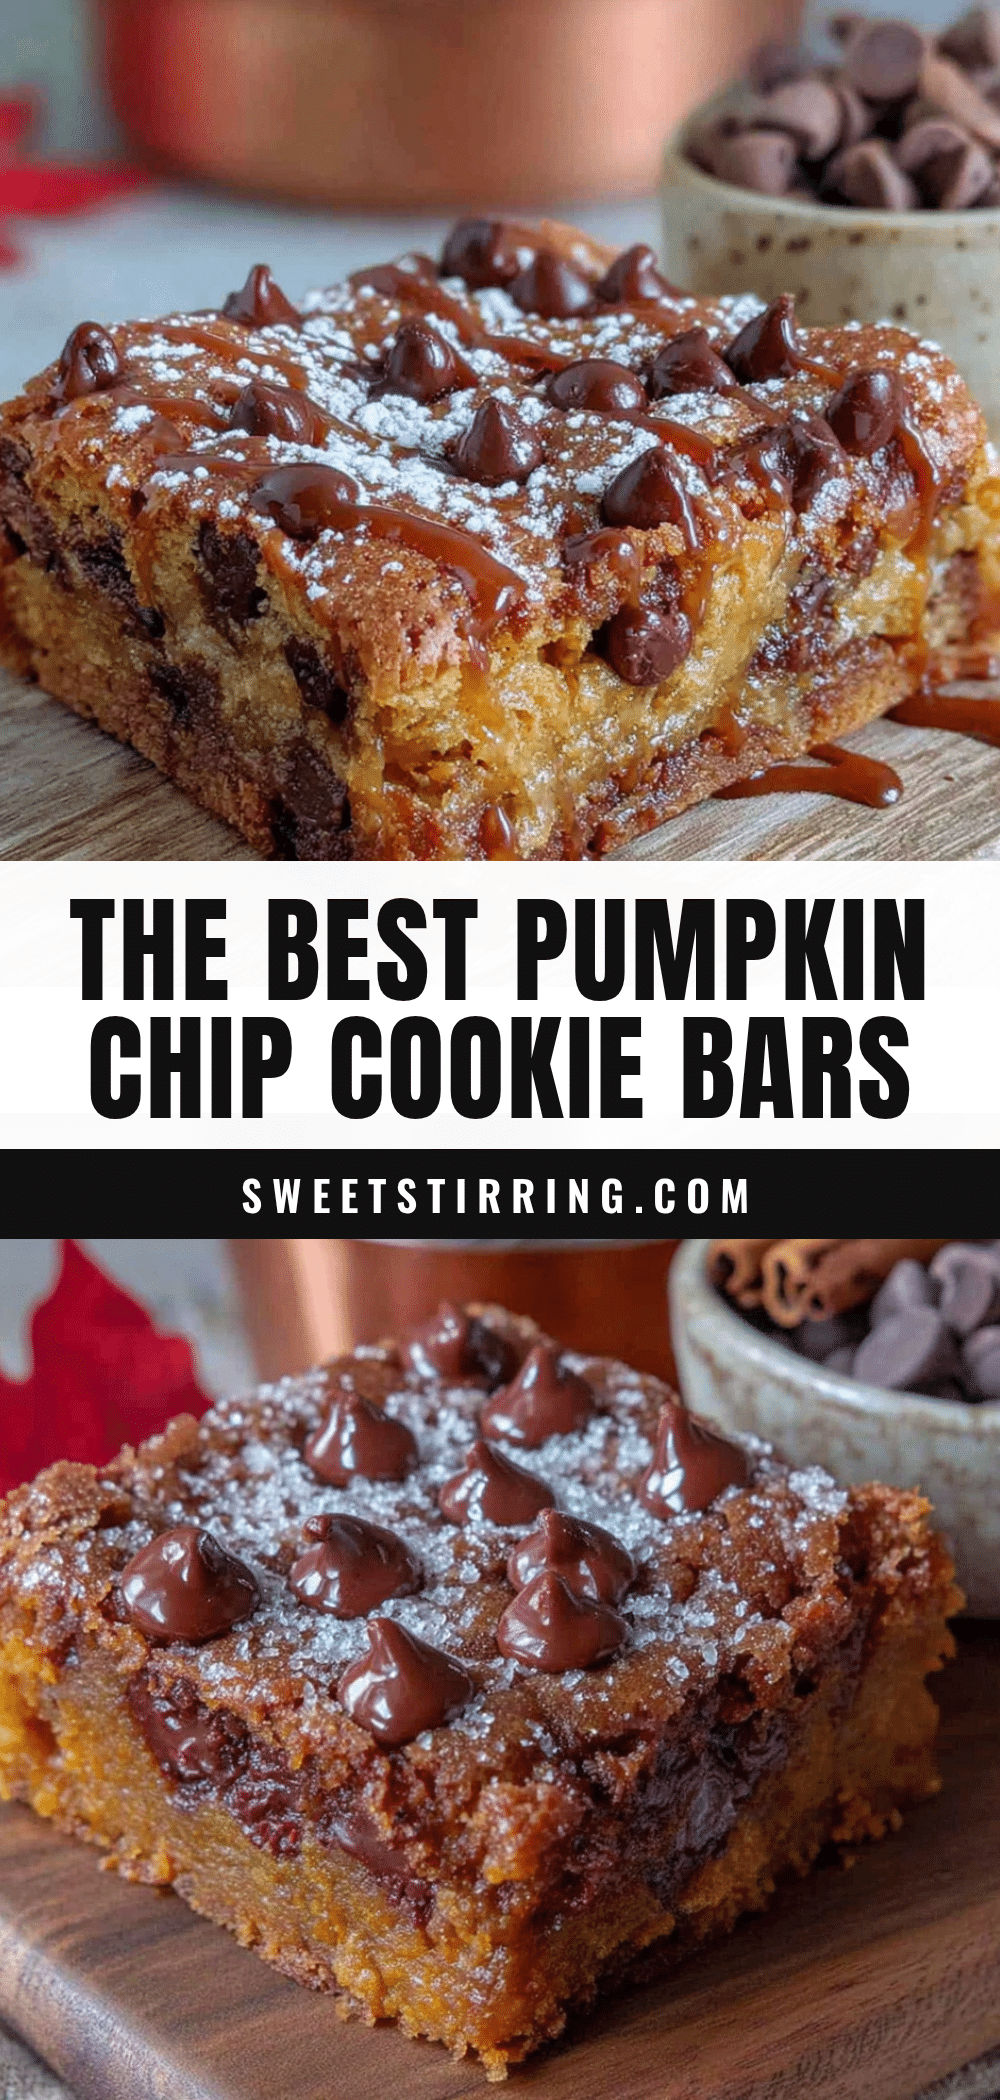
The Best Pumpkin Chocolate Chip Cookie Bars (Easy Fall Dessert)
These one-bowl pumpkin chocolate chip cookie bars are soft, fudgy, and packed with warm fall spices and melty chocolate. An easy, no-fuss dessert that tastes like you spent hours in the kitchen.
- Prep Time: 15 minutes
- Cook Time: 25 minutes
- Total Time: 1 hour 40 minutes
- Yield: 24 servings 1x
- Category: Dessert
- Cuisine: American
Ingredients
- 1 ¾ cups all-purpose flour (spooned and leveled)
- 1 teaspoon baking soda
- 2 teaspoons ground cinnamon
- ½ teaspoon ground nutmeg
- ½ teaspoon ground ginger
- ¼ teaspoon ground cloves
- ½ teaspoon salt
- ½ cup unsalted butter, melted and slightly cooled
- 1 cup light brown sugar, packed
- ¼ cup granulated sugar
- 1 large egg, at room temperature
- 1 teaspoon vanilla extract
- ¾ cup canned pumpkin purée (not pumpkin pie filling)
- 1 ½ cups semi-sweet chocolate chips
Instructions
- Preheat your oven to 350°F (175°C). Line a 9×13-inch baking pan with parchment paper, leaving some overhang on the long sides. Lightly grease the parchment if desired.
- In a small bowl, whisk together the dry ingredients: flour, baking soda, cinnamon, nutmeg, ginger, cloves, and salt. Set aside.
- In a large mixing bowl, combine the melted butter, brown sugar, and granulated sugar. Stir with a wooden spoon until smooth and well combined.
- Add the egg and vanilla extract. Stir until fully incorporated and glossy.
- Stir in the pumpkin purée until completely combined. The batter should be thick and scoopable.
- Add the flour mixture to the wet ingredients. Stir gently until just combined. A few streaks of flour are okay; do not overmix.
- Fold in the chocolate chips, reserving about ¼ cup to sprinkle on top if desired.
- Spread the batter evenly into the prepared pan. Sprinkle reserved chocolate chips on top if using.
- Bake for 22-25 minutes, until the edges are golden brown and set, and a toothpick inserted into the center comes out with a few moist crumbs. The top should spring back lightly when touched.
- Cool in the pan on a cooling rack for at least 30 minutes. Then use the parchment handles to lift the block out and cool completely (about 1 hour total) before slicing into squares.
Notes
For best results, use room temperature egg and let the bars cool completely before slicing. The bars taste even better the next day. For a gluten-free version, use a 1:1 gluten-free baking blend. For dairy-free, use melted coconut oil or vegan butter and dairy-free chocolate chips.
Nutrition
- Serving Size: 1 bar
- Calories: 195
- Sugar: 18
- Sodium: 120
- Fat: 9
- Saturated Fat: 5
- Carbohydrates: 28
- Fiber: 2
- Protein: 3
Keywords: pumpkin chocolate chip cookie bars, easy fall dessert, one-bowl pumpkin bars, pumpkin bars with chocolate chips, pumpkin dessert recipe



