Love this? Save it for later!
Share the inspiration with your friends
It was 10:47 PM on a random Wednesday in late October, and I was supposed to be meal-prepping for the week. Instead, I found myself staring into the fridge, ignoring the sad bag of kale and the container of leftover quinoa. A very specific craving had taken hold — not for pumpkin pie, not for a latte, but for something that tasted like autumn had wrapped itself around a slice of toast. I didn’t have any active sourdough starter that was “ready” (mine was three days past its last feeding and smelled a little too funky), but I had a jar of pumpkin puree left over from a failed batch of muffins, a bottle of maple syrup that was almost empty, and a wild idea. What if I just… threw the pumpkin into the dough? What if I forgot the rules about “proper” sourdough hydration ratios and just went with my gut?
Honestly, I was tired. It had been a long day of deadlines and dog walks, and I wasn’t in the mood to follow instructions. I mixed the starter with the pumpkin puree, added a splash of warm water, and watched it bubble up like a science experiment gone right. The dough felt different — heavier, more forgiving, almost like it was happy to be handled. I let it sit on the counter overnight, wrapped in a tea towel, and went to bed half-expecting a brick in the morning.
What came out of the oven the next afternoon was nothing short of a miracle. The crust was deep amber, almost caramelized from the maple, and the inside was soft, slightly sweet, and flecked with warm spices. The whole apartment smelled like a bakery and a candle store had a beautiful baby. I stood there, holding the warm loaf in my hands, and thought: I have to make this again. And again. And then share it with everyone.
Maybe you’ve been there — standing in your kitchen, tired, uninspired, and just wanting something that feels like a hug. This cozy maple pumpkin sourdough bread is that hug. It’s forgiving for beginners, rewarding for experienced bakers, and it makes your house smell like the best kind of trouble. Let’s make it together.
Why You’ll Love This Recipe
I’ve tested this cozy maple pumpkin sourdough bread at least eight times — yes, eight — to get the texture and flavor just right. The first loaf was too dense. The second was too wet. The third… well, let’s just say I learned that pumpkin puree holds a lot more water than you’d think. But by loaf number five, I had cracked the code. This version is the one I’d serve to my pickiest friend and my most judgmental aunt. It’s the one that makes people close their eyes after the first bite.
- Quick & Easy: While sourdough usually takes patience, this recipe comes together in a single day. No overnight waiting required if you use a ripe, active starter. From mixing to slicing, you’re looking at about 6-8 hours total — most of it hands-off.
- Simple Ingredients: You don’t need a specialty grocery store for this. Pumpkin puree (canned or homemade), maple syrup (the real stuff, please), flour, water, salt, and your sourdough starter. That’s it. No weird additives or hard-to-find flours.
- Perfect for Fall Mornings: This bread is made for buttering and toasting on a crisp autumn morning. It’s also incredible for Thanksgiving brunch, Friendsgiving gatherings, or just a quiet Sunday with a cup of coffee.
- Crowd-Pleaser: I’ve brought this to two potlucks and a book club meeting. Every single person asked for the recipe. Even the gluten-free folks were jealous (sorry, friends, this one’s not GF).
- Unbelievably Delicious: The combination of tangy sourdough, sweet maple, and earthy pumpkin is next-level. The whipped maple butter on top? That’s the cherry on top of an already perfect sundae.
What makes this recipe different from the rest? It’s the technique — specifically, how we handle the pumpkin puree. Most recipes add it in without adjusting the hydration, leading to a gummy, undercooked crumb. Here, we reduce the water slightly and let the autolyse step do the heavy lifting. The result is a bread that’s moist but not wet, tender but not fragile. It’s the best version, and I’m not just saying that because I burned through three pounds of flour to get here.
What Ingredients You Will Need
This recipe uses simple, wholesome ingredients to deliver bold flavor and satisfying texture without the fuss. Most of these are pantry staples — especially if you’re already a sourdough baker. The pumpkin and maple are the stars here, so don’t skimp on quality.
For the Bread
- Active sourdough starter — 100g, bubbly and doubled in size (fed 4-6 hours prior)
- Bread flour — 400g (about 3 cups), for structure and chew
- Whole wheat flour — 100g (about 3/4 cup), adds depth and nuttiness
- Pumpkin puree — 150g (about 2/3 cup), not pumpkin pie filling (make sure it’s 100% pumpkin)
- Pure maple syrup — 80g (about 1/4 cup), the real stuff, not pancake syrup
- Warm water — 225g (about 1 cup), filtered if possible
- Fine sea salt — 10g (about 1 1/2 teaspoons)
- Ground cinnamon — 1 teaspoon
- Ground ginger — 1/2 teaspoon
- Ground nutmeg — 1/4 teaspoon
- Ground cloves — 1/8 teaspoon (optional, but recommended)
For the Whipped Maple Butter
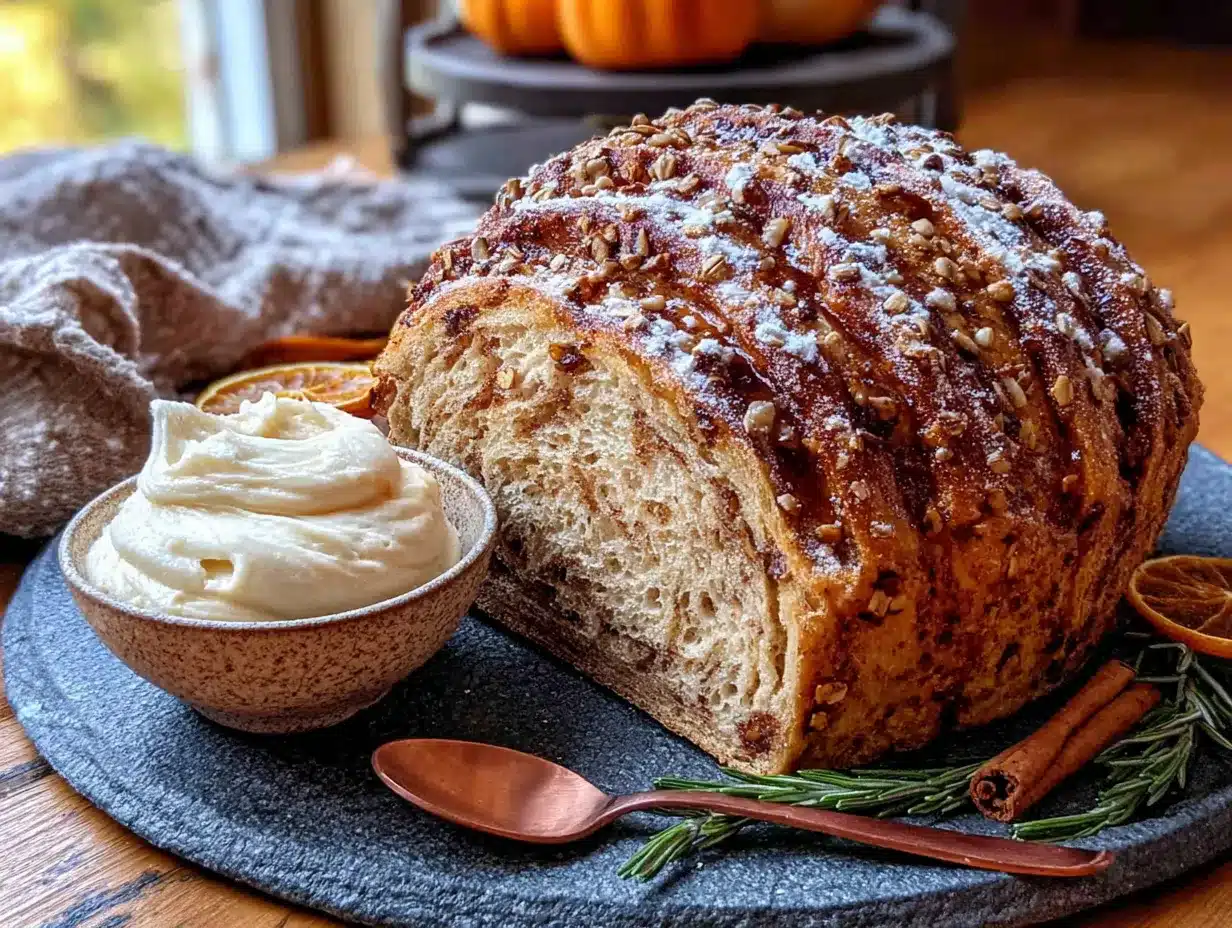
- Unsalted butter — 1/2 cup (1 stick), softened to room temperature
- Pure maple syrup — 2 tablespoons (or more to taste)
- Pinch of flaky sea salt — optional, but balances the sweetness beautifully
Ingredient Tips: I prefer King Arthur bread flour for its consistent protein content, but any good bread flour will work. For the pumpkin puree, Libby’s is my go-to — it’s consistently thick and not watery. If you’re using homemade pumpkin puree, you may need to strain it through a cheesecloth for 30 minutes to remove excess moisture. Trust me on this one; I learned the hard way when my first loaf turned into a pumpkin-flavored brick.
Substitution Notes: You can swap the whole wheat flour for all-purpose flour if you prefer a lighter crumb, though you’ll lose some of that nutty depth. For the maple syrup, honey works in a pinch, but the flavor profile will shift. And if you’re out of pumpkin spice blend, just mix your own cinnamon, ginger, nutmeg, and cloves — it’s cheaper and you can adjust to your taste.
Equipment Needed
You don’t need a professional bakery setup for this cozy maple pumpkin sourdough bread. Here’s what I use, plus a few alternatives if you’re working with less.
- Digital kitchen scale — This is non-negotiable for sourdough. Volume measurements are too inconsistent, especially with sticky doughs like this one. I use a $15 OXO scale and it’s perfect.
- Large mixing bowl — At least 4-quart capacity. Glass or ceramic is ideal because it retains warmth better than metal.
- Dutch oven — A 5-6 quart enameled cast iron pot works best for creating steam. If you don’t have one, you can use a baking stone with a metal pan of water on the bottom rack.
- Bench scraper — Makes handling the sticky dough so much easier. A plastic dough scraper is fine; metal is better for cutting the dough.
- Banneton or proofing basket — For the final rise. If you don’t have one, a colander lined with a floured tea towel works perfectly.
- Parchment paper — For transferring the dough into the hot Dutch oven without burning yourself.
- Sharp lame or razor blade — For scoring the top. A sharp knife works too, but a lame gives you those beautiful ear shapes.
- Cooling rack — Essential for letting the bread cool properly (resist the urge to cut into it hot!).
- Hand mixer or stand mixer — For the whipped maple butter. You can also do it by hand with a whisk and some elbow grease.
Budget-Friendly Tip: If you’re new to sourdough, don’t rush out and buy a fancy Dutch oven. A heavy-bottomed pot with a tight-fitting lid works fine. I used a thrifted cast iron pot for my first year of baking, and it produced beautiful loaves.
Preparation Method
This cozy maple pumpkin sourdough bread takes about 6-8 hours from start to finish, but most of that is hands-off fermentation time. Here’s the step-by-step breakdown.
Step 1: Mix the Dough (8:00 AM)
In your large mixing bowl, combine 400g bread flour and 100g whole wheat flour. Add 1 teaspoon cinnamon, 1/2 teaspoon ginger, 1/4 teaspoon nutmeg, and 1/8 teaspoon cloves. Whisk the dry ingredients together to distribute the spices evenly. In a separate small bowl, whisk together 150g pumpkin puree, 80g maple syrup, and 225g warm water until smooth. Make a well in the center of the flour and pour in the pumpkin mixture along with 100g of your active sourdough starter. Mix everything together with your hands or a dough whisk until no dry bits remain. The dough will be shaggy and sticky — that’s normal. Cover the bowl with a damp tea towel and let it rest for 30 minutes (this is called the autolyse).
Step 2: Add the Salt (8:30 AM)
Sprinkle 10g fine sea salt over the surface of the dough. Wet your hands with a little water to prevent sticking, then dimple the salt into the dough by pinching and folding it in. This takes about 2-3 minutes. The dough will feel tighter and smoother. Cover and let it rest for another 30 minutes.
Step 3: Stretch and Folds (9:00 AM – 11:00 AM)
Over the next 2 hours, you’ll perform a series of stretch and folds every 30 minutes (4 sets total). To do this: wet your hands, grab one side of the dough, stretch it up as far as it will go without tearing, and fold it over the top. Rotate the bowl 90 degrees and repeat. Do this 4 times per set. After the fourth set, the dough should feel smoother, more elastic, and slightly puffy. Cover and let it rest for the remainder of the bulk fermentation.
Step 4: Bulk Fermentation (11:00 AM – 2:00 PM)
This is the longest step. Let the dough rise at room temperature (around 70-75°F) for 3-4 hours, or until it has increased in volume by about 50% and shows bubbles on the surface. The dough should feel airy and jiggly when you gently shake the bowl. If your kitchen is cold, it may take longer. Be patient — underproofed sourdough is dense and gummy.
Step 5: Shape the Dough (2:00 PM)
Lightly flour your work surface. Turn the dough out gently, trying not to deflate it too much. Using your bench scraper, shape it into a round boule by folding the edges into the center, then flipping it seam-side down. Cup your hands around the dough and rotate it in a circular motion to create tension on the surface. Let it rest uncovered for 20 minutes (this is called the bench rest).
Step 6: Final Shaping and Proofing (2:20 PM)
After the bench rest, flip the dough over so the seam side is up. Fold the bottom edge up to the center, then the top edge down, then the sides in. Roll it up tightly and place it seam-side up in a floured banneton. Cover with a tea towel and let it proof at room temperature for 2 hours, or until it passes the poke test (when you gently press the dough with a floured finger, it should spring back slowly, leaving a small indent).
Step 7: Preheat and Bake (4:20 PM)
About 30 minutes before the end of proofing, place your Dutch oven in the oven and preheat to 475°F (245°C). When the dough is ready, carefully remove the hot Dutch oven. Place a piece of parchment paper over the banneton, invert the dough onto it, and score the top with a sharp lame (a single deep slash or a cross pattern works beautifully). Carefully lower the dough into the Dutch oven using the parchment paper as a sling. Put the lid on and bake for 25 minutes. Remove the lid and bake for another 20-25 minutes, until the crust is deep amber and the internal temperature reaches 200°F (93°C).
Step 8: Cool Completely (5:10 PM)
Transfer the loaf to a cooling rack. I know it’s tempting, but do NOT cut into it for at least 2 hours. The interior needs time to set, and cutting too early will result in a gummy, sticky crumb. Trust the process — it’s worth the wait.
Step 9: Make the Whipped Maple Butter
While the bread cools, make the whipped maple butter. In a medium bowl, beat 1/2 cup softened unsalted butter with a hand mixer on medium speed until light and fluffy (about 2 minutes). Add 2 tablespoons maple syrup and a pinch of flaky sea salt, then beat for another minute until fully incorporated. Transfer to a small ramekin and refrigerate until ready to serve. Let it come to room temperature for 10 minutes before spreading.
Cooking Tips & Techniques
I’ve made every mistake in the sourdough book so you don’t have to. Here are the lessons I learned the hard way.
Watch the hydration. Pumpkin puree is basically water disguised as a vegetable. If your dough feels too sticky and slack during the stretch and folds, don’t panic — just reduce the water by 25g next time. For this batch, I’ve already accounted for the pumpkin’s moisture, but different brands of puree vary. If your dough feels like soup, add a tablespoon of flour during the first stretch and fold.
Don’t overproof. The added sugar from the maple syrup can make the yeast activity a bit unpredictable. Your dough might rise faster than a standard sourdough. Keep an eye on it during bulk fermentation — you’re looking for a 50% increase in volume, not a doubling. Overproofed dough collapses in the oven and gives you a flat, dense loaf.
Score with confidence. A shallow score (about 1/4 inch deep) is better than a deep one for this dough because the pumpkin makes it slightly more tender. If you’re nervous, practice on a piece of paper first. And don’t forget to angle your blade at about 30 degrees — that’s what creates the beautiful “ear” on the crust.
Steam is your friend. The Dutch oven method is foolproof for creating steam, but if you’re using a baking stone, place a metal pan on the bottom rack and pour 1 cup of hot water into it right after you load the bread. Close the oven door quickly to trap the steam.
My biggest failure: I once forgot to add the salt. The bread was flat, flavorless, and honestly, it was a tragedy. Don’t skip the salt — it’s not just for flavor, it also strengthens the gluten structure. Set a timer if you need to.
Variations & Adaptations
Once you’ve mastered the basic cozy maple pumpkin sourdough bread, here are some fun ways to switch it up.
Vegan Version: The bread itself is already vegan (no eggs, no dairy), but swap the whipped maple butter for coconut oil whipped with maple syrup. It’s not quite as rich, but it’s still delicious.
Spiced Cranberry Pumpkin Bread: Add 100g dried cranberries (chopped) and an extra 1/2 teaspoon orange zest to the dough during the final stretch and fold. The tartness of the cranberries cuts through the sweetness beautifully.
Chocolate Chip Maple Pumpkin: Fold in 100g dark chocolate chips (I use 70% cacao) during the final shaping. The chocolate melts into little pockets of richness throughout the bread. This version is dangerously good.
Gluten-Free Adaptation: I won’t lie — this is tricky. Sourdough relies heavily on gluten development. If you need a gluten-free version, use a high-quality gluten-free bread flour blend (like Cup4Cup) and add 1 teaspoon xanthan gum. The texture will be more like a quick bread than a traditional sourdough, but the flavor is still there.
Savory Twist: Skip the maple syrup and reduce the pumpkin to 100g. Add 1 tablespoon fresh rosemary (chopped), 1/2 teaspoon black pepper, and 1/2 cup grated Parmesan cheese. This version is incredible alongside a bowl of tomato soup.
My personal favorite variation: I once added 1/4 cup toasted pepitas (pumpkin seeds) and a tablespoon of black sesame seeds to the dough. The crunch on the crust was incredible, and it looked beautiful sliced. I’ve been making it that way ever since.
Serving & Storage Suggestions
This cozy maple pumpkin sourdough bread is best served warm, but let’s be real — it’s also incredible at room temperature, toasted, or even slightly stale (that’s what French toast is for).
Serving Temperature: I prefer it at room temperature with a generous schmear of whipped maple butter. If you’re toasting it, pop it in a 350°F oven for 5-7 minutes rather than using a toaster — it heats more evenly and the crust stays crisp.
What to Serve With It: This bread is a chameleon. Pair it with a bowl of butternut squash soup for a cozy lunch, serve it alongside a Thanksgiving turkey dinner, or simply enjoy it with a cup of chai tea and a good book. It also makes incredible French toast (seriously, try it — the pumpkin flavor intensifies).
Storage Instructions: Store the bread cut-side down on a cutting board at room temperature for up to 3 days. Do not refrigerate — the cold air will dry it out. For longer storage, wrap the whole loaf tightly in plastic wrap, then aluminum foil, and freeze for up to 3 months. To thaw, leave it on the counter overnight, then reheat in a 350°F oven for 10 minutes.
Reheating Tips: For individual slices, pop them in the toaster on a medium setting. For a whole loaf, wrap it in foil and warm it in a 300°F oven for 15 minutes. The whipped maple butter should be served at room temperature — take it out of the fridge 20 minutes before you plan to eat.
Flavor Development: Here’s a secret — this bread actually tastes better on day two. The flavors meld together overnight, and the pumpkin and maple become more pronounced. So if you can resist eating it all on day one, you’re in for a treat.
Nutritional Information & Benefits
While I’m not a nutritionist, I can tell you that this cozy maple pumpkin sourdough bread is a healthier indulgence compared to most bakery treats. Here’s the estimated breakdown per slice (based on 12 slices per loaf, not including the whipped butter):
| Nutrient | Amount Per Slice |
|---|---|
| Calories | 210 |
| Total Fat | 1.5g |
| Saturated Fat | 0.3g |
| Carbohydrates | 44g |
| Fiber | 3g |
| Sugar | 8g |
| Protein | 6g |
| Sodium | 390mg |
Health Benefits: Pumpkin is packed with vitamin A (beta-carotene), which supports eye health and immune function. The sourdough fermentation process makes the bread easier to digest and lowers the glycemic index compared to regular bread. Maple syrup contains antioxidants and minerals like zinc and manganese — plus, it’s a more natural sweetener than refined sugar. The whole wheat flour adds extra fiber and nutrients.
Dietary Considerations: This recipe is naturally vegan and dairy-free (the whipped butter is optional). It contains gluten. If you’re watching your sugar intake, you can reduce the maple syrup to 60g, but the bread will be less sweet and slightly drier.
Conclusion
There’s something magical about pulling a loaf of bread out of the oven — especially when that bread is infused with the warm, cozy flavors of fall. This cozy maple pumpkin sourdough bread has become my go-to for autumn gatherings, quiet mornings, and everything in between. It’s forgiving enough for beginners, rewarding enough for experienced bakers, and delicious enough to make you forget about store-bought bread forever.
I love this recipe because it captures the essence of fall without being overly sweet or complicated. It’s the kind of bread that makes you want to slow down, butter a slice, and actually enjoy the moment. Whether you’re making it for a holiday brunch, a gift for a neighbor, or just because you deserve something warm and wonderful, I hope you love it as much as I do.
So go ahead — get your hands floury, crank up the oven, and make some magic. And when you do, come back and tell me how it turned out. Did you add cranberries? Chocolate chips? Did you eat the entire loaf in one sitting? (No judgment here.) Drop a comment below, share a photo on Pinterest, or tag me in your creation. I can’t wait to see your cozy maple pumpkin sourdough bread!
Happy baking, friends. 🍂
Frequently Asked Questions
Can I use active dry yeast instead of sourdough starter?
Technically, yes, but the bread won’t have the same tangy flavor or chewy texture. If you want to use commercial yeast, replace the 100g starter with 25g warm water and 1 teaspoon active dry yeast. Let the yeast bloom for 10 minutes before adding it to the flour. The rest of the recipe stays the same, but the proofing time will be much shorter — about 1-2 hours for bulk fermentation.
Why is my dough so sticky?
Pumpkin puree is naturally high in moisture, and different brands have different water content. If your dough feels excessively sticky, don’t add more flour during mixing — instead, wet your hands with water during the stretch and folds. The gluten will develop and the dough will become more manageable. If it’s still too sticky after the fourth stretch and fold, add 1 tablespoon of flour during the next fold.
Can I make this bread gluten-free?
It’s challenging but possible. Use a high-quality gluten-free bread flour blend (like Cup4Cup or King Arthur’s Measure for Measure) and add 1 teaspoon xanthan gum. The dough will behave differently — it will be more like a thick batter than a traditional dough. Bake it in a loaf pan instead of free-form to help it hold its shape. The flavor will still be delicious, but the texture will be closer to a quick bread.
How do I know when my sourdough starter is active enough?
Your starter should be bubbly, doubled in size, and pass the “float test” — drop a small spoonful into a glass of water; if it floats, it’s ready. If it sinks, feed it and wait another 4-6 hours. A hungry starter won’t give you the rise you need for this bread. I usually feed mine at night and bake in the morning for the best results.
Can I freeze this bread?
Absolutely! Let the bread cool completely, then wrap it tightly in plastic wrap, followed by a layer of aluminum foil. Freeze for up to 3 months. To thaw, leave it on the counter overnight (still wrapped) to prevent condensation from making the crust soggy. Reheat in a 350°F oven for 10 minutes to restore the crust’s crispness. The whipped maple butter can also be frozen for up to 2 months.
Pin This Recipe!
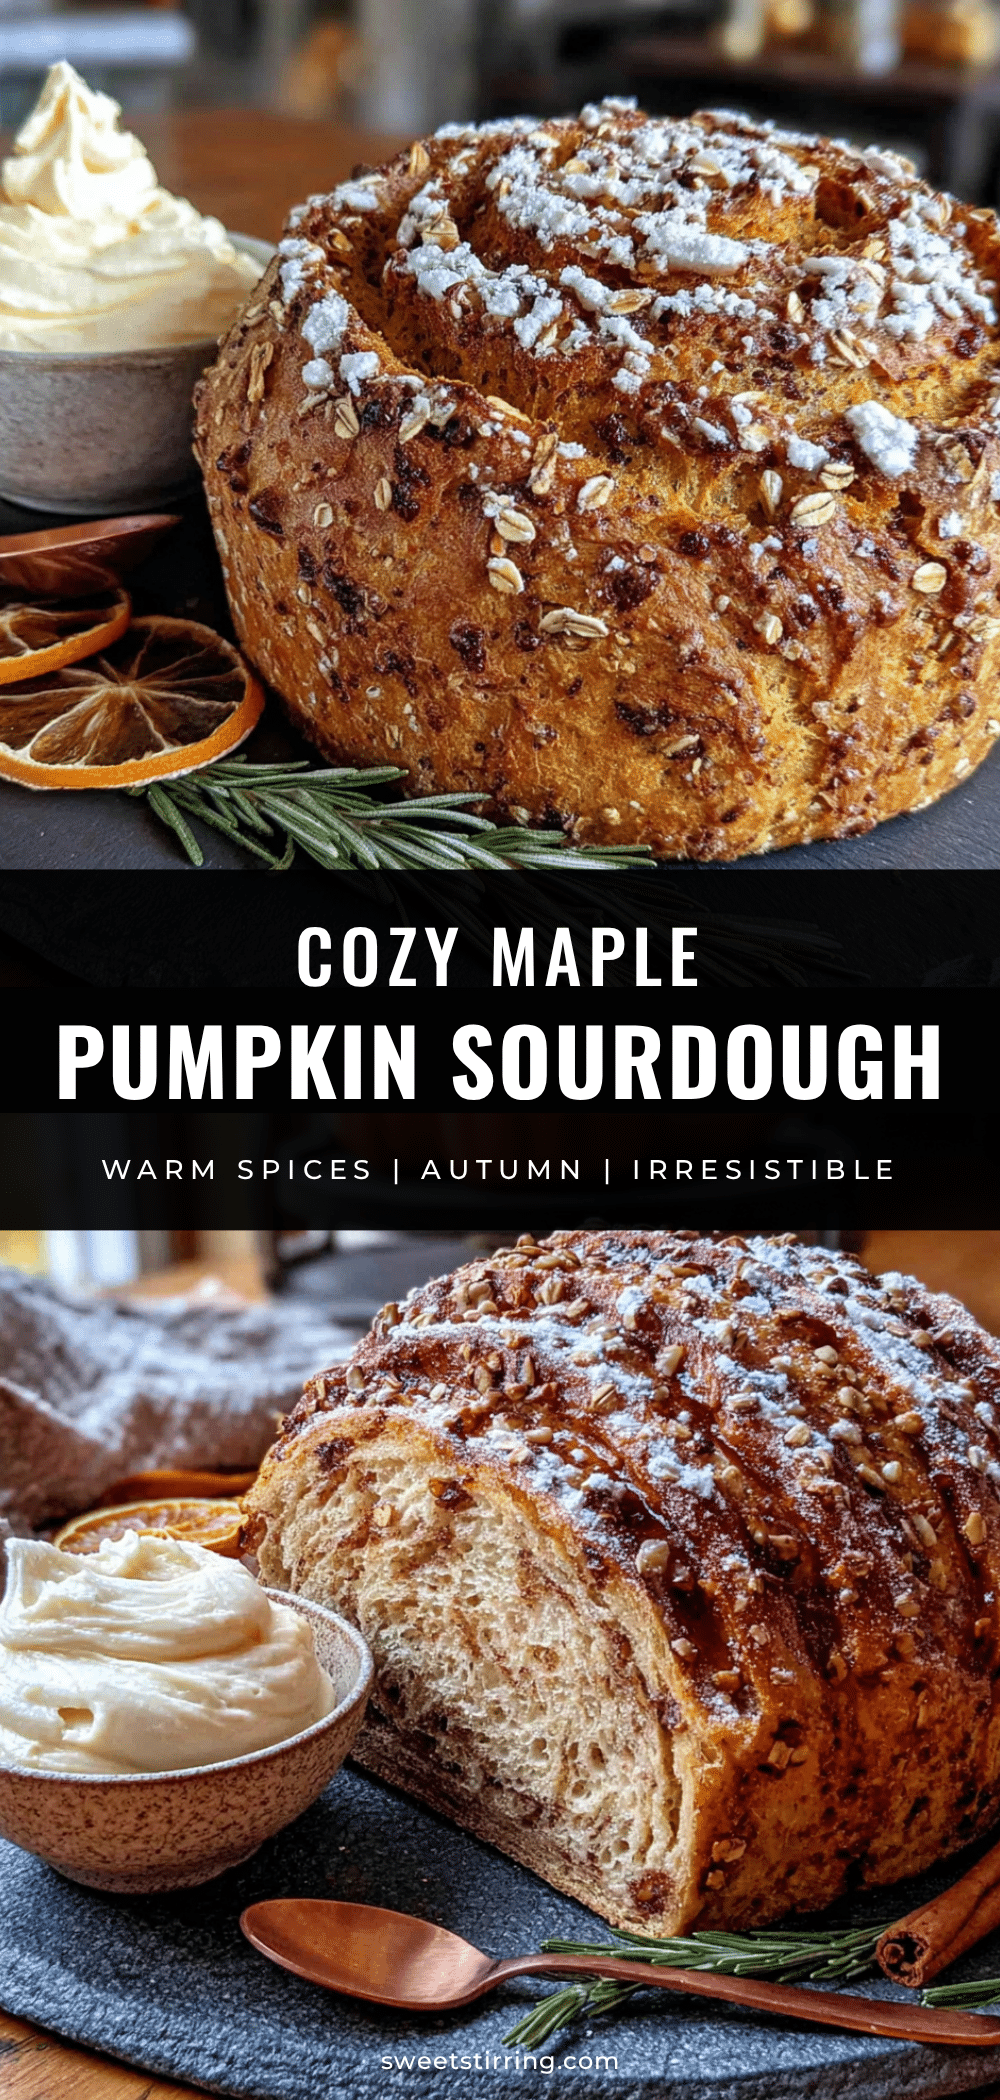
Cozy Maple Pumpkin Sourdough Bread with Whipped Maple Butter
A forgiving, beginner-friendly sourdough bread infused with pumpkin puree, maple syrup, and warm fall spices. Perfect for toasting and slathering with homemade whipped maple butter.
- Prep Time: 30 minutes
- Cook Time: 45 minutes
- Total Time: 6-8 hours (mostly hands-off)
- Yield: 12 servings 1x
- Category: Bread
- Cuisine: American
Ingredients
- 100g active sourdough starter (bubbly and doubled in size, fed 4–6 hours prior)
- 400g bread flour (about 3 cups)
- 100g whole wheat flour (about 3/4 cup)
- 150g pumpkin puree (about 2/3 cup, not pumpkin pie filling)
- 80g pure maple syrup (about 1/4 cup)
- 225g warm water (about 1 cup, filtered if possible)
- 10g fine sea salt (about 1 1/2 teaspoons)
- 1 teaspoon ground cinnamon
- 1/2 teaspoon ground ginger
- 1/4 teaspoon ground nutmeg
- 1/8 teaspoon ground cloves (optional, but recommended)
- 1/2 cup unsalted butter (1 stick, softened to room temperature, for whipped maple butter)
- 2 tablespoons pure maple syrup (for whipped maple butter)
- Pinch of flaky sea salt (optional, for whipped maple butter)
Instructions
- Mix the Dough (8:00 AM): In a large mixing bowl, combine 400g bread flour and 100g whole wheat flour. Add 1 teaspoon cinnamon, 1/2 teaspoon ginger, 1/4 teaspoon nutmeg, and 1/8 teaspoon cloves. Whisk dry ingredients together. In a separate small bowl, whisk together 150g pumpkin puree, 80g maple syrup, and 225g warm water until smooth. Make a well in the center of the flour and pour in the pumpkin mixture along with 100g active sourdough starter. Mix with hands or a dough whisk until no dry bits…
- Add the Salt (8:30 AM): Sprinkle 10g fine sea salt over the dough. Wet your hands with water to prevent sticking, then dimple the salt into the dough by pinching and folding it in for 2-3 minutes. The dough will feel tighter and smoother. Cover and let rest for another 30 minutes.
- Stretch and Folds (9:00 AM – 11:00 AM): Over the next 2 hours, perform 4 sets of stretch and folds every 30 minutes. Wet your hands, grab one side of the dough, stretch it up as far as it will go without tearing, and fold it over the top. Rotate the bowl 90 degrees and repeat 4 times per set. After the fourth set, the dough should feel smoother, more elastic, and slightly puffy. Cover and let rest for the remainder of bulk fermentation.
- Bulk Fermentation (11:00 AM – 2:00 PM): Let the dough rise at room temperature (70-75°F) for 3-4 hours, or until it has increased in volume by about 50% and shows bubbles on the surface. The dough should feel airy and jiggly when gently shaken.
- Shape the Dough (2:00 PM): Lightly flour your work surface. Gently turn out the dough. Using a bench scraper, shape it into a round boule by folding the edges into the center, then flipping it seam-side down. Cup your hands around the dough and rotate it in a circular motion to create tension. Let rest uncovered for 20 minutes (bench rest).
- Final Shaping and Proofing (2:20 PM): After bench rest, flip the dough seam-side up. Fold the bottom edge up to the center, then the top edge down, then the sides in. Roll it up tightly and place seam-side up in a floured banneton. Cover with a tea towel and proof at room temperature for 2 hours, or until it passes the poke test (gentle press with a floured finger springs back slowly, leaving a small indent).
- Preheat and Bake (4:20 PM): 30 minutes before end of proofing, place Dutch oven in oven and preheat to 475°F (245°C). When dough is ready, carefully remove hot Dutch oven. Place parchment paper over banneton, invert dough onto it, and score the top with a sharp lame (single deep slash or cross pattern). Lower dough into Dutch oven using parchment as a sling. Cover and bake for 25 minutes. Remove lid and bake for another 20-25 minutes, until crust is deep amber and internal temperature reaches 20…
- Cool Completely (5:10 PM): Transfer loaf to a cooling rack. Do not cut for at least 2 hours to allow interior to set.
- Make the Whipped Maple Butter: In a medium bowl, beat 1/2 cup softened unsalted butter with a hand mixer on medium speed until light and fluffy (about 2 minutes). Add 2 tablespoons maple syrup and a pinch of flaky sea salt, then beat for another minute until fully incorporated. Transfer to a small ramekin and refrigerate until ready to serve. Let come to room temperature for 10 minutes before spreading.
Notes
Pumpkin puree holds a lot of water; if using homemade puree, strain through cheesecloth for 30 minutes. The bread tastes even better on day two as flavors meld. Do not refrigerate; store cut-side down at room temperature for up to 3 days, or freeze for up to 3 months. For gluten-free adaptation, use a high-quality gluten-free bread flour blend with xanthan gum and bake in a loaf pan.
Nutrition
- Serving Size: 1 slice (1/12 of loa
- Calories: 210
- Sugar: 8
- Sodium: 390
- Fat: 1.5
- Saturated Fat: 0.3
- Carbohydrates: 44
- Fiber: 3
- Protein: 6
Keywords: sourdough bread, pumpkin bread, maple bread, fall bread, homemade bread, artisan bread, pumpkin sourdough, maple pumpkin bread



