Love this? Save it for later!
Share the inspiration with your friends
The PTA Halloween bake sale was in 24 hours and I’d completely forgotten. I’m not talking about “I spaced it a little” — I mean I was scrolling through Facebook at 10 PM, saw the reminder, and actually said “no” out loud to my empty kitchen. Everyone else would be bringing those elaborate cake pops shaped like eyeballs and sugar cookies with hand-piped spiderwebs. I had a box of black food coloring, a half-stick of cream cheese, and absolutely no plan. Honestly, I almost just bought a bag of candy and called it a day.
But then I thought about my kid’s face. You know the one — that look they give you when every other parent shows up with Pinterest-worthy treats and you walk in holding a bag of fun-size Snickers. So I did what any reasonable person would do at 10 PM: I started baking with zero confidence and a prayer. I threw together a black velvet cupcake batter — because chocolate plus black dye felt appropriately spooky — and crossed my fingers that the cream cheese frosting I had in my head would actually turn purple. Let me tell you, the power went out halfway through mixing the frosting. Not kidding. I finished by flashlight, holding my whisk like a candle in a storm.
Those cupcakes won the bake sale. A mom who brought three-tiered mummy cookies actually asked me for the recipe. I stood there in my flour-covered sweater, sheepish and completely shocked, explaining that I’d made them in a panic with ingredients I found in the back of my pantry. That’s the thing about these Best Black Velvet Halloween Cupcakes with Purple Cream Cheese Frosting — they look like you spent hours planning them, but really, they’re just a simple chocolate cupcake with a dramatic color change and a gorgeous swirl of purple on top. They’re the recipe you make when you want to impress without the stress. And honestly, maybe you’ve been there — staring at your kitchen at the last minute, wondering how everyone else seems to have it together. These cupcakes are for you.
Why You’ll Love This Recipe
I’ve tested this recipe more times than I care to admit — including one batch where the cupcakes turned green instead of black (don’t ask). After all those trials, I can tell you with total confidence that this is the version you want. These cupcakes have been family-approved, neighbor-tested, and bake-sale-verified. Here’s why they work so well:
- Quick & Easy: From start to finish, these come together in about 45 minutes. The batter takes 10 minutes, the frosting takes 5, and the oven does the rest. Perfect for last-minute Halloween parties or school events.
- Simple Ingredients: No specialty candy melts or fondant tools required. You probably have flour, sugar, cocoa powder, eggs, and cream cheese in your kitchen right now. The only “special” ingredient is black food coloring — and you can find that at any grocery store.
- Perfect for Halloween: These cupcakes scream spooky season. The black velvet cake is dramatic and moody, while the purple cream cheese frosting adds that perfect pop of Halloween color. They’re basically edible decorations.
- Crowd-Pleaser: Kids love the color. Adults love the flavor. Everyone loves the cream cheese frosting. I’ve watched people take one bite, pause, and then reach for a second cupcake without even asking permission.
- Unbelievably Delicious: Here’s the thing about black velvet — it’s not just chocolate cake dyed black. The texture is lighter and more tender than standard chocolate cake, with a subtle tang from the buttermilk that pairs perfectly with the rich, tangy cream cheese frosting.
What makes this recipe different from all the other Halloween cupcake recipes out there? It’s the balance. I spent months perfecting the ratio of cocoa to food coloring so the cupcakes stay moist without tasting artificial. And the frosting? I blend the cream cheese and butter together for a full three minutes until it’s silky smooth — no lumps, no graininess, just pure purple perfection. This isn’t just another version of a Halloween cupcake. It’s the one you’ll come back to year after year.
What Ingredients You Will Need
This recipe uses simple, everyday ingredients to create something that looks and tastes like it came from a fancy bakery. The magic is in the color and the frosting, but the foundation is a solid, reliable chocolate cupcake. Here’s everything you’ll need:
For the Black Velvet Cupcakes
- 1 ½ cups all-purpose flour — Spoon and level it for the most accurate measurement. Too much flour makes dense cupcakes.
- 1 cup granulated sugar — Standard white sugar works best here. Brown sugar would change the color and moisture level.
- ¼ cup unsweetened cocoa powder — I recommend Hershey’s Special Dark for a richer chocolate flavor that complements the black color. Regular cocoa works too.
- 1 teaspoon baking soda — This helps the cupcakes rise and gives them that tender velvet texture.
- ½ teaspoon salt — Balances the sweetness and enhances the chocolate flavor.
- 1 cup buttermilk — Room temperature. The acidity in buttermilk reacts with the baking soda for a light, fluffy crumb. No buttermilk? Add 1 tablespoon of lemon juice to regular milk and let it sit for 5 minutes.
- ½ cup vegetable oil — Keeps the cupcakes moist for days. Canola or any neutral oil works fine.
- 2 large eggs — Room temperature. Cold eggs can seize the batter and make the cupcakes dense.
- 2 teaspoons vanilla extract — Pure vanilla extract gives the best flavor. Imitation vanilla works in a pinch.
- 1 tablespoon black gel food coloring — This is crucial. Liquid food coloring won’t give you a true black color — you need gel or paste. I use the AmeriColor Super Black gel. Start with 1 tablespoon and add more if needed.
- 1 teaspoon white vinegar — Sounds weird, I know. But the vinegar reacts with the baking soda for extra lift and helps set the black color.
For the Purple Cream Cheese Frosting
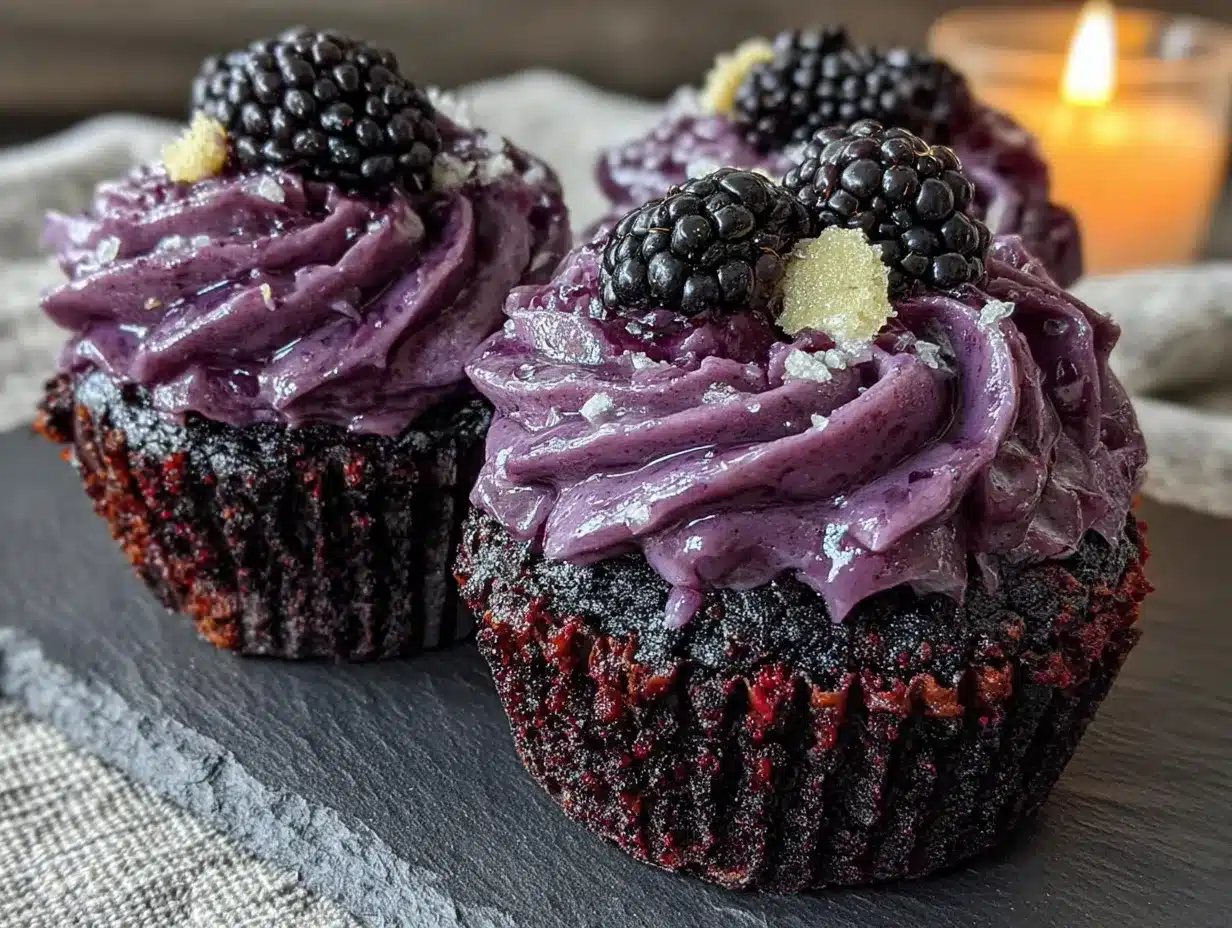
- 8 ounces cream cheese — Full-fat, softened to room temperature. Low-fat cream cheese makes the frosting runny. Let it sit out for at least 30 minutes.
- ½ cup unsalted butter — Softened. Salted butter works if you reduce the added salt.
- 3 ½ cups powdered sugar — Sifted if it’s lumpy. This gives the frosting structure and sweetness.
- 1 teaspoon vanilla extract — Adds warmth and depth to the frosting.
- Pinch of salt — Just a tiny bit to balance the sweetness.
- Purple gel food coloring — Start with 4-5 drops and add more until you reach your desired shade. I like a deep royal purple for Halloween.
Equipment Needed
You don’t need a fancy kitchen to make these cupcakes. Here’s what you’ll actually use:
- 12-cup standard muffin tin — The non-stick kind works great. If yours is old and scratched, use paper liners anyway.
- Paper cupcake liners — Halloween-themed ones make these extra fun. I found a pack with little ghosts and bats at the grocery store for $2.
- Two large mixing bowls — One for dry ingredients, one for wet. Glass or metal is fine.
- Whisk — For mixing the dry ingredients together. A fork works in a pinch.
- Hand mixer or stand mixer — You can mix the cupcake batter by hand with a spatula, but the frosting really needs a mixer to get smooth. I’ve made the frosting with a whisk before — it took forever and my arm was sore. Just use the mixer.
- Rubber spatula — For scraping down the bowl and folding ingredients together.
- Cooling rack — Essential for letting the cupcakes cool completely before frosting. Frosting warm cupcakes is a disaster — trust me, I’ve done it.
- Piping bag with star tip — For that beautiful swirled look. No piping bag? Use a zip-top bag with the corner snipped off. It’s not as pretty, but it works.
- Measuring cups and spoons — Standard set for accurate baking.
Preparation Method
Alright, let’s get to the good part. Here’s how to make the Best Black Velvet Halloween Cupcakes with Purple Cream Cheese Frosting. I’ll walk you through every step, including what things should look and feel like along the way.
Step 1: Preheat and Prep
Preheat your oven to 350°F (175°C). Line your muffin tin with 12 paper liners. This is not the time to skip the liners — black cake stuck to a pan is not a fun cleanup situation. Set the tin aside.
Step 2: Mix the Dry Ingredients
In a large bowl, whisk together the flour, sugar, cocoa powder, baking soda, and salt. Make sure there are no lumps of cocoa powder — I usually press them against the side of the bowl with the whisk. This takes about 30 seconds. Set the bowl aside.
Step 3: Mix the Wet Ingredients
In a separate bowl, whisk together the buttermilk, vegetable oil, eggs, vanilla extract, and black gel food coloring. Whisk until everything is combined and the color is uniformly black. Don’t worry if it looks a little grayish at first — the color will deepen as it mixes with the dry ingredients. Add the white vinegar and whisk one more time.
Step 4: Combine Wet and Dry
Pour the wet ingredients into the dry ingredients. Use a rubber spatula to fold everything together gently. Mix just until you no longer see streaks of flour — about 15 to 20 strokes. Overmixing at this stage will make the cupcakes tough. The batter should be smooth, glossy, and very dark. If it looks more dark gray than black, add another teaspoon of black gel food coloring and fold it in gently.
Step 5: Fill the Liners
Divide the batter evenly among the 12 cupcake liners. I use a cookie scoop for this — it keeps things clean and ensures every cupcake is the same size. Fill each liner about ⅔ full. Don’t overfill, or the cupcakes will mushroom over the top. The batter is thick, almost like a brownie batter, so don’t worry if it doesn’t spread out perfectly in the liners. It will level out as it bakes.
Step 6: Bake
Bake for 18 to 22 minutes. At the 18-minute mark, insert a toothpick into the center of a cupcake. If it comes out clean or with just a few moist crumbs, they’re done. If the toothpick has wet batter on it, give them another 2 minutes and check again. The tops should spring back when you lightly press them. Let the cupcakes cool in the pan for 5 minutes, then transfer them to a cooling rack to cool completely. This is important — warm cupcakes will melt your frosting into a sad puddle. Wait until they’re completely cool to the touch, about 30 minutes.
Step 7: Make the Purple Cream Cheese Frosting
While the cupcakes cool, make the frosting. In a large bowl using a hand mixer or stand mixer with the paddle attachment, beat the softened cream cheese and butter together on medium speed until smooth and creamy — about 3 minutes. Scrape down the sides of the bowl with a spatula. Add the vanilla extract and a pinch of salt, then beat again for 30 seconds. Gradually add the powdered sugar, about ½ cup at a time, beating on low speed after each addition. Once all the sugar is added, increase the speed to medium-high and beat for 2 minutes until the frosting is light, fluffy, and completely smooth. Add the purple gel food coloring, starting with 4 to 5 drops, and beat until the color is evenly distributed. Add more drops for a deeper purple. The frosting should be thick enough to hold its shape but soft enough to pipe easily.
Step 8: Frost and Decorate
Transfer the frosting to a piping bag fitted with a star tip. Starting at the outer edge of the cupcake, pipe the frosting in a spiral motion toward the center, then lift straight up to create a peak. Repeat with the remaining cupcakes. If you don’t have a piping bag, you can spread the frosting with a knife — it won’t look as dramatic, but it will taste just as good.
Cooking Tips & Techniques
I’ve made these Best Black Velvet Halloween Cupcakes more times than I can count, and I’ve learned a few things the hard way. Here are my best tips:
Use gel food coloring, not liquid. Liquid food coloring will turn your batter gray and watery. Gel coloring is concentrated and gives you that deep, true black color without thinning the batter. I learned this after my first batch came out looking like charcoal-gray sad pucks.
Don’t overmix the batter. I know I said this already, but it’s worth repeating. Overmixing develops the gluten in the flour, which makes the cupcakes tough and dense. Mix just until the flour disappears. A few tiny lumps are okay — they’ll bake out.
Room temperature ingredients matter. Cold eggs and cold buttermilk won’t emulsify properly with the oil, which can lead to dense, greasy cupcakes. Let your eggs and buttermilk sit on the counter for 30 minutes before you start. I usually set them out when I preheat the oven.
Check your oven temperature. Ovens run hot or cold more often than you think. I burned my first batch because my oven runs 25 degrees hot. An inexpensive oven thermometer will save your cupcakes.
Let the cupcakes cool completely. I know you’re excited. I know the kitchen smells amazing. But frosting warm cupcakes is a guaranteed way to end up with a puddle of purple cream cheese on your counter. I’ve done it three times. Learn from my mistakes.
Make the frosting ahead of time. You can make the purple cream cheese frosting up to 3 days in advance and store it in the fridge. Just let it come to room temperature and give it a quick whip with the mixer before using it. This is a lifesaver if you’re baking for a party.
Variations & Adaptations
One of the best things about these cupcakes is how easy they are to customize. Here are some variations I’ve tried and loved:
Gluten-Free Version: Swap the all-purpose flour for a 1:1 gluten-free baking flour blend. I’ve used Bob’s Red Mill 1:1 Baking Flour with great results. The texture is slightly more tender, but the flavor is spot on. Add an extra tablespoon of buttermilk to compensate for the drier flour blend.
Dairy-Free Version: Use dairy-free cream cheese (I like Kite Hill), vegan butter, and a plant-based milk mixed with lemon juice for the buttermilk. The frosting will be slightly softer, so chill it for 10 minutes before piping.
Different Frosting Colors: Purple is classic for Halloween, but you can use any color you want. Orange frosting with black sprinkles is a fun alternative. Green frosting gives these a Frankenstein vibe. Or go with blood-red for a vampire-themed party.
Add Sprinkles or Toppers: After frosting, top each cupcake with Halloween-themed sprinkles, a candy eyeball, or a small plastic spider ring. My kids love the spider rings — they fight over which color spider they get.
Make It a Cake: Pour the batter into two 8-inch round cake pans lined with parchment paper and bake for 25 to 30 minutes. Double the frosting recipe for a layer cake. It’s stunning for Halloween parties.
Spice It Up: Add 1 teaspoon of cinnamon and ½ teaspoon of cayenne pepper to the dry ingredients for a Mexican hot chocolate twist. The heat is subtle but adds a nice warmth that pairs beautifully with the cream cheese frosting.
Serving & Storage Suggestions
These Best Black Velvet Halloween Cupcakes are best served at room temperature. The cream cheese frosting softens slightly, the cake stays moist, and the flavors are at their peak. If you’ve refrigerated them, let them sit on the counter for 20 to 30 minutes before serving.
For presentation, arrange the cupcakes on a black or orange platter for maximum Halloween impact. I like to scatter a few candy corn pieces around the platter for extra color. If you’re serving these at a party, place them on a tiered stand — the height makes the purple frosting pop against the black cake.
These cupcakes pair beautifully with a glass of cold milk, a warm cup of coffee, or a hot apple cider. For an adult gathering, they’re fantastic with a dark stout beer or a bourbon-spiked hot chocolate.
Storage: Store unfrosted cupcakes in an airtight container at room temperature for up to 3 days. Frosted cupcakes should be stored in the refrigerator in an airtight container for up to 5 days. The cream cheese frosting needs to stay cold. Let them come to room temperature before serving.
Freezing: You can freeze the unfrosted cupcakes for up to 3 months. Wrap each one tightly in plastic wrap, then place them in a freezer-safe bag. Thaw at room temperature before frosting. The frosting itself can also be frozen for up to 3 months in an airtight container. Thaw in the refrigerator overnight and rewhip before using.
Flavor Development: Here’s a secret — these cupcakes actually taste better the next day. The black velvet cake absorbs the moisture and the flavors meld together overnight. If you have the time, bake the cupcakes a day ahead and frost them the morning of your event.
Nutritional Information & Benefits
I’m not going to pretend these are health food — they’re cupcakes, after all. But here’s the nutritional breakdown for one cupcake with frosting, based on the recipe as written:
| Nutrient | Amount Per Cupcake |
|---|---|
| Calories | 385 |
| Total Fat | 22g |
| Saturated Fat | 10g |
| Cholesterol | 65mg |
| Sodium | 280mg |
| Total Carbohydrates | 45g |
| Sugars | 34g |
| Protein | 4g |
That said, there are a few redeeming qualities. The cream cheese adds a small amount of protein and calcium. The cocoa powder is rich in antioxidants — specifically flavonoids, which are good for heart health. And the buttermilk provides probiotics and calcium. Is it a health food? No. But is it worth every single calorie? Absolutely.
If you’re looking for a lighter option, you can reduce the sugar in the frosting by using a sugar-free powdered sugar alternative, or swap the cream cheese for a reduced-fat version. The texture will be slightly different, but the flavor will still be delicious.
Conclusion
These Best Black Velvet Halloween Cupcakes with Purple Cream Cheese Frosting are everything I want in a Halloween dessert — dramatic, delicious, and deceptively easy. They look like you spent hours in the kitchen, but really, they come together in under an hour with ingredients you probably already have. The black velvet cake is tender and moist, with just the right amount of chocolate flavor. And that purple cream cheese frosting? It’s tangy, sweet, and absolutely irresistible.
I love this recipe because it reminds me that you don’t need to be a professional baker to create something memorable. You just need a good recipe, a little bit of patience, and the willingness to try — even when you’re starting at 10 PM with no plan. These cupcakes have saved me for bake sales, Halloween parties, and last-minute get-togethers more times than I can count. They’re my secret weapon, and now they’re yours too.
I’d love to hear how these turn out for you! Did you try a different frosting color? Add sprinkles? Make them gluten-free? Drop a comment below and let me know — I read every single one. And if you share a photo on Pinterest or Instagram, tag me so I can see your spooky creations. Happy Halloween, and happy baking!
Frequently Asked Questions
Can I use liquid food coloring instead of gel?
I really don’t recommend it. Liquid food coloring will thin out your batter and won’t give you a true black color — you’ll end up with a dark gray at best. Gel food coloring is concentrated, so you get a deep, rich black without changing the texture of the batter. You can find it at most grocery stores in the baking aisle or online.
Why did my cupcakes turn green instead of black?
This happened to me the first time I made these! It’s usually caused by a reaction between the cocoa powder and the baking soda. The cocoa powder has natural pigments that can turn greenish when combined with an alkaline ingredient like baking soda. The solution is to use a higher quality cocoa powder or add a tiny bit more black gel food coloring. I also recommend using Hershey’s Special Dark cocoa — it’s less prone to this reaction.
Can I make these cupcakes ahead of time?
Absolutely. You have two options: bake the cupcakes up to 3 days ahead and store them unfrosted in an airtight container at room temperature, then frost them the day of your event. Or you can freeze the unfrosted cupcakes for up to 3 months. The frosting can also be made ahead and refrigerated for up to 3 days — just let it come to room temperature and rewhip it before using.
My cream cheese frosting turned out runny. What went wrong?
This usually happens for one of two reasons. First, your cream cheese or butter might have been too soft. They should be at room temperature — soft but not melty. Second, you might have overbeaten the frosting. Once you add the powdered sugar, don’t beat for more than 2 to 3 minutes on medium-high speed. If your frosting is already runny, try chilling it in the refrigerator for 20 minutes before piping.
Can I make these into mini cupcakes?
Yes! Mini cupcakes are perfect for Halloween parties. Fill mini muffin liners about ⅔ full and bake at 350°F for 10 to 12 minutes. Check them at 10 minutes with a toothpick. You’ll get about 36 mini cupcakes from this recipe. Use a smaller piping tip for the frosting, or just spread it on with a knife.
Pin This Recipe!
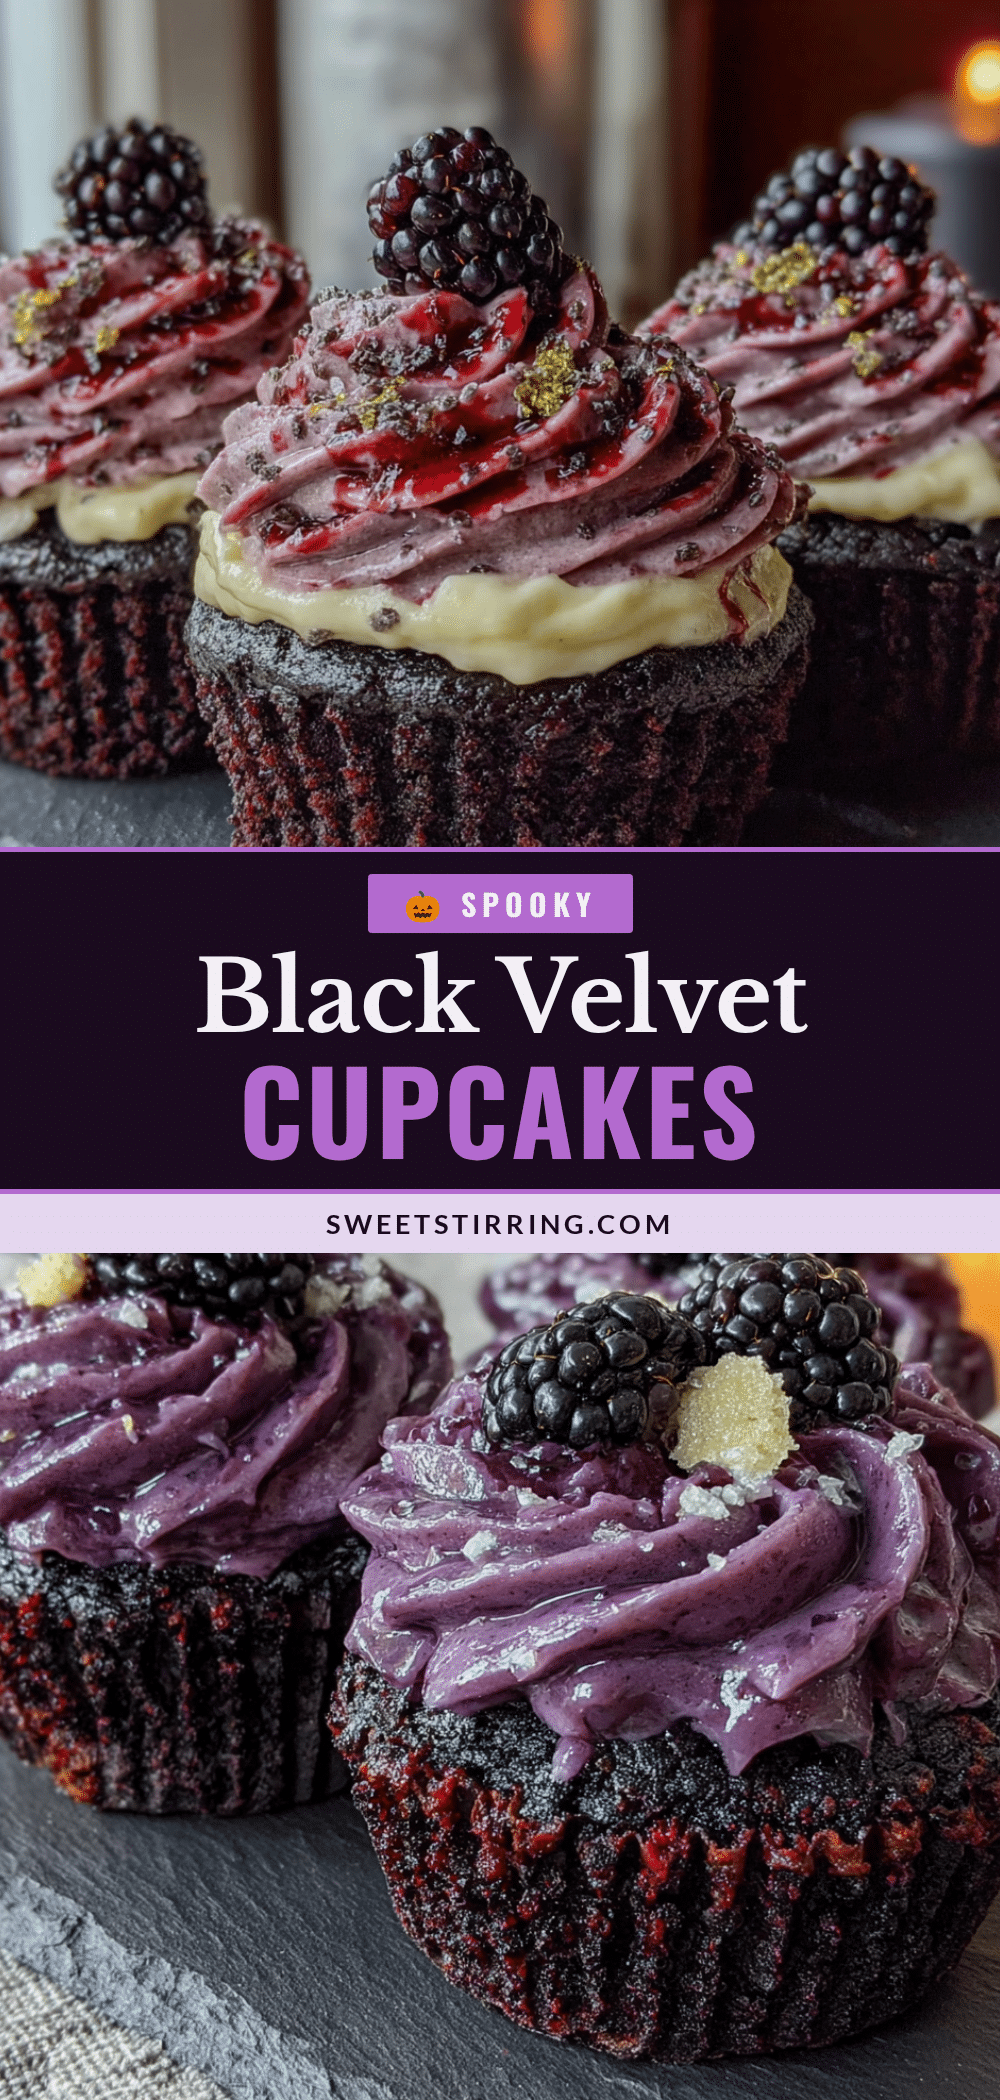
Best Black Velvet Halloween Cupcakes (Easy, Spooky Recipe)
These dramatic black velvet cupcakes with purple cream cheese frosting are deceptively easy to make, perfect for last-minute Halloween parties or bake sales. The tender, moist chocolate cake pairs perfectly with the tangy, sweet purple frosting.
- Prep Time: 15 minutes
- Cook Time: 20 minutes
- Total Time: 45 minutes
- Yield: 12 cupcakes 1x
- Category: Dessert
- Cuisine: American
Ingredients
- 1 ½ cups all-purpose flour
- 1 cup granulated sugar
- ¼ cup unsweetened cocoa powder (Hershey’s Special Dark recommended)
- 1 teaspoon baking soda
- ½ teaspoon salt
- 1 cup buttermilk, room temperature
- ½ cup vegetable oil
- 2 large eggs, room temperature
- 2 teaspoons vanilla extract
- 1 tablespoon black gel food coloring
- 1 teaspoon white vinegar
- 8 ounces cream cheese, softened
- ½ cup unsalted butter, softened
- 3 ½ cups powdered sugar, sifted if lumpy
- 1 teaspoon vanilla extract
- Pinch of salt
- Purple gel food coloring (4-5 drops, more for deeper shade)
Instructions
- Preheat oven to 350°F (175°C). Line a 12-cup muffin tin with paper liners.
- In a large bowl, whisk together flour, sugar, cocoa powder, baking soda, and salt until no lumps remain.
- In a separate bowl, whisk together buttermilk, vegetable oil, eggs, vanilla extract, and black gel food coloring until uniformly black. Add white vinegar and whisk once more.
- Pour wet ingredients into dry ingredients. Fold gently with a rubber spatula until just combined (15-20 strokes). Batter should be smooth, glossy, and very dark. Add more black gel food coloring if needed.
- Divide batter evenly among the 12 liners, filling each about ⅔ full.
- Bake for 18-22 minutes, until a toothpick inserted in the center comes out clean or with a few moist crumbs. Cool in pan for 5 minutes, then transfer to a wire rack to cool completely (about 30 minutes).
- While cupcakes cool, make frosting: In a large bowl, beat cream cheese and butter together on medium speed until smooth and creamy (about 3 minutes). Add vanilla and salt, beat 30 seconds. Gradually add powdered sugar, ½ cup at a time, beating on low. Increase speed to medium-high and beat 2 minutes until light and fluffy. Add purple gel food coloring (4-5 drops) and beat until evenly distributed.
- Transfer frosting to a piping bag fitted with a star tip. Pipe onto cooled cupcakes in a spiral motion from outer edge to center, lifting to create a peak. Alternatively, spread with a knife.
Notes
Use gel food coloring, not liquid, for true black color. Do not overmix batter. Room temperature ingredients are important for proper emulsification. Let cupcakes cool completely before frosting to prevent melting. Frosting can be made up to 3 days ahead and refrigerated; bring to room temperature and rewhip before using. Unfrosted cupcakes can be stored at room temperature for up to 3 days; frosted cupcakes should be refrigerated for up to 5 days. Cupcakes taste even better the next day.
Nutrition
- Serving Size: 1 cupcake
- Calories: 385
- Sugar: 34
- Sodium: 280
- Fat: 22
- Saturated Fat: 10
- Carbohydrates: 45
- Fiber: 1
- Protein: 4
Keywords: Halloween cupcakes, black velvet cupcakes, purple cream cheese frosting, easy Halloween dessert, spooky cupcakes, bake sale recipe



