Love this? Save it for later!
Share the inspiration with your friends
Introduction
“You know that feeling when you suddenly crave something sweet and cold at midnight, but the ice cream machine is nowhere in sight?” Well, that was me last summer, standing in my tiny kitchen with no fancy gadgets, a half-empty freezer, and a desperate sweet tooth. I wasn’t about to make a late-night trip to the corner store, so I started experimenting with whatever I had on hand. Honestly, it was a bit of a mess—spilled cream, a cracked bowl, and a stubborn mixer that refused to cooperate. But after a few tweaks, I ended up with this creamy budget ice cream recipe that needs no machine at all.
This recipe came out of pure necessity, but it stuck with me because it’s so simple and surprisingly rich. Maybe you’ve been there too—wanting that indulgent scoop without the fuss or expense. What I love about this homemade treat is that it doesn’t rely on expensive equipment or fancy ingredients. Plus, it tastes like something far more luxurious than the humble pantry staples it’s made from.
So, let me tell you about how this recipe became my go-to when the craving hits but my freezer’s empty except for a handful of staples. It’s creamy, dreamy, and budget-friendly—the kind of comfort food you can make anytime, no machine needed. It’s funny how the best ideas sometimes come from the most unexpected moments, isn’t it?
Why You’ll Love This Recipe
- Quick & Easy: Whips up in about 10 minutes, with minimal hands-on time—perfect for last-minute treats.
- Simple Ingredients: Uses everyday pantry staples like heavy cream and sweetened condensed milk, so no complicated shopping trips.
- Perfect for Any Occasion: Whether it’s a spontaneous dessert after dinner or a casual weekend indulgence, this recipe fits right in.
- Crowd-Pleaser: The creamy texture and sweet flavor consistently get thumbs up from both kids and adults.
- Unbelievably Delicious: The smooth mouthfeel and balanced sweetness make it feel like premium ice cream.
This isn’t just another frozen dessert recipe—it’s the one I’ve perfected through trial, error, and a few happy accidents. The secret lies in using sweetened condensed milk, which gives the ice cream that velvety richness without needing an ice cream maker. I also found that gently folding the whipped cream into the base keeps it airy and soft, with no icy crunch. Honestly, it’s like magic in a bowl.
It’s the kind of recipe that makes you want to close your eyes after the first bite, savoring the creamy coolness. Plus, it’s a great way to impress guests without breaking a sweat or the bank. Trust me, once you make this, you might find yourself reaching for it more often than you thought possible.
What Ingredients You Will Need
This recipe uses simple, wholesome ingredients to deliver creamy, rich ice cream without fuss. Most of these are pantry staples, and you can find them easily at any grocery store. Here’s what I use:
- Heavy cream (2 cups / 480 ml) – For that rich, creamy texture. I usually go with organic cream from my local dairy.
- Sweetened condensed milk (1 can, 14 oz / 396 g) – The magic ingredient that adds sweetness and creaminess without needing to churn.
- Pure vanilla extract (1 teaspoon) – Adds a warm, inviting flavor; I prefer Nielsen-Massey brand for its natural taste.
- Pinch of salt – Balances the sweetness and enhances the flavors.
- Optional mix-ins: chopped nuts, chocolate chips, or fresh fruit (about ½ cup / 75 g) – Add texture and extra flavor if you like.
If you want to try a dairy-free version, you can substitute the heavy cream with full-fat coconut milk (chilled overnight) and use sweetened condensed coconut milk instead. Just keep in mind this will add a slight coconut flavor, which can be delicious!
For a lower-sugar option, look for no-sugar-added sweetened condensed milk or make your own using evaporated milk and a natural sweetener. In summer, fresh berries or chopped peaches work wonderfully blended into this base.
Equipment Needed
- Mixing bowl: A large, chilled bowl works best for whipping the cream properly.
- Electric mixer or stand mixer: Essential for whipping the heavy cream to stiff peaks. A hand whisk can work but will take longer and require some muscle.
- Spatula: For gently folding the whipped cream and mixing in ingredients without deflating the airiness.
- Freezer-safe container: To store your ice cream while it sets. I like using a loaf pan or a shallow plastic container with a lid.
- Measuring cups and spoons: For precise measurements, which really help the texture come out just right.
If you don’t have an electric mixer, don’t worry—I’ve whipped up batches by hand when I forgot to charge the mixer! It just takes a bit more patience. Also, a silicone spatula is my personal favorite because it’s gentle and flexible for folding.
Preparation Method
- Chill your mixing bowl and beaters: Place them in the freezer for about 15 minutes before you start. This helps the cream whip faster and hold its shape better.
- Pour heavy cream into the chilled bowl: Using an electric mixer, beat on medium-high speed until stiff peaks form—this usually takes about 3-5 minutes. You’ll know it’s ready when the cream holds firm peaks that don’t collapse when you lift the beaters.
- In a separate bowl, combine sweetened condensed milk, vanilla extract, and a pinch of salt: Stir gently to mix everything evenly. This is your creamy, sweet base.
- Fold the whipped cream into the condensed milk mixture: Use a spatula and fold carefully to keep the airiness intact. This step is key to avoid losing volume and ending up with a dense ice cream.
- Add any optional mix-ins: If you’re including nuts, chocolate chips, or fruit, fold them in now with gentle strokes.
- Transfer the mixture to a freezer-safe container: Spread it out evenly, cover tightly with a lid or plastic wrap, and place in the freezer.
- Freeze for at least 6 hours, preferably overnight: The ice cream will firm up nicely but stay creamy without icy chunks.
- Before serving, let it sit at room temperature for 5 minutes: This softens it slightly, making scooping easier and enhancing that creamy texture.
Tip: If your cream starts to look grainy or watery, it’s usually because it was over-whipped or the folding was too vigorous. Just take a deep breath and fold gently next time—patience is key here. Also, keep your freezer temperature steady for the best result.
Cooking Tips & Techniques
Whipping cream correctly can be tricky if you’re not used to it, but here’s what I’ve learned through trial and error. First, always chill your bowl and beaters beforehand. It makes a huge difference—warm equipment means the cream won’t whip up properly.
When folding, think of it like gently tucking in a baby blanket—too rough and you’ll deflate all that lovely air you just worked to create. Use a light hand and fold from the bottom up, turning the bowl as you go.
One mistake I made early on was rushing the freezing time. The mixture needs to be fully firm so it doesn’t turn into a melty mess when you scoop. If you’re impatient like me, set a timer so you don’t sneak a premature taste!
Multitasking tip: While the cream chills, prep your mix-ins or clean up your kitchen so you’re ready to fold and freeze right away. Efficiency helps keep the cream cold and fluffy.
Lastly, don’t skip the rest time outside the freezer before scooping. It’s tempting to dig in right away, but letting it soften for a few minutes gives you the perfect creamy bite every time.
Variations & Adaptations
- Chocolate Swirl: Melt ½ cup (90 g) of semi-sweet chocolate and swirl it in just before freezing for a marbled effect.
- Fruit Flavor: Puree 1 cup (150 g) of fresh or frozen berries and fold into the base before freezing for a fresh twist. You can also use mango or peach.
- Nut-Free and Vegan: Use full-fat coconut milk instead of heavy cream and sweetened condensed coconut milk. Add vanilla and salt as usual.
- Low-Sugar Option: Substitute sweetened condensed milk with a homemade blend of evaporated milk and a sugar substitute like stevia or erythritol, adjusting sweetness to taste.
- My personal favorite variation: Adding a teaspoon of instant espresso powder to the base for a subtle coffee flavor that pairs beautifully with vanilla.
You can also change up the mix-ins depending on the season or your pantry stash—think toasted coconut, crushed cookies, or even a handful of candied ginger for a spicy kick.
Serving & Storage Suggestions
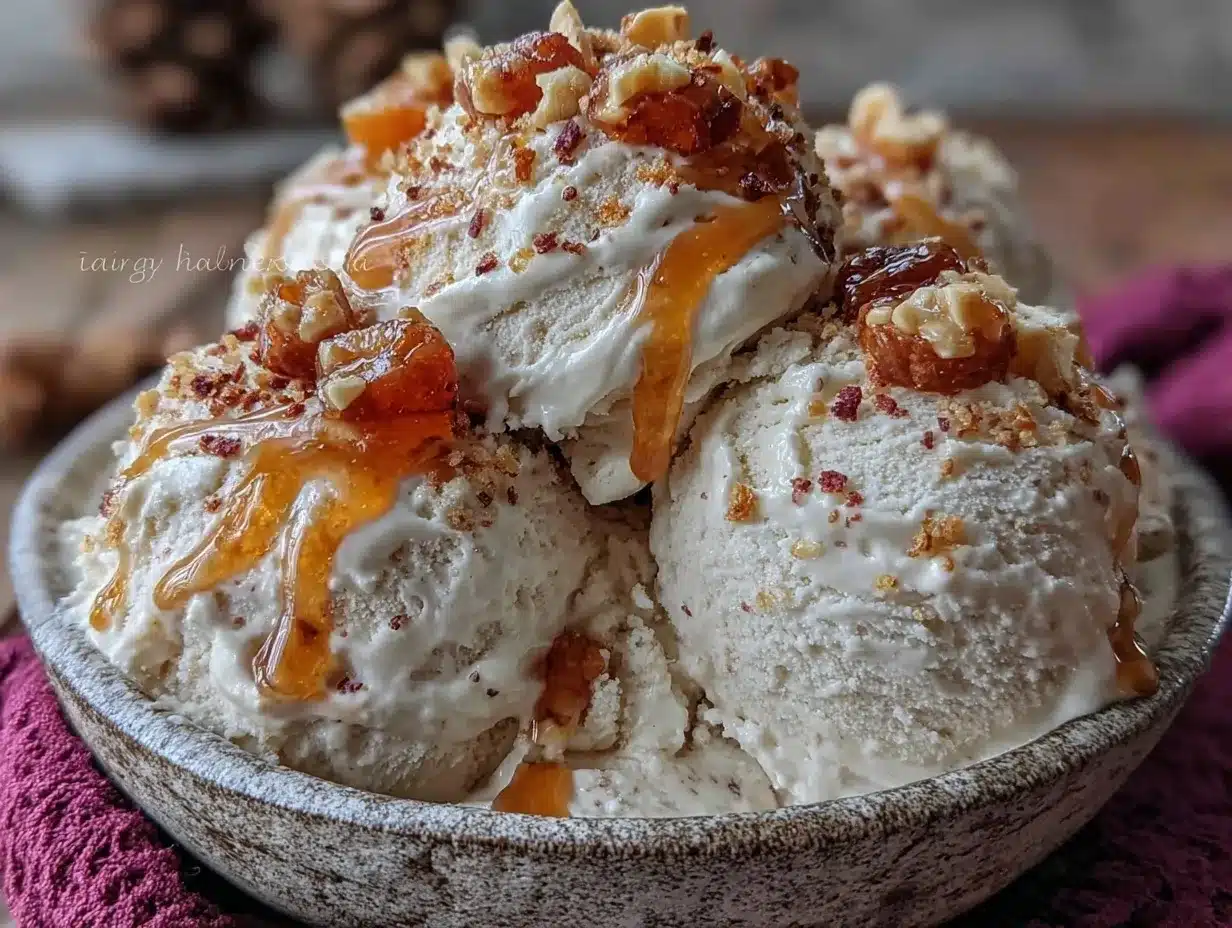
This ice cream tastes best served straight from the freezer after a brief 5-minute rest at room temperature. Scoop it into bowls or cones and enjoy immediately for that perfect creamy texture.
Pair it with warm fruit compote, a drizzle of caramel, or alongside a slice of rich chocolate brownies for an indulgent treat. It also makes a fantastic topping for fresh pies or crumbles.
Store leftovers in an airtight container in the freezer for up to two weeks. Avoid frequent thawing and refreezing to keep it creamy. When reheating, let it soften at room temperature before scooping to avoid a hard, icy texture.
Flavors tend to deepen slightly after a day or two in the freezer, so sometimes I make it a day ahead to let those subtle notes develop. Just remember to stir gently if you add mix-ins before serving again.
Nutritional Information & Benefits
This creamy budget ice cream is richer than typical store-bought options, thanks to the heavy cream and sweetened condensed milk. A typical serving (½ cup / 120 ml) has approximately 250 calories, 15g fat, 25g carbohydrates (mostly sugars), and 3g protein.
While it’s definitely an indulgence, the heavy cream provides fat-soluble vitamins like A, D, and E. Using real vanilla extract adds antioxidants without artificial flavors. For a lighter option, you can swap in coconut milk or lower-fat dairy alternatives.
Note that this recipe contains dairy and is not suitable for those with lactose intolerance or milk allergies unless you use the vegan adaptation.
Personally, I appreciate that this recipe lets me enjoy a creamy, homemade treat without additives or preservatives, which feels better than grabbing a commercial pint loaded with stabilizers and artificial ingredients.
Conclusion
This creamy budget ice cream recipe without a machine is a lifesaver when you want homemade comfort without fuss or fancy tools. It’s simple, affordable, and honestly, one of the creamiest no-churn ice creams I’ve ever made. I keep coming back to it because it hits that sweet spot between indulgent and easy.
Feel free to experiment with flavors and mix-ins—this base is like a blank canvas waiting for your creativity. I hope it becomes your go-to like it is for me, especially on those nights when you just need a little sweet escape.
Give it a try, and don’t hesitate to share your own twists or experiences in the comments below. I’d love to hear how you make it your own! Happy scooping and enjoy every creamy bite.
FAQs
- Can I use milk instead of heavy cream?
Milk won’t whip up like heavy cream, so the texture won’t be as creamy or airy. For best results, stick with heavy cream or try full-fat coconut milk for a dairy-free option. - How long does this ice cream need to freeze?
It should freeze for at least 6 hours, but overnight is best for a firm yet creamy texture. - Can I add mix-ins like cookie pieces?
Absolutely! Fold in your favorite mix-ins gently after combining the base to keep the texture light. - Is this recipe suitable for vegans?
Yes, by swapping heavy cream with chilled coconut milk and using sweetened condensed coconut milk, you can make a vegan-friendly version. - Why is my ice cream icy instead of creamy?
This usually happens if the cream isn’t whipped enough or if the folding is too rough, causing the mixture to lose air. Also, freezing at too low a temperature or not letting it rest before scooping can cause ice crystals.
Pin This Recipe!
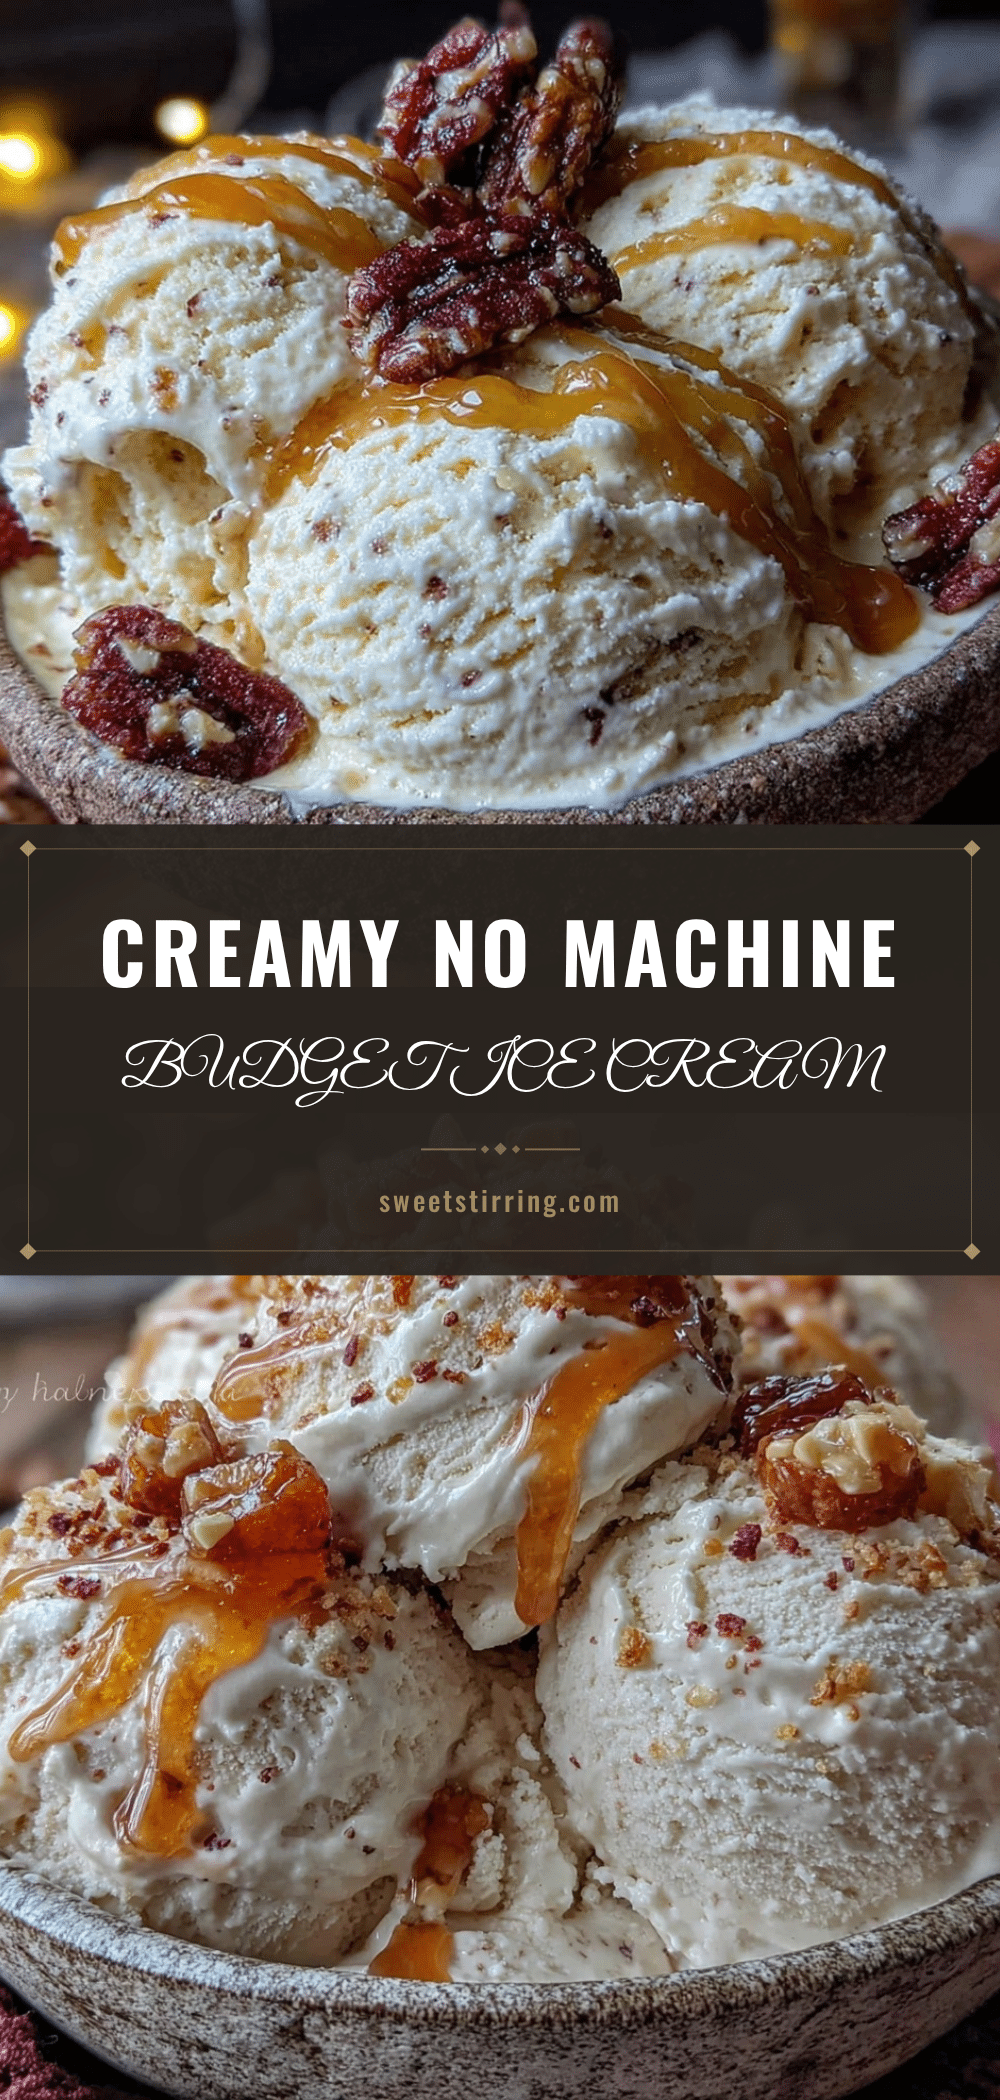
Creamy Budget Ice Cream No Machine Needed Easy Homemade Recipe

A simple, creamy, and budget-friendly homemade ice cream recipe that requires no ice cream machine and uses everyday pantry staples.
- Prep Time: 15 minutes
- Cook Time: 6 hours
- Total Time: 6 hours 15 minutes
- Yield: 6 servings 1x
- Category: Dessert
- Cuisine: American
Ingredients
- 2 cups (480 ml) heavy cream
- 1 can (14 oz / 396 g) sweetened condensed milk
- 1 teaspoon pure vanilla extract
- Pinch of salt
- Optional mix-ins: ½ cup (75 g) chopped nuts, chocolate chips, or fresh fruit
Instructions
- Chill your mixing bowl and beaters in the freezer for about 15 minutes.
- Pour heavy cream into the chilled bowl and beat on medium-high speed with an electric mixer until stiff peaks form (3-5 minutes).
- In a separate bowl, combine sweetened condensed milk, vanilla extract, and a pinch of salt; stir gently to mix.
- Fold the whipped cream into the condensed milk mixture carefully using a spatula to keep the airiness intact.
- Fold in any optional mix-ins gently.
- Transfer the mixture to a freezer-safe container, spread evenly, cover tightly, and place in the freezer.
- Freeze for at least 6 hours, preferably overnight.
- Before serving, let the ice cream sit at room temperature for 5 minutes to soften.
Notes
Chill bowl and beaters before whipping cream for best results. Fold whipped cream gently to maintain airiness. Let ice cream soften 5 minutes before scooping. Avoid over-whipping cream to prevent grainy texture. Keep freezer temperature steady.
Nutrition
- Serving Size: ½ cup (120 ml)
- Calories: 250
- Fat: 15
- Carbohydrates: 25
- Protein: 3
Keywords: no churn ice cream, homemade ice cream, easy ice cream recipe, budget ice cream, creamy ice cream, no machine ice cream