Love this? Save it for later!
Share the inspiration with your friends
My roommate swore she wasn’t a granola bar person. For years, she claimed those store-bought bars were just dry, crumbly excuses for snacks—too sweet or too bland, and always falling apart the moment you bit into them. Then, one rainy Sunday afternoon, I whipped up a batch of these chewy chocolate chip granola bars homemade recipe style, mostly to clear out my pantry. I left them on the counter and went back to my book, expecting her to ignore them like usual.
But an hour later, I caught her in the kitchen, stealing bites while pretending to read a magazine. Honestly, I was half annoyed and half impressed. She admitted the bars were “shockingly good,” and I realized that sometimes it just takes the right recipe to change a skeptic’s mind. Maybe you’ve been there, too—skeptical of homemade granola bars because of past crumbly or overly sweet disasters. Let me tell you, this chewy chocolate chip granola bars homemade recipe isn’t just a snack; it’s a little revolution in bar form.
What makes it stick around my kitchen? The texture is just right—soft, chewy, with a hint of that nostalgic chocolate chip cookie vibe, but wholesome enough to feel like a treat you don’t have to feel guilty about. Plus, it’s forgiving (I once forgot to add the vanilla extract and it still turned out great), and quick enough to throw together on a weekday afternoon. So yeah, these bars changed a mind, and they might just change yours, too.
Why You’ll Love This Recipe
This chewy chocolate chip granola bars homemade recipe has been honed through several kitchen experiments, family taste tests, and honest feedback from friends who, like my roommate, once doubted the charm of homemade bars. Here’s why it’s become a staple:
- Quick & Easy: Comes together in under 30 minutes, making it perfect for busy mornings or last-minute snack preps.
- Simple Ingredients: No fancy or hard-to-find items. You likely have oats, chocolate chips, and a few pantry staples already.
- Perfect for On-the-Go: Ideal for lunchboxes, hikes, or an afternoon pick-me-up.
- Crowd-Pleaser: Kids, adults, and even the pickiest of eaters tend to love these bars.
- Unbelievably Delicious: The chewy texture combined with melty chocolate chips hits that comforting sweet spot.
What sets this recipe apart is the balance between wholesome ingredients and indulgent flavor. It isn’t just about packing oats into a bar; it’s about crafting a snack that feels like a treat but with heartier nutrition. The secret is in the gentle melting of butter and honey, binding everything together just right, and the chocolate chips that get soft but don’t melt completely. It’s like homemade granola bars with personality.
This recipe isn’t just good—it’s the kind that makes you close your eyes after the first bite, savoring the chewy, chocolatey goodness. Whether you’re impressing guests with a homemade snack or just treating yourself after a long day, these bars deliver comfort food vibes without the fuss.
What Ingredients You Will Need
This chewy chocolate chip granola bars homemade recipe uses simple, wholesome ingredients to deliver bold flavor and satisfying texture without the fuss. Most of these are pantry staples, and substitutions are easy if needed.
- Old-fashioned rolled oats: 2 ½ cups (about 250g). The base for chewiness and fiber.
- Mini chocolate chips: ¾ cup (130g). I prefer Ghirardelli for their rich flavor and perfect melt.
- Honey: ⅓ cup (113g). Acts as a natural sweetener and binding agent.
- Unsalted butter: ⅓ cup (75g), melted. Adds richness and helps create that chewy texture.
- Brown sugar: ⅓ cup (70g), packed. Brings depth with a hint of molasses.
- Vanilla extract: 1 tsp. Essential for flavor complexity.
- Ground cinnamon: ½ tsp (optional). Adds a warm note that pairs beautifully with chocolate.
- Salt: ¼ tsp. Balances sweetness and enhances flavors.
- Almond flour: ¼ cup (28g). Helps with structure and adds a subtle nuttiness. Use oat flour for gluten-free option.
- Chopped nuts (optional): ½ cup (70g), like walnuts or pecans for crunch.
If you want to swap out ingredients, use maple syrup instead of honey for a different sweetness profile, or try coconut oil in place of butter for dairy-free bars. During summer, fresh berries folded in right before pressing the mixture into the pan make a fun twist, though it’s best to eat those bars within a day or two.
Equipment Needed
- Mixing bowls: One large bowl to combine dry ingredients and a smaller one for wet ingredients.
- 9×9 inch (23×23 cm) baking pan: For pressing and shaping the bars. A square glass or metal pan works fine.
- Parchment paper: To line the pan for easy removal and cleanup.
- Measuring cups and spoons: Accurate measurements keep the texture consistent.
- Spatula or wooden spoon: For mixing and spreading the mixture evenly.
- Microwave-safe bowl or small saucepan: To melt butter gently.
If you don’t have parchment paper, lightly greasing the pan with butter or non-stick spray will do, but bars may stick slightly. I keep a silicone spatula handy for scraping the bowl clean—it’s a small thing but makes a difference in getting every bit of the delicious mix into the pan. For budget-friendly options, any sturdy metal or glass pan around 8×8 or 9×9 inches will work fine.
Preparation Method
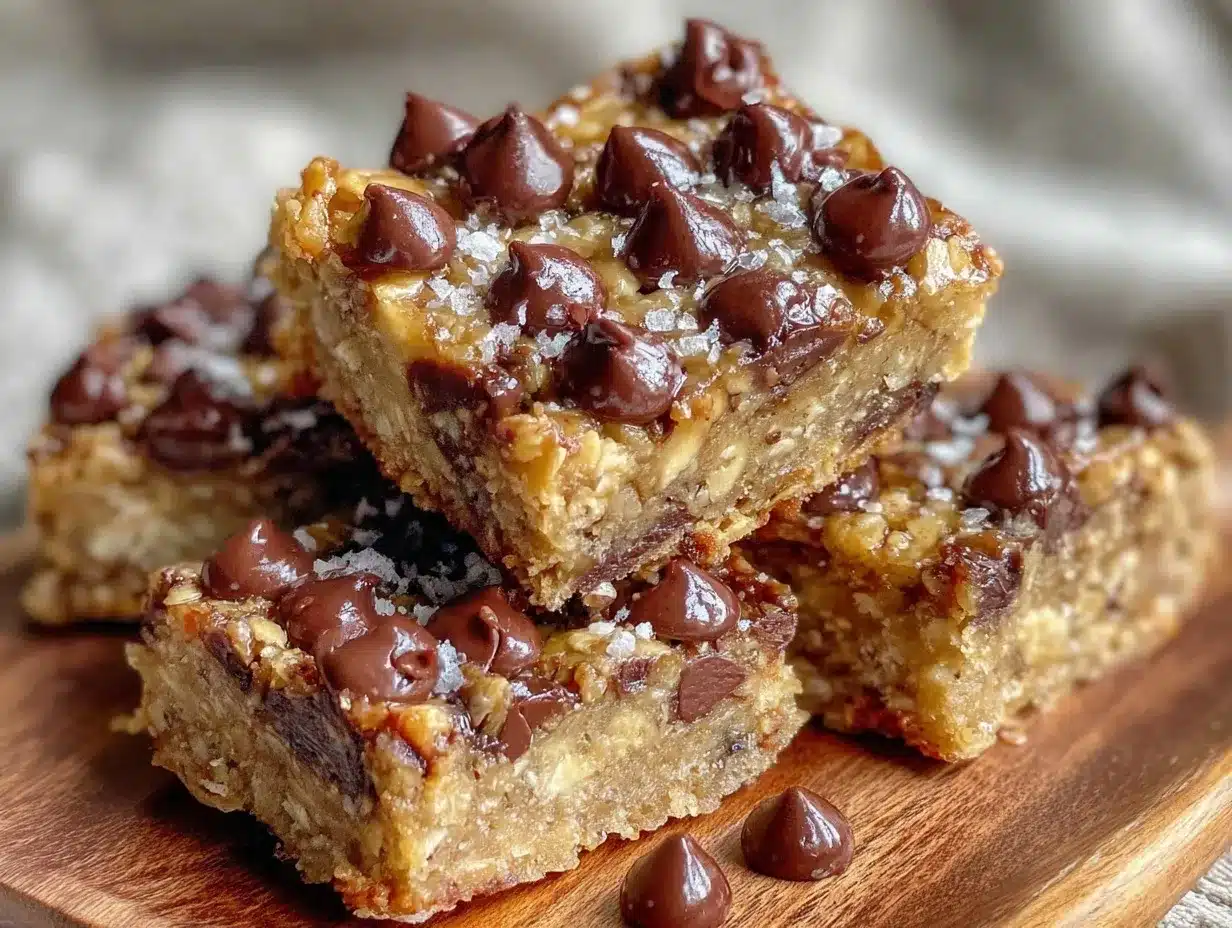
- Preheat your oven to 350°F (175°C). Line your 9×9 inch baking pan with parchment paper, leaving an overhang on two sides for easy bar removal later. This takes about 5 minutes.
- Mix dry ingredients. In a large bowl, combine 2 ½ cups rolled oats, ¼ cup almond flour, ⅓ cup brown sugar, ½ tsp cinnamon, and ¼ tsp salt. Stir gently to distribute everything evenly. This step ensures your bars have consistent texture—about 3 minutes.
- Melt the butter and honey together. Use a microwave-safe bowl or small saucepan to melt ⅓ cup unsalted butter and ⅓ cup honey, stirring occasionally until smooth and combined. Remove from heat and stir in 1 tsp vanilla extract. This step is crucial because the warm mixture helps bind the dry ingredients just right—about 3-4 minutes.
- Combine wet and dry ingredients. Pour the melted butter and honey mixture over the dry ingredients. Stir with a spatula or wooden spoon until everything is evenly coated and sticky. The mixture should feel thick and hold together when pressed. If it feels too dry, add a teaspoon of honey or melted butter. This usually takes 3-5 minutes.
- Fold in chocolate chips and nuts. Add ¾ cup mini chocolate chips and ½ cup chopped nuts (if using). Stir gently to distribute without melting the chips prematurely.
- Press mixture firmly into the pan. Transfer everything to your lined baking pan. Using the spatula or clean hands, press the mixture firmly and evenly into the pan, compacting it tightly. This step gives you that chewy texture instead of crumbly bars. Take your time—about 5 minutes.
- Bake for 18-20 minutes. Place the pan in the preheated oven and bake until the edges turn golden and the center feels set but still soft. The smell of toasted oats and chocolate will fill the kitchen—your cue to check on it.
- Cool completely before slicing. Remove from oven and let the bars cool in the pan for at least 30 minutes. Use the parchment paper overhang to lift the bars out gently, then slice into 12 squares with a sharp knife. If you cut too soon, bars may crumble. Patience here is key!
Cooking Tips & Techniques
Getting chewy chocolate chip granola bars homemade recipe just right takes a few little tricks I’ve learned over time. Here’s what helps:
- Don’t skip the almond flour or oat flour. It’s the secret to structure and chewiness, preventing crumbly bars.
- Press firmly. I can’t stress this enough. The tighter you pack the mixture into the pan, the better the chew and shape.
- Watch your oven. Baking too long dries bars out. Aim for golden edges but a soft center.
- Use mini chocolate chips. They melt just enough to be dreamy without turning into a chocolate puddle.
- Let bars cool fully. Cutting too soon is a common mistake that leads to crumbling.
- Substitutions matter. I once swapped honey with maple syrup and the bars got a little softer but still delicious.
One time, I forgot the vanilla extract—which usually adds that background warmth—but the bars still tasted good. I learned not to panic if you miss a small ingredient, but vanilla does make a nice difference. Multitasking tip: while bars bake, clean up the mixing bowls and utensils to save time. It feels so good to have a tidy kitchen when you’re done!
Variations & Adaptations
This chewy chocolate chip granola bars homemade recipe is a great base for tweaking based on your taste or dietary needs. Here are some ways I’ve mixed it up:
- Nut-free Version: Skip nuts and add extra seeds like pumpkin or sunflower for crunch.
- Vegan Adaptation: Use coconut oil instead of butter and maple syrup for honey. Choose dairy-free chocolate chips.
- Flavor Twists: Add shredded coconut, a pinch of nutmeg, or swap chocolate chips for dried cherries or cranberries.
- Lower Sugar: Reduce brown sugar by half and increase honey slightly for a less sweet bar.
- Different Cooking Methods: Press mixture into muffin tins for grab-and-go mini bars or freeze for a cool treat.
Personally, I once added a spoonful of peanut butter into the melted butter and honey mix. It gave the bars a slight nutty richness that my kids declared a winner. Feel free to make this recipe your own—there’s room to play!
Serving & Storage Suggestions
These granola bars are best served at room temperature, making them perfect snack companions for school lunches, work breaks, or hiking trips. I like to pair them with a glass of cold milk or a cup of black coffee to balance the sweetness.
For storage, wrap bars individually in parchment or plastic wrap and keep them in an airtight container. They last well for up to a week at room temperature, and up to two weeks in the fridge. You can also freeze them for up to three months—just thaw at room temperature before enjoying.
Reheating isn’t usually necessary, but a few seconds in the microwave can revive that soft, melty chocolate feel. Over time, the flavors meld nicely, so bars taste even better the day after baking—if they last that long!
Nutritional Information & Benefits
Each chewy chocolate chip granola bar (assuming 12 bars per batch) contains approximately:
| Calories | 200-220 kcal |
|---|---|
| Protein | 4 g |
| Fat | 9 g (mostly from butter and nuts) |
| Carbohydrates | 28 g (including 10 g sugars) |
| Fiber | 3 g |
The oats provide good fiber and slow-digesting carbs, helping keep you full longer. Using real butter and honey means this is a treat with recognizable ingredients, unlike many processed bars loaded with additives. Nuts add healthy fats and protein, while dark chocolate chips bring antioxidants. If you want gluten-free bars, be sure to use certified gluten-free oats and almond or oat flour.
Conclusion
Honestly, this chewy chocolate chip granola bars homemade recipe is one of those rare snacks that feels both indulgent and wholesome. It changed my roommate’s mind and has since become a quiet staple in my kitchen for whenever I want a quick, satisfying snack that doesn’t crumble under pressure.
Feel free to tweak the nuts, sweeteners, or mix-ins to fit your taste or dietary needs. I love how versatile and forgiving this recipe is—it’s practically a canvas for your kitchen creativity. If you give it a try, I’d love to hear how you make it your own, so don’t hesitate to leave a comment or share your favorite twists!
Go ahead, make a batch, and watch any granola bar skeptic in your life quietly change their tune.
FAQs
Can I use quick oats instead of rolled oats?
Quick oats can be used, but they will result in a less chewy and slightly more crumbly bar. Rolled oats hold their texture better.
How do I prevent the granola bars from sticking to the pan?
Line your pan with parchment paper, leaving an overhang on two sides for easy removal. If you don’t have parchment, grease the pan well with butter or non-stick spray.
Can I substitute chocolate chips with other mix-ins?
Absolutely! Try dried fruit, seeds, or even butterscotch chips for different flavors and textures.
How long do homemade granola bars last?
Stored in an airtight container at room temperature, they last about a week. Refrigerated, they can keep for two weeks, and freezing extends shelf life up to three months.
Is this recipe gluten-free?
It can be if you use certified gluten-free oats and substitute almond or oat flour for any wheat-based flours. Check all ingredient labels to be sure.
Pin This Recipe!
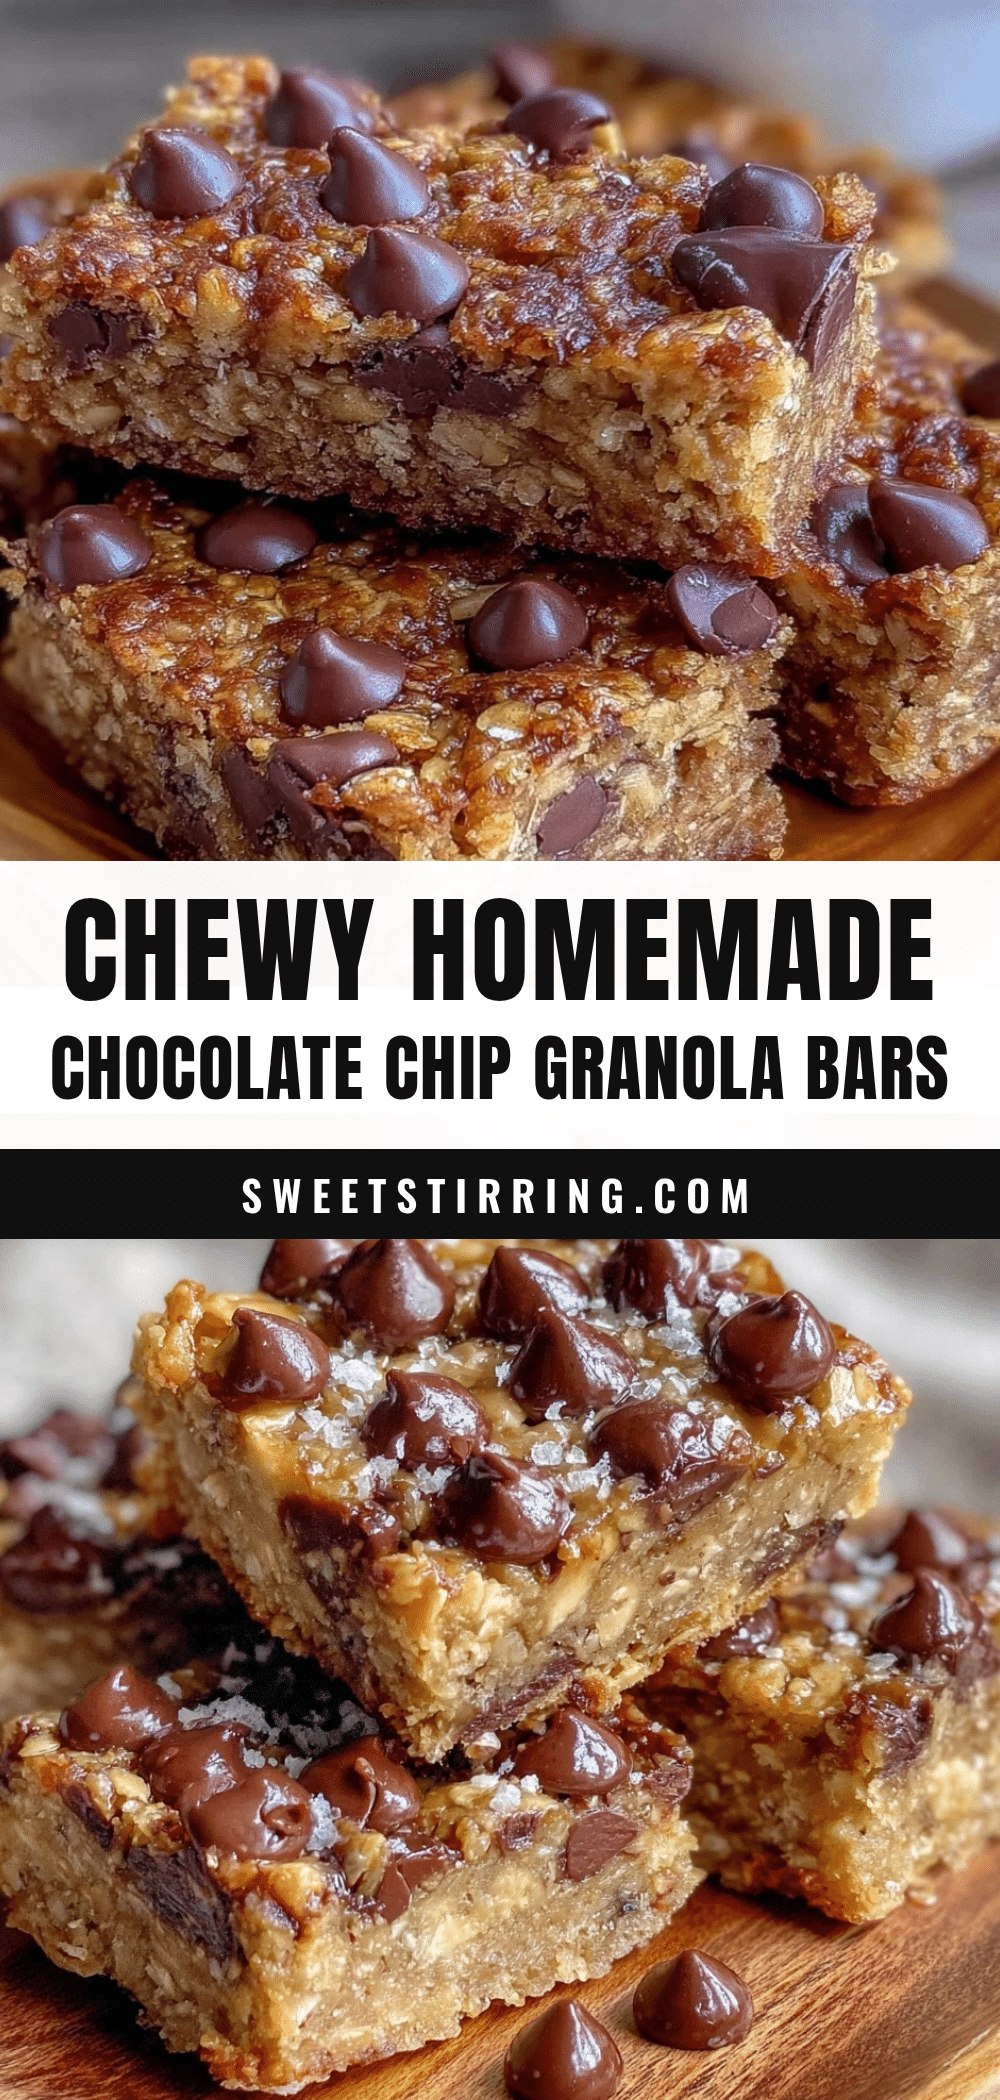
Chewy Chocolate Chip Granola Bars Homemade Recipe
These chewy chocolate chip granola bars combine soft, chewy texture with melty chocolate chips for a wholesome and delicious snack that’s quick and easy to make.
- Prep Time: 10 minutes
- Cook Time: 20 minutes
- Total Time: 50 minutes
- Yield: 12 bars 1x
- Category: Snack
- Cuisine: American
Ingredients
- 2 ½ cups old-fashioned rolled oats (about 250g)
- ¾ cup mini chocolate chips (130g)
- ⅓ cup honey (113g)
- ⅓ cup unsalted butter, melted (75g)
- ⅓ cup packed brown sugar (70g)
- 1 tsp vanilla extract
- ½ tsp ground cinnamon (optional)
- ¼ tsp salt
- ¼ cup almond flour (28g) (use oat flour for gluten-free option)
- ½ cup chopped nuts (optional, like walnuts or pecans, 70g)
Instructions
- Preheat your oven to 350°F (175°C). Line a 9×9 inch baking pan with parchment paper, leaving an overhang on two sides for easy bar removal.
- In a large bowl, combine rolled oats, almond flour, brown sugar, cinnamon, and salt. Stir gently to distribute evenly.
- Melt the butter and honey together in a microwave-safe bowl or small saucepan, stirring occasionally until smooth. Remove from heat and stir in vanilla extract.
- Pour the melted butter and honey mixture over the dry ingredients. Stir with a spatula or wooden spoon until everything is evenly coated and sticky. Add a teaspoon of honey or melted butter if mixture feels too dry.
- Fold in mini chocolate chips and chopped nuts (if using), stirring gently to distribute without melting the chips.
- Transfer the mixture to the lined baking pan. Press firmly and evenly into the pan to compact tightly.
- Bake for 18-20 minutes until edges turn golden and center feels set but still soft.
- Remove from oven and let cool completely in the pan for at least 30 minutes. Use parchment paper overhang to lift bars out and slice into 12 squares.
Notes
[‘Do not skip almond or oat flour to prevent crumbly bars and ensure structure.’, ‘Press mixture firmly into the pan for better chew and shape.’, ‘Watch baking time carefully to avoid drying out bars; aim for golden edges and soft center.’, ‘Use mini chocolate chips for ideal melting without puddling.’, ‘Let bars cool completely before slicing to prevent crumbling.’, ‘Substitute maple syrup for honey and coconut oil for butter for vegan adaptation.’, ‘Bars can be stored at room temperature for up to one week, refrigerated for two weeks, or frozen for three months.’]
Nutrition
- Serving Size: 1 bar (1/12 of recip
- Calories: 210
- Sugar: 10
- Sodium: 100
- Fat: 9
- Saturated Fat: 5
- Carbohydrates: 28
- Fiber: 3
- Protein: 4
Keywords: granola bars, chocolate chip, chewy granola bars, homemade granola bars, easy snack, healthy snack, chocolate chip granola bars



