Love this? Save it for later!
Share the inspiration with your friends
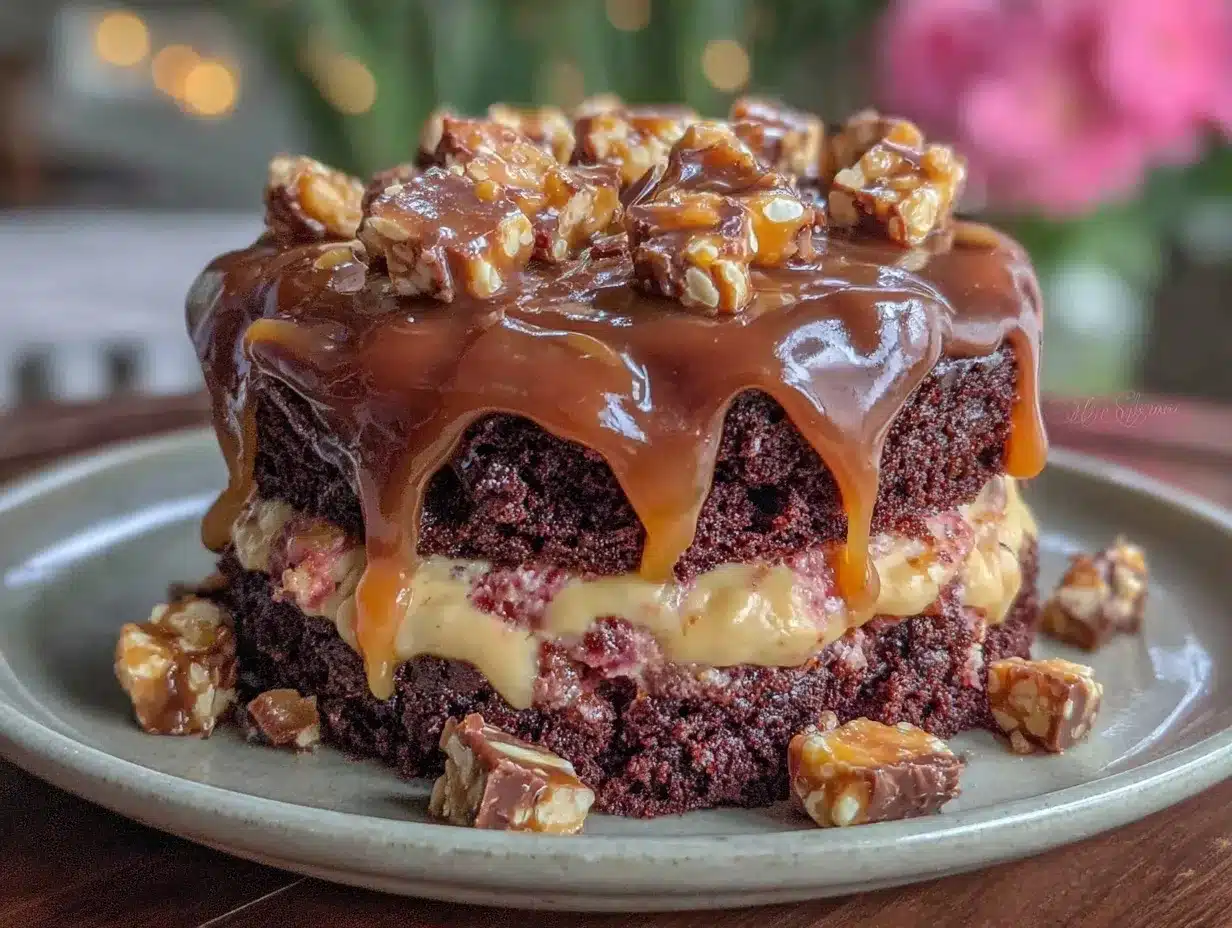
“I wasn’t expecting a cake to turn my kitchen upside down on a Tuesday night,” I admit. The power flickered just as I was about to finish the salted caramel drip, causing me to scramble in the dim glow of my phone’s flashlight. Honestly, it was a mess—a cracked caramel pot, a few drips on the counter, and a minor panic attack about ruining everything. But that Decadent Dark Chocolate Espresso Layer Cake with Salted Caramel Drip? It still came out rich, glossy, and unforgettable.
This recipe wasn’t born from some fancy bakery or a high-end café. Nope, it came from a late-night craving and a stubborn refusal to settle for anything less than extraordinary. You know that feeling when you want chocolate so intensely, but also crave that kick of espresso and the silky sweetness of caramel? Yeah, this cake nails that vibe perfectly.
Maybe you’ve been there—standing in your kitchen, ingredients scattered, wondering if you should just call it a night. But something about this cake keeps drawing me back. It’s like a little celebration wrapped in layers, with each bite telling a story of bold flavors and smooth textures. And let me tell you, the salted caramel drip? That’s the showstopper that takes this cake from great to unforgettable.
If you’re ready for a chocolate experience with a bit of edge, a hint of coffee, and a caramel finish that makes you close your eyes in delight, then this recipe is for you. It’s my go-to when I want to impress without stress, and I can’t wait to share every step with you.
Why You’ll Love This Recipe
Having tested this dark chocolate espresso layer cake more times than I can count, I’ve picked up some solid reasons why it’s become a staple for special occasions and cozy nights alike. Here’s why you’re going to want to make it ASAP:
- Quick & Easy: Despite the fancy look, it comes together in under 2 hours—perfect for when you want something impressive but don’t have all day.
- Simple Ingredients: You don’t need exotic stuff; most are pantry staples. The espresso really just amps up the chocolate, no complicated coffee brewing needed.
- Perfect for Celebrations: Whether it’s a birthday, dinner party, or just a treat-yourself moment, this cake fits the bill.
- Crowd-Pleaser: It’s rich but balanced, so even those who say they’re “not a chocolate person” have been won over (true story!).
- Unbelievably Delicious: The espresso intensifies the chocolate, and the salted caramel drip adds that perfect sweet-salty contrast—honestly, it’s magic.
What makes this recipe stand out? It’s the layering technique combined with the espresso-infused batter and a smooth salted caramel drip that’s not overly sweet. I’ve tried versions with heavy frostings or cloying caramel, but this one keeps everything balanced and clean. Plus, the texture is just right—moist, tender layers with a touch of espresso bitterness to cut through the sweetness.
For me, this cake isn’t just dessert; it’s a little moment of indulgence that feels both luxurious and homey. I hope you’ll feel the same way after your first slice.
What Ingredients You Will Need
This cake calls for straightforward ingredients that come together to deliver a bold, balanced flavor and a luscious texture. Most of these are probably already in your kitchen, with a few easy-to-find extras that really make the difference.
- For the Cake Layers:
- All-purpose flour – 2 ½ cups (315g), sifted for a light texture
- Unsweetened cocoa powder – ¾ cup (75g), preferably Dutch-processed for deeper color and flavor
- Baking powder – 1 ½ tsp
- Baking soda – 1 ½ tsp
- Fine sea salt – 1 tsp
- Granulated sugar – 2 cups (400g), for that perfect sweetness balance
- Large eggs – 3, room temperature (helps with even mixing)
- Whole milk – 1 cup (240ml), warmed slightly (adds moisture and richness)
- Brewed espresso or strong coffee – 1 cup (240ml), freshly made or instant (intensifies the chocolate)
- Vegetable oil – ½ cup (120ml), for moist crumb
- Pure vanilla extract – 2 tsp
- For the Espresso Buttercream Frosting:
- Unsalted butter – 1 cup (227g), softened (for creamy texture)
- Powdered sugar – 4 cups (480g), sifted to avoid lumps
- Espresso powder – 2 tbsp, dissolved in 1 tbsp hot water (concentrated espresso flavor)
- Heavy cream – 2-4 tbsp, to adjust consistency
- Vanilla extract – 1 tsp
- For the Salted Caramel Drip:
- Granulated sugar – 1 cup (200g)
- Unsalted butter – 6 tbsp (85g), cubed
- Heavy cream – ½ cup (120ml), warmed
- Flaky sea salt – 1 tsp (balances the sweetness)
Pro tip: I usually use King Arthur Flour for the cake and Land O’Lakes butter for the frosting—both give me consistent results. If you want a gluten-free option, you can swap the all-purpose flour with a 1:1 gluten-free baking flour, though the texture will be a bit different.
Equipment Needed
Here’s what you’ll need to pull off this decadent cake without a hitch:
- Two 8-inch (20 cm) round cake pans – I prefer metal pans for even heat distribution, but glass works too.
- Electric mixer – stand or hand mixer will work; stand mixers make the buttercream easier.
- Mixing bowls – at least two, one for dry ingredients and one for wet.
- Measuring cups and spoons – accuracy matters for baking!
- Rubber spatula – for folding and scraping bowls clean.
- Cooling racks – to cool the cake layers evenly.
- Offset spatula or butter knife – for smooth frosting application.
- Saucepan – for making the salted caramel drip.
- Instant-read thermometer (optional) – helpful for caramel but not required.
If you don’t have cake pans, you can use an 8×8-inch square pan but adjust baking time slightly. For frosting, a simple wooden spoon and some elbow grease can work if you don’t have a mixer, but it’ll take longer and might not be as smooth.
Preparation Method
- Preheat and Prepare: Preheat your oven to 350°F (175°C). Grease two 8-inch cake pans and line the bottoms with parchment paper for easy release. Set aside. (10 minutes prep)
- Mix Dry Ingredients: In a large bowl, sift together the flour, cocoa powder, baking powder, baking soda, and salt. Whisk to combine evenly. This ensures the leavening agents are well-distributed. (5 minutes)
- Combine Wet Ingredients: In a separate bowl, whisk the eggs and sugar until slightly pale. Add the warmed milk, brewed espresso, vegetable oil, and vanilla extract. Mix well but don’t overbeat. (5 minutes)
- Make the Batter: Gradually add the dry ingredients to the wet mixture, folding gently with a spatula or mixing on low speed. Stop when just combined; overmixing can make the cake dense. The batter will be thin—that’s normal and helps keep it moist. (5 minutes)
- Bake the Layers: Divide the batter evenly between the pans and smooth the tops. Bake for 30-35 minutes, or until a toothpick inserted comes out with moist crumbs but no wet batter. Rotate pans halfway for even baking. (30-35 minutes)
- Cool Completely: Let the cakes cool in the pans for 10 minutes before turning out onto wire racks. Cool completely before frosting. (1 hour)
- Prepare Espresso Buttercream: Beat softened butter with an electric mixer until fluffy (about 3 minutes). Gradually add powdered sugar, alternating with espresso liquid, and beat until smooth and spreadable. Add cream to adjust consistency. (10 minutes)
- Make Salted Caramel Drip: In a saucepan over medium heat, melt sugar, stirring constantly until it turns amber (about 7-10 minutes). Remove from heat, whisk in butter until melted, then slowly add warm cream. Stir until smooth. Cool slightly, then sprinkle flaky sea salt. (15 minutes)
- Assemble the Cake: Place one layer on your serving plate. Spread a thick layer of buttercream on top. Add the second layer and cover the entire cake with a thin crumb coat of frosting. Chill for 20 minutes to set. Then apply a final smooth layer of frosting. (20-30 minutes)
- Drip the Caramel: Once the frosting is firm but not cold, spoon the salted caramel over the edges, letting it drip down naturally. Pour the remaining caramel on top and spread gently. Chill the cake briefly for the caramel to set. (10-15 minutes)
Quick tip: If your caramel thickens too much before dripping, warm it gently over low heat to loosen it. Also, don’t rush cooling the cake layers; a warm cake with frosting can melt the buttercream.
Cooking Tips & Techniques
Getting this cake just right takes a few tricks I picked up over time. Here’s what to keep in mind:
- Espresso’s Role: Don’t skip the espresso—it’s subtle but sharpens the chocolate flavor. Use fresh, strong coffee or dissolve espresso powder in hot water for convenience.
- Mixing Matters: When combining wet and dry ingredients, fold gently. Overmixing activates gluten, making the cake tough instead of tender.
- Caramel Control: Caramel can go from perfect to burnt in seconds. Keep your eyes glued to the saucepan and stir constantly. If you mess it up, don’t fret; you can start again with just a cup of sugar.
- Buttercream Consistency: If the frosting feels too stiff, add heavy cream one tablespoon at a time. If too soft, chill briefly before frosting.
- Layer Leveling: Use a serrated knife to trim domed cake tops for even stacking. This prevents a leaning tower of chocolate!
- Timing & Multitasking: Make the caramel while the cakes bake to save time. Then let the caramel cool while you whip the frosting.
I once ended up with a caramel drip that was too runny and my kitchen looked like a caramel crime scene—lesson learned: patience is key!
Variations & Adaptations
This cake is flexible—feel free to tweak it to suit your tastes or dietary needs:
- Flavor Twist: Add a teaspoon of cinnamon or chili powder to the cake batter for a warm, spicy kick.
- Vegan Option: Use flax eggs (1 tbsp ground flaxseed + 3 tbsp water per egg), almond milk instead of dairy milk, and coconut oil instead of vegetable oil. Swap butter for vegan margarine in frosting and caramel.
- Nutty Crunch: Add chopped toasted hazelnuts or pecans between the layers or sprinkle on top of the caramel drip for texture.
- Different Frosting: Replace espresso buttercream with mascarpone cream for a lighter finish.
- Seasonal Adaptation: In fall, swirl in pumpkin puree and spices into the batter and use maple caramel drip instead of salted caramel.
Once, I swapped the espresso for a shot of orange liqueur—surprisingly delightful! Feel free to experiment as you get comfortable with the base recipe.
Serving & Storage Suggestions
Serve this cake at room temperature to let the flavors shine and the frosting soften slightly. It pairs perfectly with a cup of black coffee or a glass of bold red wine, making it a versatile dessert for any occasion.
Store leftovers covered tightly in the refrigerator for up to 4 days. Bring slices to room temperature before serving to soften the buttercream and mellow the espresso notes.
If you want to freeze it, wrap the whole cake in plastic wrap and foil, then freeze for up to 2 months. Thaw in the fridge overnight, then let sit at room temperature for an hour before serving.
Over time, the salted caramel drip may soak slightly into the frosting, softening its edges and blending the flavors beautifully—so you might find it tastes even better the next day.
Nutritional Information & Benefits
This dark chocolate espresso layer cake is indulgent but also packs some nutritional perks:
- Dark cocoa powder is rich in antioxidants that support heart health.
- Espresso adds flavor with minimal calories and may boost metabolism slightly.
- Using whole milk and butter provides calcium and vitamin D, balancing indulgence with nutrition.
- While this cake is not low-calorie, portion control can help you enjoy it guilt-free.
- Contains common allergens: gluten, dairy, eggs. Substitutions can make it allergy-friendly.
From a wellness perspective, I see this cake as a treat to savor mindfully, reminding us that balance is key in any diet.
Conclusion
So, why try this Decadent Dark Chocolate Espresso Layer Cake with Salted Caramel Drip? Because it’s a showstopper that’s surprisingly doable. It brings together bold flavors, moist textures, and that perfect sweet-salty caramel finish that keeps everyone coming back for more.
Feel free to tweak it to your liking—the recipe is forgiving and open to your personal spin. Whether you’re baking for a crowd or indulging solo, this cake makes the moment special.
I love this recipe because it’s a little messy, a little fussy, but totally worth every bite. I hope you enjoy making (and eating!) it as much as I do. If you give it a try, I’d love to hear how your version turns out—drop a comment or share your tweaks!
Happy baking and savor every decadent slice.
FAQs
Can I make this cake a day ahead?
Yes! You can bake the layers a day ahead and wrap them tightly. Frost and assemble the next day for fresher frosting and easier handling.
What if I don’t have espresso powder?
You can substitute with strong brewed coffee, but espresso powder gives a more intense flavor. Instant coffee granules can also work in a pinch.
How do I prevent my caramel from hardening too much?
Don’t overcook the sugar and add warm cream slowly. If it thickens too much, gently reheat it over low heat while stirring.
Can I use a different size cake pan?
Absolutely. If using a 9-inch pan, expect shorter baking time and thinner layers. Adjust accordingly and test with a toothpick.
Is this recipe suitable for beginners?
Yes! The steps are straightforward, and the ingredients are simple. Just take your time with the caramel and frosting for best results.
Pin This Recipe!
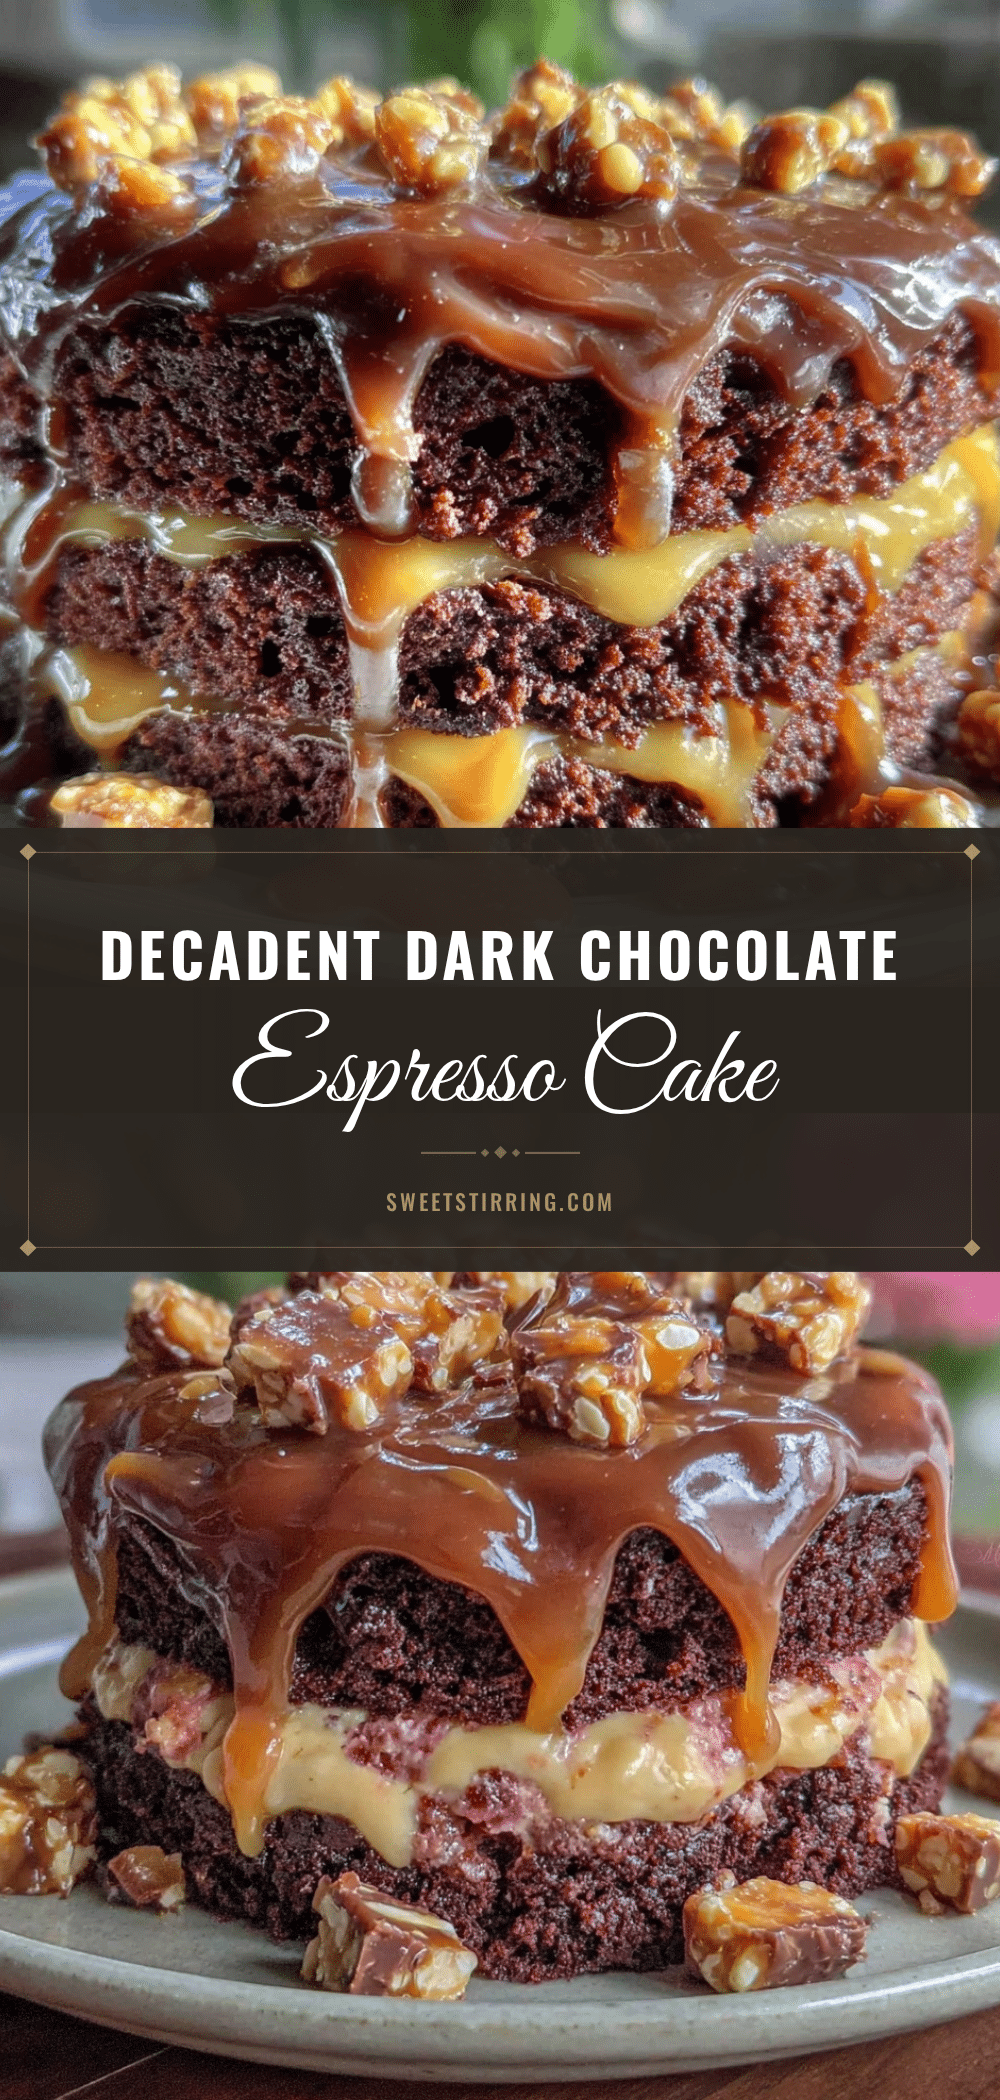
Decadent Dark Chocolate Espresso Layer Cake with Salted Caramel Drip
A rich and glossy dark chocolate espresso layer cake topped with a smooth salted caramel drip, perfect for celebrations or cozy nights.
- Prep Time: 25 minutes
- Cook Time: 35 minutes
- Total Time: 1 hour 50 minutes
- Yield: 12 servings
- Category: Dessert
- Cuisine: American
Ingredients
- All-purpose flour – 2 ½ cups (315g), sifted
- Unsweetened cocoa powder – ¾ cup (75g), preferably Dutch-processed
- Baking powder – 1 ½ tsp
- Baking soda – 1 ½ tsp
- Fine sea salt – 1 tsp
- Granulated sugar – 2 cups (400g)
- Large eggs – 3, room temperature
- Whole milk – 1 cup (240ml), warmed slightly
- Brewed espresso or strong coffee – 1 cup (240ml)
- Vegetable oil – ½ cup (120ml)
- Pure vanilla extract – 2 tsp
- Unsalted butter – 1 cup (227g), softened (for frosting)
- Powdered sugar – 4 cups (480g), sifted
- Espresso powder – 2 tbsp, dissolved in 1 tbsp hot water
- Heavy cream – 2-4 tbsp (for frosting)
- Vanilla extract – 1 tsp (for frosting)
- Granulated sugar – 1 cup (200g) (for caramel)
- Unsalted butter – 6 tbsp (85g), cubed (for caramel)
- Heavy cream – ½ cup (120ml), warmed (for caramel)
- Flaky sea salt – 1 tsp (for caramel)
Instructions
- Preheat oven to 350°F (175°C). Grease two 8-inch cake pans and line bottoms with parchment paper. Set aside.
- In a large bowl, sift together flour, cocoa powder, baking powder, baking soda, and salt. Whisk to combine.
- In a separate bowl, whisk eggs and sugar until slightly pale. Add warmed milk, brewed espresso, vegetable oil, and vanilla extract. Mix well but do not overbeat.
- Gradually add dry ingredients to wet mixture, folding gently or mixing on low speed until just combined. Batter will be thin.
- Divide batter evenly between pans and smooth tops. Bake 30-35 minutes or until toothpick comes out with moist crumbs. Rotate pans halfway through baking.
- Cool cakes in pans for 10 minutes, then turn out onto wire racks to cool completely (about 1 hour).
- For espresso buttercream: Beat softened butter until fluffy (~3 minutes). Gradually add powdered sugar alternating with espresso liquid. Beat until smooth. Add heavy cream to adjust consistency. Stir in vanilla extract.
- For salted caramel drip: In saucepan over medium heat, melt sugar while stirring constantly until amber (7-10 minutes). Remove from heat, whisk in butter until melted, then slowly add warm cream. Stir until smooth. Cool slightly and sprinkle flaky sea salt.
- Assemble cake: Place one layer on serving plate. Spread thick layer of buttercream on top. Add second layer and cover entire cake with thin crumb coat. Chill 20 minutes.
- Apply final smooth layer of frosting. Once frosting is firm but not cold, spoon salted caramel over edges to drip down naturally. Pour remaining caramel on top and spread gently. Chill briefly to set caramel.
Notes
Use fresh espresso or dissolve espresso powder in hot water for best flavor. Avoid overmixing batter to keep cake tender. Make caramel while cakes bake to save time. Warm caramel gently if it thickens before dripping. Chill cake layers completely before frosting to prevent melting buttercream. For gluten-free option, substitute all-purpose flour with 1:1 gluten-free baking flour.
Nutrition
- Serving Size: 1 slice (1/12 of cak
- Calories: 480
- Sugar: 38
- Sodium: 320
- Fat: 28
- Saturated Fat: 15
- Carbohydrates: 55
- Fiber: 4
- Protein: 5
Keywords: dark chocolate cake, espresso cake, salted caramel drip, layered cake, chocolate espresso cake, buttercream frosting, celebration cake