Love this? Save it for later!
Share the inspiration with your friends
It was 10:47 PM on a random Tuesday in late September, and I had this ridiculous, urgent need for something sweet, crunchy, and—honestly—a little bit ridiculous looking. I’d just spent the evening organizing my pantry (a task I only do when I’m avoiding actual work), and there they were: a half-eaten bag of marshmallows, a box of Rice Krispies that was way past its “best by” date, and a bag of candy corn I’d bought on a whim three weeks ago because it was on clearance. I didn’t have a plan. I didn’t have a recipe. But I had a weird idea that just sort of arrived, fully formed, like a late-night visitor who didn’t knock.
I mean, candy corn is one of those things you either love or you pretend to hate, right? I’m firmly in the “love” camp, but I also know it can be a little one-dimensional. So I thought, what if I gave it a job? What if I turned it into something that wasn’t just a handful of sugary triangles but actually part of a treat that had texture, color, and that perfect sticky-sweet pull of a classic Rice Krispie square? The idea felt a little unhinged, and that’s exactly why I had to try it. Maybe you’ve been there—standing in your kitchen at an hour when you should be in bed, staring at ingredients that don’t seem to belong together, and feeling a spark of something that says, “Just try it.”
So I did. I melted butter and marshmallows, stirred in the candy corn until it bled into a beautiful orange-and-yellow swirl, and folded in the crispy cereal. I pressed it into a pan, let it set, and cut it into squares. The first bite was a revelation—the candy corn softened just enough to blend with the marshmallow, creating a sweet, buttery, almost caramel-like flavor, while the Rice Krispies kept everything light and crunchy. It was weird, wonderful, and absolutely perfect. I’ve made these Easy No-Bake Candy Corn Rice Krispie Treats at least a dozen times since that night, and they never fail to make people smile. They’re the kind of recipe that feels like a happy accident—and honestly, those are the best kind.
Why You’ll Love This Recipe
Let me tell you why this recipe has become my go-to for fall gatherings, Halloween parties, and those random Tuesday nights when I need a little joy. I’ve tested this more times than I care to admit, and every batch has been a hit. Here’s what makes it special:
- Quick & Easy: These come together in about 15 minutes, start to finish. No oven, no complicated steps—just a pot, a spatula, and a pan. Perfect for when you need a treat fast.
- Simple Ingredients: You probably have everything in your pantry right now. Marshmallows, butter, Rice Krispies, and candy corn. That’s it. No fancy grocery trips required.
- Perfect for Fall: These are basically autumn in dessert form. The colors are gorgeous, the flavor is nostalgic, and they’re a total crowd-pleaser at Halloween parties, Thanksgiving gatherings, or just a cozy movie night.
- Crowd-Pleaser: I’ve brought these to potlucks, school events, and office parties, and they always disappear fast. Kids love the fun colors, and adults love the unexpected twist on a classic.
- Unbelievably Delicious: The candy corn doesn’t just sit on top—it melts into the marshmallow mixture, creating this amazing buttery, vanilla-caramel flavor that’s way more complex than you’d expect. It’s next-level comfort food.
What makes this recipe different from all the other Rice Krispie treat recipes out there is the way the candy corn integrates. Most recipes just sprinkle it on top, but here, it becomes one with the marshmallow. The texture is perfect—soft, chewy, with that signature crunch from the cereal. And the best part? No baking. No waiting. Just pure, satisfying sweetness that makes you close your eyes after the first bite. It’s comfort food reimagined—faster, easier, and with the same soul-soothing satisfaction.
What Ingredients You Will Need
This recipe uses simple, wholesome ingredients that come together to create something truly special. You don’t need anything fancy—just a few pantry staples and a bag of candy corn. Here’s what you’ll need:
- 3 tablespoons unsalted butter (I prefer salted butter in a pinch, but unsalted gives you more control over the flavor)
- 1 package (10 ounces) regular marshmallows (about 40 large marshmallows, or 4 cups mini marshmallows)
- 1 cup candy corn (plus extra for topping, if you want that classic look)
- 6 cups Rice Krispies cereal (or any crispy rice cereal—store brands work great too)
- ¼ teaspoon salt (optional, but I highly recommend it to balance the sweetness)
- 1 teaspoon vanilla extract (optional, but adds a lovely depth of flavor)
Now, let’s talk about the ingredients a bit more. The butter is your base—it adds richness and helps the marshmallows melt smoothly. I recommend using a good-quality unsalted butter, like Kerrygold or Plugrà, for the best flavor. The marshmallows are the glue that holds everything together, so don’t skimp here. Regular-sized marshmallows work perfectly, but mini marshmallows melt faster if you’re in a hurry.
The candy corn is the star of the show. I like to use classic Brach’s candy corn because it melts beautifully and has that signature honey-vanilla flavor. If you’re feeling adventurous, you can try the autumn-themed mixes that have pumpkin-shaped pieces too. Just make sure your candy corn is fresh—stale candy corn can be hard and won’t melt as well.
For the cereal, Rice Krispies are the classic choice, but any crispy rice cereal will work. I’ve used generic store brands before, and they’re fine—just make sure they’re fresh and crunchy. Stale cereal will result in soggy treats. And don’t forget the salt! It might seem optional, but it really helps cut through the sweetness and makes the flavors pop.
If you need substitutions, here are a few options: use vegan butter and vegan marshmallows for a dairy-free version, or swap in gluten-free crispy rice cereal if needed. The candy corn is naturally gluten-free, so that’s one less thing to worry about.
Equipment Needed
You don’t need a lot of fancy equipment for this recipe, which is one of the reasons I love it. Here’s what you’ll need:
- Large saucepan or pot (at least 4-quart capacity—you need room to stir everything together)
- Wooden spoon or silicone spatula (silicone is great because it won’t scratch your pan)
- 9×13-inch baking dish (or an 8×8-inch dish for thicker treats)
- Parchment paper or wax paper (for easy removal and cleanup)
- Measuring cups and spoons
- Sharp knife or bench scraper (for cutting clean squares)
If you don’t have a 9×13-inch pan, you can use a 9×9-inch square pan for thicker treats—just adjust the cooking time slightly (they’ll need a bit longer to set). I’ve also used a disposable aluminum pan in a pinch, and it works fine. For the spatula, I prefer a silicone one because it doesn’t stick to the marshmallow mixture, but a wooden spoon will do the job. Just make sure to grease it lightly with butter or cooking spray to prevent sticking.
One tip: invest in a good bench scraper for cutting. It makes clean, even cuts without dragging the marshmallow mixture. I learned this the hard way after using a butter knife and ending up with jagged, messy squares. Trust me on this one.
Preparation Method
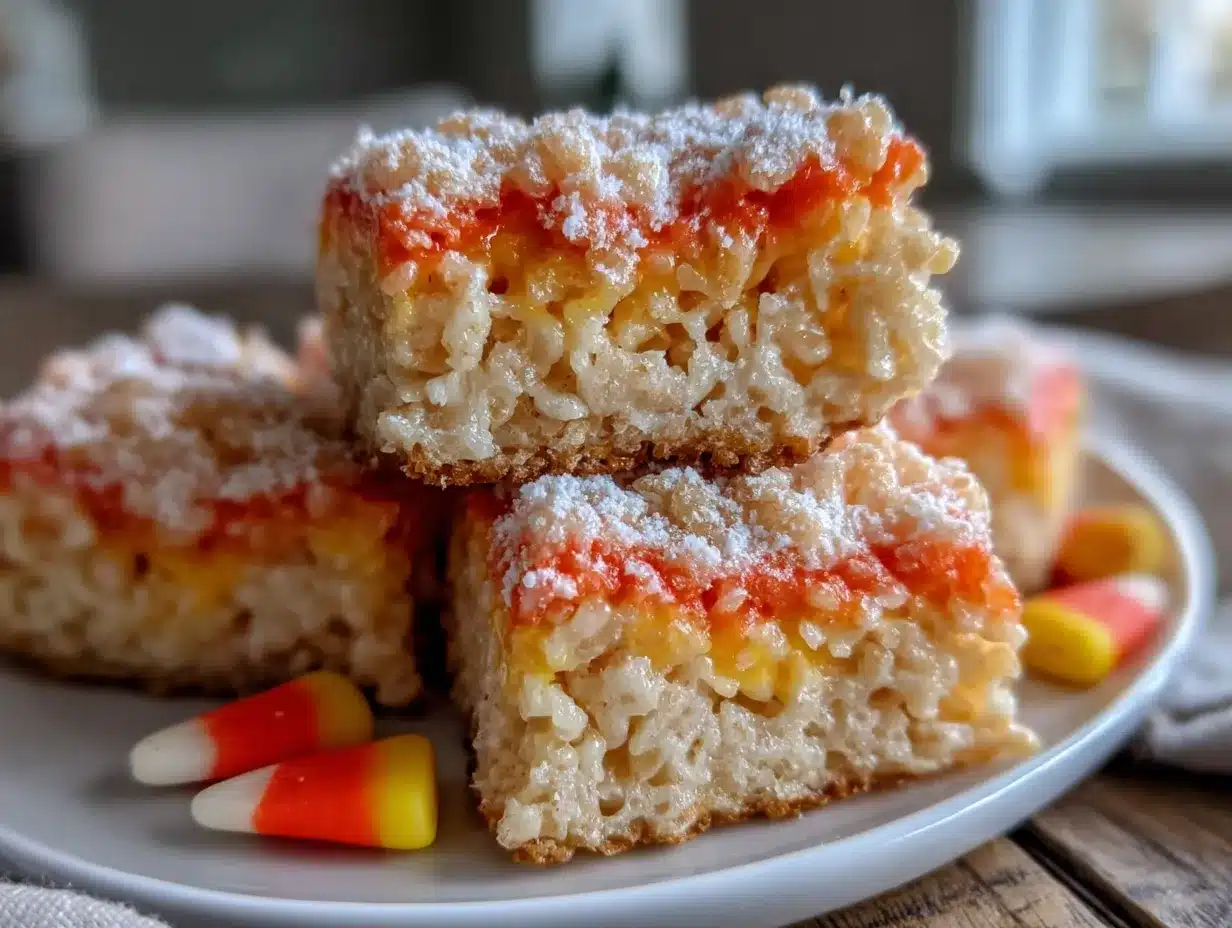
Let’s get to the fun part—making these treats! Follow these steps carefully, and you’ll have perfect, gooey, crunchy squares in no time.
- Prepare your pan: Line a 9×13-inch baking dish with parchment paper, leaving some overhang on two sides. This will make it super easy to lift the treats out later. Lightly grease the parchment with butter or non-stick cooking spray.
- Melt the butter: In a large saucepan over medium-low heat, melt the 3 tablespoons of unsalted butter. Stir occasionally with your silicone spatula until it’s fully melted and just starting to bubble. Don’t let it brown—you want it golden, not burnt.
- Add the marshmallows: Pour the entire package of marshmallows into the pot. Stir constantly as they melt, scraping the bottom and sides to prevent sticking. This should take about 3-4 minutes. The mixture will look smooth and glossy when it’s ready.
- Incorporate the candy corn: Reduce the heat to low. Add 1 cup of candy corn to the marshmallow mixture and stir gently. The candy corn will start to soften and melt, creating streaks of orange and yellow. Don’t overmix—you want some visible color variation. This is where the magic happens!
- Add vanilla and salt: If using, stir in the vanilla extract and salt. The salt is a game-changer—it balances the sweetness and makes the flavors pop. Stir until everything is well combined.
- Fold in the cereal: Remove the pot from heat. Add 6 cups of Rice Krispies cereal all at once. Gently fold the cereal into the marshmallow mixture using a folding motion—don’t stir too vigorously or you’ll crush the cereal. You want every piece coated, but still crunchy.
- Press into the pan: Transfer the mixture to your prepared pan. Using a greased spatula or your hands (lightly buttered), press the mixture evenly into the pan. Don’t press too hard—you want them to stay light and airy, not dense and hard.
- Add extra candy corn (optional): If you want that classic look, press a few extra pieces of candy corn onto the top of the treats while they’re still warm. This makes them look festive and gives a little extra sweetness in each bite.
- Let them set: Allow the treats to cool at room temperature for at least 30 minutes. They’ll firm up as they cool. Don’t rush this step—if you cut them too soon, they’ll fall apart.
- Cut and serve: Once set, lift the treats out of the pan using the parchment overhang. Place them on a cutting board and use a sharp knife or bench scraper to cut into squares. I like to cut them into 12 large squares or 24 smaller ones, depending on the occasion.
Here’s a pro tip: if the mixture starts to stick to your spatula while pressing, lightly grease the spatula with butter or cooking spray. And if you’re making these with kids, let them help with the pressing—it’s a fun, hands-on activity that doesn’t require any heat.
Cooking Tips & Techniques
I’ve made these treats more times than I can count, and I’ve learned a few things along the way. Here are my best tips for perfect results every time:
- Don’t overheat the marshmallows: This is the number one mistake people make. If you cook the marshmallows too long or on too high heat, they’ll become hard and rubbery. Keep the heat low and stir constantly. The moment they’re smooth and glossy, take them off the heat.
- Use fresh marshmallows: Stale marshmallows don’t melt as smoothly and can leave lumps in your mixture. If your marshmallows are a bit old, add a tablespoon of water to help them melt.
- Work quickly: Once the cereal is added, the mixture starts to set fast. Have your pan ready and greased before you start. If it gets too stiff, you can microwave it for 10 seconds to soften it up again.
- Grease everything: Grease your spatula, your hands, and even the inside of your measuring cup for the marshmallows. This prevents sticking and makes cleanup a breeze.
- Don’t press too hard: I learned this the hard way after making a batch that was as hard as a brick. Gentle pressure is all you need. The treats should be light and airy, not compressed.
- Let them cool completely: Patience is key. If you cut them too soon, they’ll be sticky and messy. Give them a full 30 minutes at room temperature, or even pop them in the fridge for 15 minutes if you’re in a hurry.
One of my biggest failures? I once tried to double the recipe in a pot that was too small, and the mixture overflowed onto the stove. It was a sticky, sugary mess that took forever to clean. So, make sure your pot is big enough—at least 4 quarts for a single batch.
Variations & Adaptations
This recipe is incredibly versatile, and I’ve tried several variations over the years. Here are some of my favorites:
- Chocolate Drizzle: Melt ½ cup of chocolate chips with 1 teaspoon of coconut oil and drizzle it over the top of the treats before they set. The chocolate pairs beautifully with the sweet, buttery candy corn flavor.
- Peanut Butter Twist: Add ¼ cup of creamy peanut butter to the marshmallow mixture along with the candy corn. The salty-sweet combo is irresistible. Just make sure to stir until smooth.
- Spiced Autumn Version: Add ½ teaspoon of pumpkin pie spice or cinnamon to the marshmallow mixture. It gives the treats a warm, cozy fall flavor that’s perfect for Thanksgiving.
- Gluten-Free Option: Use a gluten-free crispy rice cereal (like Nature’s Path or Erewhon) and double-check that your candy corn is certified gluten-free. Most brands are, but it’s always good to verify.
- Vegan Version: Use vegan butter (like Miyoko’s or Earth Balance) and vegan marshmallows (like Dandies). The flavor and texture are almost identical to the original.
- Halloween Mix: Swap half the candy corn for candy corn pumpkins or autumn-colored M&Ms. It adds extra color and a different texture.
One of my personal favorite variations is the chocolate drizzle version. I made it for a Halloween party last year, and people couldn’t stop talking about it. The chocolate adds a touch of sophistication that balances the sweetness perfectly.
Serving & Storage Suggestions
These treats are best served at room temperature, right after they’ve set. The texture is perfect—soft, chewy, and crunchy all at once. Here are some ideas for serving:
- Presentation: Arrange the squares on a festive platter or cake stand. For Halloween, I like to add a few extra candy corn pieces around the edges for decoration.
- Pairings: These treats pair beautifully with a cold glass of milk, a warm cup of apple cider, or even a pumpkin spice latte. For a fun dessert board, serve them alongside other fall treats like caramel apples or pumpkin cookies.
- Storing: Store leftovers in an airtight container at room temperature for up to 5 days. I like to layer them between sheets of parchment paper to prevent sticking. Do not refrigerate—the cold can make them hard and dry.
- Freezing: These treats freeze beautifully! Wrap each square individually in plastic wrap, then place them in a freezer-safe bag or container. They’ll keep for up to 3 months. To thaw, let them sit at room temperature for about 30 minutes.
- Reheating: If your treats have gotten a bit stale, pop them in the microwave for 5-10 seconds. This will soften them up and bring back that fresh-from-the-pan texture.
One thing I’ve noticed is that these treats actually get better after a day or two. The flavors meld together, and the candy corn flavor becomes more pronounced. So don’t worry if you make them a day ahead—they’ll still be amazing.
Nutritional Information & Benefits
Let’s be real—these are a treat, not a health food. But that doesn’t mean they can’t fit into a balanced lifestyle! Here’s the approximate nutritional breakdown for one square (based on 12 servings):
- Calories: 220
- Total Fat: 6g
- Saturated Fat: 3.5g
- Carbohydrates: 42g
- Sugar: 28g
- Protein: 2g
- Sodium: 180mg
While these aren’t exactly a superfood, there are a few bright spots. The Rice Krispies provide a small amount of iron and B vitamins (since they’re fortified). The butter adds a touch of vitamin A, and the candy corn—well, it’s mostly sugar, but it does bring joy, which has its own health benefits!
If you’re watching your sugar intake, you can reduce the candy corn to ½ cup or use a sugar-free marshmallow alternative. For a lower-calorie version, use a light butter spray and reduce the marshmallow quantity slightly. But honestly, I think these are best enjoyed as an occasional indulgence—life is too short not to enjoy a little sweetness.
For those with dietary restrictions, please note that this recipe contains dairy (butter) and may contain gluten depending on the cereal you use. Always check labels if you’re serving someone with allergies.
Conclusion
These Easy No-Bake Candy Corn Rice Krispie Treats are more than just a dessert—they’re a little piece of autumn joy that you can make in under 20 minutes. They’re fun, festive, and unbelievably delicious, with that perfect balance of sweet, buttery, and crunchy that makes you reach for seconds. Whether you’re making them for a Halloween party, a Thanksgiving dessert table, or just a cozy night in, they’re guaranteed to bring smiles.
I love this recipe because it’s proof that the best ideas often come from late-night pantry experiments. It’s simple enough for kids to help with, impressive enough to share with friends, and forgiving enough that even a beginner can nail it on the first try. So go ahead—grab that bag of candy corn and give it a try. I promise you won’t regret it.
If you make these, I’d love to hear about it! Leave a comment below and let me know how they turned out. Did you add any fun variations? Share your photos on social media and tag me—I can’t wait to see your creations. Happy fall, and happy snacking!
Frequently Asked Questions
Can I use stale candy corn for this recipe?
I wouldn’t recommend it. Stale candy corn is hard and dry, and it won’t melt properly into the marshmallow mixture. Fresh candy corn is soft and pliable, which is exactly what you need for that smooth, creamy texture. If your candy corn is a bit old, try microwaving it for 10 seconds to soften it before adding it to the pot.
Can I make these treats ahead of time?
Absolutely! These treats actually taste great the next day because the flavors have time to meld together. Just store them in an airtight container at room temperature for up to 5 days. If you’re making them for a party, I recommend making them the day before—they’ll be perfectly set and easy to cut.
Why did my treats turn out hard?
This usually happens when the marshmallow mixture is overheated or when the treats are pressed too firmly into the pan. To avoid this, keep the heat low when melting the marshmallows and use gentle pressure when pressing the mixture into the pan. Your treats should be light and airy, not dense and tough.
Can I use a different type of cereal?
Yes! While Rice Krispies are the classic choice, you can experiment with other crispy cereals. Fruity Pebbles would add a fun pop of color, and Cocoa Krispies would give a chocolatey twist. Just keep in mind that different cereals have different textures, so your results may vary slightly.
How do I cut these treats without them sticking to the knife?
This is a common issue, but it’s easy to fix. Lightly grease your knife or bench scraper with butter or non-stick cooking spray before cutting. You can also run the knife under hot water and wipe it dry between cuts. For the cleanest cuts, let the treats cool completely before slicing.
Pin This Recipe!
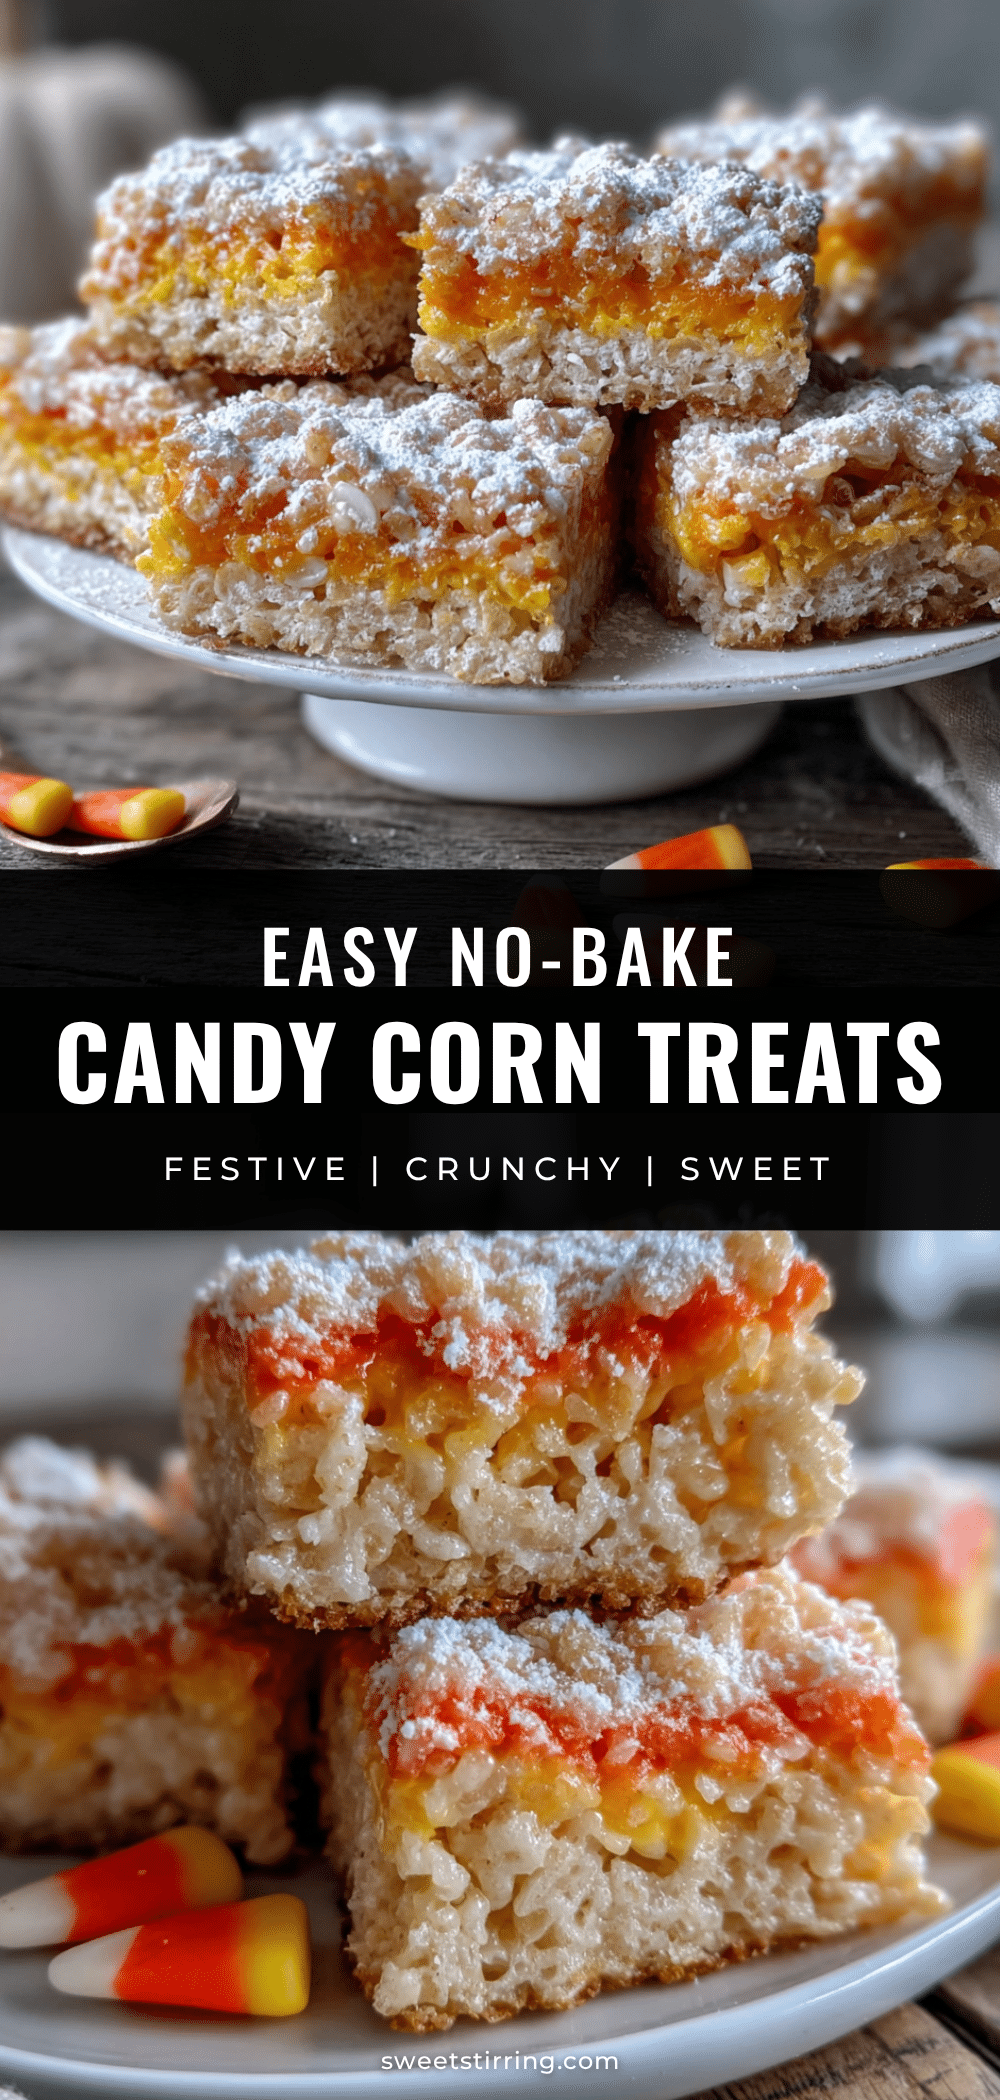
Easy No-Bake Candy Corn Rice Krispie Treats
These Easy No-Bake Candy Corn Rice Krispie Treats are a quick, fun, and festive fall dessert that combines the classic crunch of Rice Krispies with the sweet, buttery flavor of melted candy corn. Perfect for Halloween parties, Thanksgiving gatherings, or a cozy night in, they come together in just 15 minutes with simple pantry ingredients.
- Prep Time: 10 minutes
- Cook Time: 5 minutes
- Total Time: 15 minutes
- Yield: 12 servings 1x
- Category: Dessert
- Cuisine: American
Ingredients
- 3 tablespoons unsalted butter
- 1 package (10 ounces) regular marshmallows (about 40 large or 4 cups mini)
- 1 cup candy corn (plus extra for topping, optional)
- 6 cups Rice Krispies cereal (or any crispy rice cereal)
- ¼ teaspoon salt (optional)
- 1 teaspoon vanilla extract (optional)
Instructions
- Line a 9×13-inch baking dish with parchment paper, leaving overhang on two sides. Lightly grease the parchment with butter or non-stick cooking spray.
- In a large saucepan over medium-low heat, melt 3 tablespoons unsalted butter. Stir occasionally until fully melted and just starting to bubble; do not let it brown.
- Add the entire package of marshmallows to the pot. Stir constantly until smooth and glossy, about 3-4 minutes.
- Reduce heat to low. Add 1 cup candy corn and stir gently until it softens and creates streaks of orange and yellow. Do not overmix.
- If using, stir in vanilla extract and salt until well combined.
- Remove pot from heat. Add 6 cups Rice Krispies cereal all at once. Gently fold until every piece is coated, being careful not to crush the cereal.
- Transfer mixture to prepared pan. Using a greased spatula or lightly buttered hands, press evenly into the pan with gentle pressure.
- If desired, press extra candy corn pieces onto the top while still warm.
- Let treats cool at room temperature for at least 30 minutes until firm.
- Lift treats out using parchment overhang, place on a cutting board, and cut into squares with a sharp knife or bench scraper.
Notes
Use fresh candy corn for best melting. Do not overheat marshmallows or they will become hard. Grease spatula and hands to prevent sticking. Let treats cool completely before cutting for clean squares. Store in an airtight container at room temperature for up to 5 days. Freeze individually wrapped for up to 3 months.
Nutrition
- Serving Size: 1 square
- Calories: 220
- Sugar: 28
- Sodium: 180
- Fat: 6
- Saturated Fat: 3.5
- Carbohydrates: 42
- Protein: 2
Keywords: candy corn, Rice Krispie treats, no-bake, fall dessert, Halloween treats, easy dessert, marshmallow treats



