Love this? Save it for later!
Share the inspiration with your friends
“You won’t believe how simple this is,” my neighbor Lisa said as she handed me a plate of these vibrant red, white, and blue cheesecake bars last Fourth of July. I was standing on her porch, juggling a plate of half-melted hot dogs and a glass of lemonade, when the sweet, creamy dessert caught my eye. Honestly, I wasn’t expecting much—no-bake desserts can sometimes be a bit… meh. But one bite of those Easy No-Bake Red White and Blue Cheesecake Bars, and I was hooked.
Lisa confessed she’d whipped them up in under 20 minutes, with zero oven time, just in time for the block party that afternoon. She’d tossed together a simple crumb crust, a luscious cream cheese filling, and topped it with fresh berries that popped like fireworks on the tongue. The whole thing was bright, refreshing, and looked like a little celebration on a plate.
Maybe you’ve been there—trying to find a dessert that’s as festive as it is fuss-free. Let me tell you, this recipe stuck with me because it’s the kind of patriotic treat that never feels like a chore. It’s the perfect answer when you want to impress without the stress or the heat of the oven, especially on those blazing summer days when you just want to keep things cool.
So, whether you’re planning your own neighborhood cookout, a family picnic, or just craving a slice of Americana with a creamy twist, these cheesecake bars are the ones you’ll keep reaching for. I can’t wait to share the full scoop with you—because honestly, this is my go-to for easy, festive desserts that bring the party to your table.
Why You’ll Love This Recipe
I’ve tested this Easy No-Bake Red White and Blue Cheesecake Bars recipe countless times—sometimes for a quick treat after dinner, other times for full-on celebrations. It’s a recipe that delivers every single time, and here’s why you’ll love it as much as I do:
- Quick & Easy: Comes together in under 30 minutes without needing an oven, making it perfect for last-minute dessert cravings or hot summer days.
- Simple Ingredients: Uses everyday pantry staples and fresh berries—you probably already have most of these on hand.
- Perfect for Patriotic Occasions: Ideal for Memorial Day, Fourth of July, Labor Day, or any time you want a splash of red, white, and blue on your dessert table.
- Crowd-Pleaser: Loved by kids and adults alike, these bars balance creamy sweetness with refreshing berry bursts.
- Unbelievably Delicious: The creamy cheesecake filling with a crunchy crust and juicy berries creates a texture and flavor combo that keeps everyone coming back for more.
What makes this recipe stand out? The no-bake method means no oven worries, and blending the cream cheese with whipped topping gives the filling a light, airy texture that feels indulgent but never heavy. Plus, swapping in fresh blueberries and strawberries adds natural sweetness and vibrant color that screams celebration. Honestly, it’s the kind of dessert that makes you close your eyes after the first bite and smile—comfort food with a patriotic twist.
What Ingredients You Will Need
This Easy No-Bake Red White and Blue Cheesecake Bars recipe relies on straightforward, wholesome ingredients to deliver bold flavor and a satisfying texture without fuss. Most are pantry staples, while the fresh berries add that seasonal pop. Here’s what you’ll need:
- For the Crust:
- 1 ½ cups graham cracker crumbs (you can crush your own or grab pre-packaged; I prefer Honey Maid for the perfect sweetness)
- ⅓ cup unsalted butter, melted (adds richness and helps bind the crust)
- 2 tablespoons granulated sugar (balances the buttery crust)
- For the Filling:
- 16 oz (450g) cream cheese, softened (use full-fat for best creaminess; I recommend Philadelphia brand)
- 1 cup powdered sugar (for smooth sweetness)
- 1 teaspoon vanilla extract (pure vanilla makes a big difference here)
- 1 ½ cups heavy whipping cream, cold (whipped to soft peaks for that fluffy texture)
- For the Topping:
- 1 cup fresh strawberries, sliced (in summer, fresh is best; frozen works in a pinch but can be watery)
- 1 cup fresh blueberries (look for plump, firm berries for the best burst)
- Optional: a few fresh mint leaves for garnish (adds a fresh aroma and color contrast)
Substitution tips: For a lighter version, you can swap heavy cream with coconut cream, and use dairy-free cream cheese if needed. Gluten-free graham cracker crumbs or crushed gluten-free cookies work perfectly for those with gluten sensitivity. If fresh berries are scarce, frozen mixed berries can be used, but drain them well to avoid extra moisture.
Equipment Needed
To whip up these Easy No-Bake Red White and Blue Cheesecake Bars, you don’t need anything fancy—just some basic kitchen tools that you probably already have.
- 8×8 inch (20×20 cm) square baking pan: This size is perfect for the bars. If you don’t have one, a similar-sized glass or metal dish will do.
- Mixing bowls: One large for the crust and one medium for the filling.
- Electric mixer or stand mixer: Essential for whipping the cream and blending the cream cheese smoothly. Hand mixers work too—just be prepared for a bit more elbow grease.
- Rubber spatula: Helps scrape down the bowl and fold in whipped cream gently.
- Measuring cups and spoons: For precise ingredient amounts.
- Food processor (optional): If you want to crush the graham crackers quickly and finely, but a rolling pin and zip-top bag work just fine.
Personally, I’ve used both hand mixers and stand mixers for this recipe. The stand mixer makes whipping cream a breeze and frees up your hands for other tasks. If you’re on a budget, a sturdy whisk and a little patience will get you there too.
Preparation Method
- Prepare the crust: In a medium bowl, combine 1 ½ cups graham cracker crumbs, ⅓ cup melted unsalted butter, and 2 tablespoons granulated sugar. Stir until the mixture looks like wet sand and holds together when pressed. (About 3 minutes)
- Press the crust into the pan: Transfer the crumb mixture into your 8×8 inch pan. Use the back of a spoon or the bottom of a glass to press it down firmly and evenly. This helps create a sturdy base for your bars. Chill the crust in the fridge while you prepare the filling. (10 minutes)
- Whip the cream: In a clean bowl, pour 1 ½ cups cold heavy whipping cream. Using an electric mixer, whip on medium-high speed until soft peaks form—this means the cream holds its shape but still looks fluffy. Be careful not to overwhip or it will turn grainy. (3-4 minutes)
- Make the cheesecake filling: In another large bowl, beat 16 oz softened cream cheese, 1 cup powdered sugar, and 1 teaspoon vanilla extract until smooth and creamy. This usually takes about 2-3 minutes. Scrape down the sides with a spatula to avoid lumps.
- Fold in whipped cream: Gently fold the whipped cream into the cream cheese mixture using a rubber spatula. Use slow, sweeping motions to keep it light and airy—this is key to that melt-in-your-mouth texture. (2 minutes)
- Assemble the bars: Spread the cheesecake filling evenly over the chilled crust. Smooth the top with your spatula to make a clean surface. (5 minutes)
- Add the topping: Arrange the sliced strawberries and blueberries on top in a fun pattern—rows, stripes, or a loose scatter. This part is your chance to get creative! (5 minutes)
- Chill to set: Cover the pan with plastic wrap and refrigerate for at least 4 hours, or preferably overnight. This gives the filling time to firm up and the flavors to meld together.
- Slice and serve: Use a sharp knife dipped in hot water and wiped dry between cuts to slice neat bars. Serve chilled and enjoy the cool, creamy, berry-studded goodness!
Quick tip: If the crust feels crumbly when you press it, add a tiny splash more melted butter. Also, if your cream cheese isn’t soft enough, it can lead to lumps, so plan ahead to bring it to room temperature.
Cooking Tips & Techniques
Making these cheesecake bars is straightforward, but a few tips from my experience will help you avoid common pitfalls and get the best results every time.
- Softening cream cheese: Don’t rush this step. If your cream cheese is cold, it won’t blend smoothly. I usually let mine sit on the counter for about 30 minutes before starting.
- Whipping cream perfectly: Cold cream whips better and faster. Also, be patient—stop whipping once you see soft peaks. Overwhipping turns it grainy and buttery, which nobody wants.
- Folding technique: Folding the whipped cream into the cream cheese mixture gently keeps the filling light. Stirring too vigorously can deflate the whipped cream and make the bars dense.
- Crust binding: The melted butter is essential for holding the crust together. If your crust feels loose, add a tablespoon more butter next time.
- Fruit freshness: Use ripe strawberries and firm blueberries for the best texture. Washing and drying the berries thoroughly prevents extra moisture from making the bars soggy.
- Chilling time: Don’t skip the chilling step! It’s tempting to dig in early, but the bars need time to set so they slice cleanly and hold their shape.
Honestly, I once tried to speed things up and only chilled for 2 hours—big mistake. The filling was too soft, and the bars fell apart when sliced. Lesson learned: patience pays off!
Variations & Adaptations
This recipe is a fun canvas that you can easily tweak to suit your tastes, dietary needs, or the season.
- Berry swaps: Try raspberries or blackberries for a deeper color contrast. In the fall, diced fresh peaches or mangoes add a tropical twist.
- Crust alternatives: Use crushed vanilla wafers or gluten-free cookies instead of graham crackers to switch up the flavor and cater to gluten-free diets.
- Dairy-free version: Substitute vegan cream cheese and coconut cream for a plant-based take. The texture changes slightly but stays delightfully creamy.
- Layered look: For a fun twist, divide the filling and tint a portion with natural red or blue food coloring (like beet juice or blueberry powder) before layering for a striped effect.
- Personal favorite: I once added a thin layer of homemade blueberry jam on the crust before spreading the filling. It added a tangy surprise that everyone loved.
Serving & Storage Suggestions
These cheesecake bars are best served chilled, straight from the fridge, where their creamy texture shines. They look fantastic on a simple white plate with a sprig of mint or a few extra berries on the side for a festive touch.
Pair them with a cold glass of lemonade, iced tea, or even a light sparkling wine to complement the creamy, fruity flavors. For a casual picnic, they’re a refreshing sweet bite after savory dishes like grilled chicken or crispy garlic chicken.
Store leftovers covered tightly in the refrigerator for up to 3 days. If you want to keep them longer, wrap individual bars in plastic wrap and freeze for up to a month. Thaw them in the fridge overnight before serving.
Keep in mind that the flavors settle and intensify after a day, so the bars often taste even better the next day. Just watch out for excess moisture from the fruit topping—if it looks watery, blot gently with a paper towel before serving.
Nutritional Information & Benefits
Each serving of these cheesecake bars offers a creamy indulgence balanced by fresh, antioxidant-rich berries. Here’s a rough estimate per serving (based on 9 bars):
| Calories | ~280 kcal |
|---|---|
| Fat | 18g (mostly from cream cheese and butter) |
| Carbohydrates | 22g (includes natural sugars from berries) |
| Protein | 4g |
The fresh blueberries and strawberries bring vitamin C and antioxidants to the table, making this dessert a bit more than just a sweet treat. For those watching carbs, using sugar substitutes or low-carb crust options can easily adapt this recipe.
Keep in mind the cream cheese and butter add richness, so enjoy these bars as an occasional indulgence paired with active, balanced meals. Personally, I love how this dessert satisfies sweet cravings without complicated prep or artificial ingredients.
Conclusion
Easy No-Bake Red White and Blue Cheesecake Bars are my go-to when I want a dessert that’s festive, fuss-free, and delicious. Whether you’re hosting a summer barbecue or just need a quick, patriotic treat, this recipe hits the spot every time. You can easily customize it with your favorite berries or dietary preferences, making it truly your own.
I love how these bars bring everyone together—kids adore the colorful fruit, and adults appreciate the creamy texture without the oven heat. Give it a try, and let me know how your version turns out! Don’t hesitate to tweak the toppings or crust to your liking—this recipe welcomes creativity.
Feel free to leave a comment sharing your favorite twists or questions, and share this recipe with friends who might want an easy dessert for their next celebration. Remember, sometimes the simplest recipes bring the biggest smiles!
FAQs
Can I make these cheesecake bars ahead of time?
Absolutely! These bars actually taste better after chilling overnight. Just cover and store them in the fridge until ready to serve.
What can I use if I don’t have graham crackers?
You can substitute crushed vanilla wafers, digestive biscuits, or gluten-free cookies depending on your preference and dietary needs.
How do I prevent the crust from becoming soggy?
Press the crust firmly and chill it well before adding the filling. Also, make sure to pat dry any wet berries before placing them on top.
Can this recipe be made vegan?
Yes! Swap the cream cheese for vegan cream cheese and use coconut cream instead of heavy whipping cream. Use a vegan butter substitute for the crust as well.
How should I store leftovers?
Keep the bars covered in the refrigerator for up to 3 days. You can also freeze them in individual wraps for up to a month—just thaw in the fridge before eating.
Pin This Recipe!
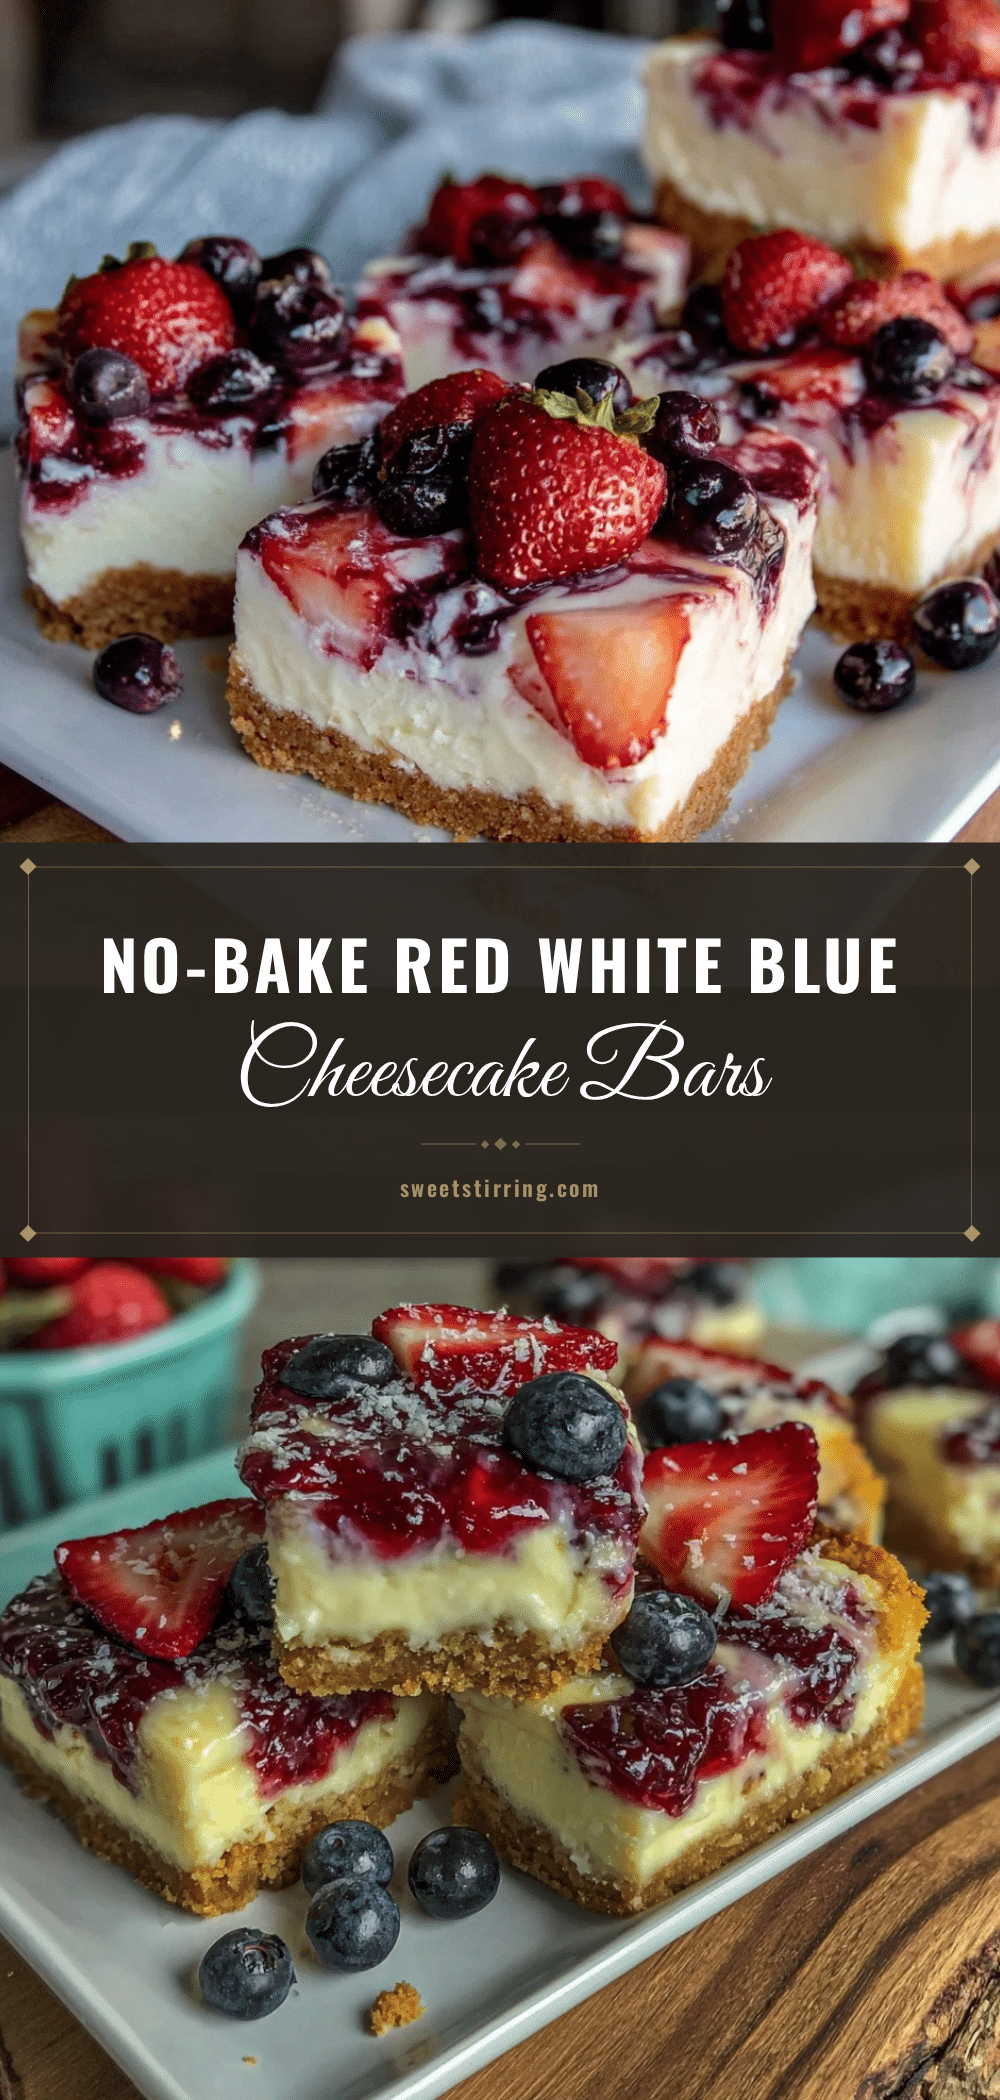
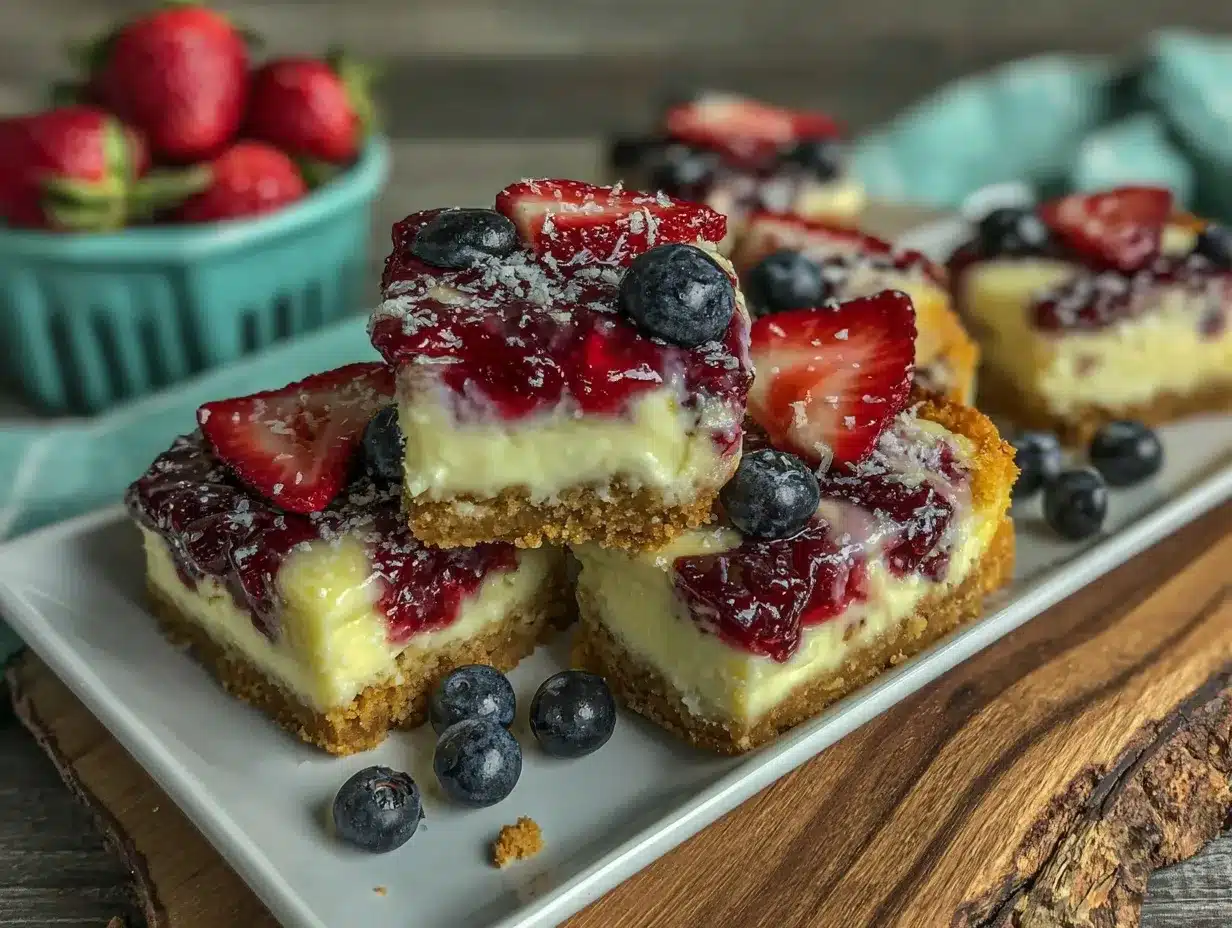
Easy No-Bake Red White and Blue Cheesecake Bars
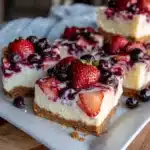
A quick and festive no-bake cheesecake bar recipe featuring a graham cracker crust, creamy filling, and fresh strawberries and blueberries for a patriotic dessert perfect for summer celebrations.
- Prep Time: 20 minutes
- Cook Time: 0 minutes
- Total Time: 4 hours 20 minutes
- Yield: 9 servings 1x
- Category: Dessert
- Cuisine: American
Ingredients
- 1 ½ cups graham cracker crumbs
- ⅓ cup unsalted butter, melted
- 2 tablespoons granulated sugar
- 16 oz cream cheese, softened
- 1 cup powdered sugar
- 1 teaspoon vanilla extract
- 1 ½ cups heavy whipping cream, cold
- 1 cup fresh strawberries, sliced
- 1 cup fresh blueberries
- Optional: fresh mint leaves for garnish
Instructions
- In a medium bowl, combine graham cracker crumbs, melted butter, and granulated sugar. Stir until mixture resembles wet sand and holds together when pressed.
- Press the crumb mixture firmly and evenly into an 8×8 inch pan. Chill the crust in the refrigerator for 10 minutes.
- In a clean bowl, whip the cold heavy cream with an electric mixer on medium-high speed until soft peaks form (3-4 minutes).
- In a large bowl, beat softened cream cheese, powdered sugar, and vanilla extract until smooth and creamy (2-3 minutes).
- Gently fold the whipped cream into the cream cheese mixture using a rubber spatula with slow, sweeping motions (2 minutes).
- Spread the cheesecake filling evenly over the chilled crust and smooth the top (5 minutes).
- Arrange sliced strawberries and blueberries on top in a desired pattern (5 minutes).
- Cover the pan with plastic wrap and refrigerate for at least 4 hours or overnight to set.
- Slice into bars using a sharp knife dipped in hot water and wiped dry between cuts. Serve chilled.
Notes
Bring cream cheese to room temperature before mixing to avoid lumps. Use cold heavy cream and whip to soft peaks to avoid grainy texture. Press crust firmly and chill well to prevent sogginess. Pat dry berries before topping to avoid excess moisture. Chill bars at least 4 hours or overnight for best results. For gluten-free or dairy-free versions, substitute ingredients as suggested.
Nutrition
- Serving Size: 1 bar (1/9th of reci
- Calories: 280
- Fat: 18
- Carbohydrates: 22
- Protein: 4
Keywords: no-bake cheesecake bars, patriotic dessert, red white and blue dessert, Fourth of July dessert, easy cheesecake bars, summer dessert