Love this? Save it for later!
Share the inspiration with your friends
This was supposed to be a batch of classic chocolate-covered pretzel rods. I had the melting wafers ready, the sprinkles laid out, and a vision of neat, elegant treats for a Halloween party. But somewhere between answering the door for a package and my phone buzzing with a family group chat, I grabbed the wrong bag from the pantry. Instead of the milk chocolate, I pulled out a bag of white chocolate chips I had stashed for a different project. I was already running late, the kitchen was a mess, and I realized I didn’t have any of the usual Halloween sprinkles left. I stood there, staring at the white chocolate and the plain pretzel rods, feeling that familiar knot of panic. What came out of that moment was nothing like the plan—and better.
I mean, honestly, I almost scraped the whole idea. But then I spotted the bag of slivered almonds in the cupboard, and something clicked. Almonds look like fingernails, right? A little dab of red gel icing at the base, and suddenly these weren’t just pretzel rods anymore—they were witch fingers. It was one of those rare, beautiful kitchen accidents where a mistake turns into something more creative than the original plan. I dipped the first one, pressed on an almond, and let out a little laugh. These were going to be the hit of the party, and they didn’t even take any extra effort.
You know that feeling when you’re about to give up on a recipe, but then a weird idea saves the day? That was this moment. The white chocolate gave them a slightly sweeter, creamier finish that actually worked better with the salty pretzel than the dark chocolate would have. And the almond? It added this wonderful crunch that made them feel like a real treat, not just a kids’ craft. Maybe you’ve been there—staring at a half-finished project, wondering if you should just scrap it and order pizza. Let me tell you, pushing through that moment is why I keep making these witch finger pretzel rods every single October. They remind me that the best recipes often come from the messiest moments.
Why You’ll Love This Recipe
I’ve tested a lot of Halloween treats over the years, and these witch finger pretzel rods have become the one I come back to again and again. They are not just cute—they are genuinely foolproof. After a few trial runs where the chocolate seized or the almonds slid off, I figured out the exact method that works every single time. Here is why I think you will love them as much as I do:
- Quick & Easy: These come together in about 20 minutes of active work. Perfect for last-minute Halloween prep or a fun weekend activity with kids.
- Simple Ingredients: You only need four main things—pretzel rods, white chocolate, slivered almonds, and a dab of red icing. No fancy baking supplies required.
- Perfect for Halloween Parties: They look spooky and impressive without any complicated decorating skills. Great for classroom treats, office parties, or a spooky movie night.
- Crowd-Pleaser: The salty-sweet combo gets everyone. I have seen kids and adults alike grab three or four before walking away.
- Unbelievably Delicious: The creamy white chocolate against the crunchy, salty pretzel with that nutty almond finish is next-level comfort food. It is the kind of treat that makes you close your eyes after the first bite.
What makes this recipe different from the dozens of other spooky pretzel recipes out there? It is the texture. Most versions use candy melts or colored chocolate that can taste waxy. Using real white chocolate chips (the kind with cocoa butter) gives a much creamier mouthfeel. Plus, the secret is toasting the almonds just slightly before pressing them on. It brings out their natural oils and makes them look even more like creepy fingernails. This is comfort food reimagined for the Halloween season—spooky, sweet, and so satisfying.
What Ingredients You Will Need
This recipe uses simple, wholesome ingredients to deliver that perfect balance of salty and sweet. Most of these are pantry staples for bakers, and the few specialty items are easy to find at any grocery store during the Halloween season.
For the Pretzel Rods
- Pretzel rods: 12 standard-size rods. Look for thick, sturdy ones that won’t snap easily when you dip them. I prefer the brand Snyder’s of Hanover for their consistent shape and salt level.
- White chocolate chips or melting wafers: 1 cup (about 6 ounces). I recommend Ghirardelli white chocolate chips for the smoothest melt and best flavor. Avoid white candy melts if you can—they often contain palm oil and taste artificial.
- Coconut oil or shortening: 1 teaspoon (optional). This helps thin the white chocolate for a smoother dip. It is not strictly necessary but makes a big difference in the final coating.
For the Witch Fingers

- Slivered almonds: 24 pieces (about 1/4 cup). You want natural, unroasted slivered almonds. They are flatter and wider than sliced almonds, which makes them perfect for fingernails.
- Red gel icing or red food coloring: A small tube. Gel icing works best because it stays put and doesn’t run. I use Wilton red icing tubes—they are easy to control.
- Green food coloring (optional): For tinting the white chocolate if you want green witch fingers. A few drops of gel coloring works perfectly.
Ingredient Tips and Substitutions
For the white chocolate, look for chips that list cocoa butter as an ingredient—that is the real deal. If you want a dairy-free version, use dairy-free white chocolate chips and skip the butter. For a nut-free option, you can use a sliced dried apricot or a small piece of banana chip for the fingernail instead of almonds. It changes the look slightly but still gives that creepy finger effect. I have also seen people use a small dollop of green-tinted frosting for the nail bed, but the almond gives the best texture.
If you cannot find pretzel rods, thick pretzel sticks work in a pinch. They are shorter, so you will get more pieces per batch, but the dipping can be a bit trickier with the shorter length. For the red gel, any brand works—just make sure it is a gel or paste, not liquid food coloring, which will bead up on the chocolate.
Equipment Needed
You do not need a lot of fancy equipment for this recipe, which is part of its charm. Here is what you will need to have on hand:
- Baking sheet: A standard half-sheet pan lined with parchment paper or a silicone baking mat. The non-stick surface is crucial for easy removal.
- Microwave-safe bowl: A medium glass or ceramic bowl for melting the white chocolate. I use a Pyrex measuring cup—it is deep enough to dip the pretzels without making a mess.
- Small saucepan (optional): If you prefer stovetop melting, a small saucepan over very low heat works too. I have done it both ways, and the microwave is faster with less cleanup.
- Toothpicks: For dabbing the red gel onto the almond fingernails. A small offset spatula also works, but toothpicks give you more control.
- Piping bag or small zip-top bag: For adding the red gel details. A zip-top bag with the corner snipped off works perfectly and costs nothing.
If you do not have a microwave, you can melt the white chocolate in a double boiler. I have done this many times when my microwave was occupied with other things. Just make sure the water does not touch the bottom of the bowl, or the chocolate can seize. For the parchment paper, I have used wax paper in a pinch, but parchment is better because it does not stick to the chocolate as much. Budget-friendly option: use a clean, empty ketchup bottle for the red gel decoration—just wash it thoroughly first!
Preparation Method
Follow these steps carefully, and you will have a batch of spooky witch finger pretzel rods in no time. I have broken it down into easy stages so you can multitask without feeling overwhelmed.
- Prepare your workstation: Line a large baking sheet with parchment paper or a silicone mat. Set it aside within easy reach. Have your pretzel rods, slivered almonds, and red gel icing ready. This is not a recipe where you want to be searching for ingredients while the chocolate is melting.
- Toast the almonds (optional but recommended): Spread the slivered almonds on a separate small baking sheet. Place them in a preheated 350°F (175°C) oven for 3-4 minutes, just until they become fragrant and lightly golden. Watch them closely—almonds burn fast. Let them cool completely. This step brings out their nutty flavor and makes them look more like real fingernails. I have skipped this step before, and the raw almonds taste fine, but the toasted ones are noticeably better.
- Melt the white chocolate: Place the white chocolate chips in a microwave-safe bowl. Microwave in 30-second intervals at 50% power, stirring well after each interval. It usually takes about 1.5 to 2 minutes total. If the chocolate is too thick, stir in the teaspoon of coconut oil or shortening until smooth. Do not overheat the chocolate—white chocolate is delicate and can seize into a grainy mess if it gets too hot. If it starts to look lumpy, you have gone too far. (I have done this more times than I want to admit. If it happens, stir in a teaspoon of warm cream or milk and whisk vigorously—it sometimes saves it.)
- Dip the pretzel rods: Hold one pretzel rod at the end and dip it into the melted white chocolate, leaving about an inch uncoated at the top. Lift it out and let the excess chocolate drip back into the bowl. Gently scrape the bottom of the pretzel against the rim of the bowl to remove any big drips. Place the dipped pretzel on the prepared baking sheet. Repeat with all 12 pretzels. Work quickly—the chocolate will start to set as it cools.
- Attach the almond fingernails: While the chocolate is still wet, take one toasted slivered almond and press it gently onto the tip of the dipped pretzel, angled slightly upward like a fingernail. The pointed end of the almond should face away from the pretzel. Press it just enough to stick—do not push it all the way in, or it will look like a stubby finger. Repeat for all 12 pretzels. This step goes fast, so have your almonds ready.
- Add the red gel details: Using a toothpick or the tip of a small piping bag, dab a small amount of red gel icing at the base of each almond, where it meets the white chocolate. This creates the look of a cuticle or a bloody nail bed. You can also add a tiny dab on the tip of the almond for a bloody fingernail effect. Do not overdo it—a little goes a long way, and too much red looks messy instead of spooky.
- Let them set: Allow the pretzel rods to set completely at room temperature. This takes about 30-45 minutes, depending on your kitchen temperature. Do not refrigerate them while they set—the condensation can cause the chocolate to bloom and develop white streaks. I usually let them sit on the counter while I clean up the kitchen. If you are in a hurry, you can pop them in the fridge for 10 minutes, but watch for condensation when you take them out.
- Optional green tint: If you want green witch fingers, stir a few drops of green gel food coloring into the melted white chocolate before dipping. I have done this both ways, and honestly, the white version looks more like real witch fingers from old movies. The green version is fun for a more cartoonish look. Choose whichever fits your Halloween vibe.
One thing I learned the hard way: do not crowd the pretzels on the baking sheet. Leave at least an inch between them so the chocolate does not pool together. Also, if the chocolate starts to thicken while you are working, pop it back in the microwave for 10 seconds to loosen it up. Patience is the secret ingredient here.
Cooking Tips & Techniques
I have made these witch finger pretzel rods at least a dozen times over the past few Halloweens, and I have collected a few tricks that make the process smoother and the results more consistent. Let me share what I have learned the hard way so you can skip the mistakes.
The biggest mistake: Overheating the white chocolate. White chocolate has a lower melting point than milk or dark chocolate, and it seizes easily. If it gets too hot, it turns into a thick, grainy paste that is impossible to dip. Always melt at 50% power in the microwave and stir frequently. If you are using a double boiler, make sure the water is simmering, not boiling, and the bowl does not touch the water. I have ruined two batches this way, and it is so frustrating. If it happens, do not throw it away—try stirring in a teaspoon of warm coconut oil or heavy cream. Sometimes it comes back to life.
Timing is everything: Have all your almonds and red gel ready before you start melting the chocolate. Once the chocolate is melted, you need to work quickly before it starts to set. I learned this the first time when I was fumbling with the almond bag while the chocolate hardened in the bowl. Now I lay out all my almonds on a small plate and have the red gel tube open and ready. It saves so much stress.
Consistency tip: If your white chocolate is too thick for smooth dipping, add a teaspoon of coconut oil or shortening. This thins it out without changing the flavor. Do not use butter—it has water content that can cause the chocolate to seize. I keep a small jar of coconut oil in my baking cupboard just for this purpose.
Multitasking strategy: While the chocolate is melting, I toast the almonds. That way, they are cooling while I dip. I also line the baking sheet with parchment before I start anything. This recipe is all about prep work. The actual dipping takes maybe 10 minutes, but if you are not prepared, it feels like a chaotic race against the clock.
Variations & Adaptations
One of the best things about this recipe is how easy it is to adapt. I have tried several variations over the years, and each one has its own charm. Here are some of my favorites:
- Dark Chocolate Witch Fingers: Swap the white chocolate for dark or milk chocolate. The dark chocolate gives a more sophisticated, less sweet flavor that pairs beautifully with the salty pretzel. Use the same method—just melt carefully as dark chocolate is also prone to seizing. I made these for a grown-up Halloween party, and they were a hit with the coffee drinkers.
- Green Monster Fingers: Add a few drops of green gel food coloring to the melted white chocolate for a classic witchy green tone. You can also add a drop of black coloring to make it a deeper, more ominous green. My niece loved these because they looked like “real monster fingers.”
- Nut-Free Version: For those with nut allergies, replace the almond fingernail with a small piece of dried banana chip or a sliver of dried apple. The texture is different but still gives that creepy nail look. I have also used a small dollop of green-tinted frosting for the nail bed, which looks more cartoonish but works for kids’ parties.
- Spooky Sprinkle Fingers: Before the chocolate sets, sprinkle the dipped pretzels with black or orange sprinkles, edible glitter, or crushed graham crackers for a “dirt” effect. This adds texture and makes them look even more Halloween-y. I did this for a school party, and the kids loved the extra crunch.
- Bloody Drip Effect: After the white chocolate sets, drizzle a small amount of red candy melts or red icing down the sides of the pretzel for a “bloody” effect. This makes them look even more gruesome and fun. Just be careful not to overdo it—you want them to still look appetizing.
Each variation takes about the same amount of time, so feel free to experiment. I have found that the basic white chocolate version is the most versatile and crowd-pleasing, but the dark chocolate version is my personal favorite for a more grown-up treat.
Serving & Storage Suggestions
These witch finger pretzel rods are best served at room temperature, which keeps the white chocolate firm and the pretzel crunchy. I usually arrange them on a platter with the almond fingernails pointing outward for maximum creep factor. They look fantastic on a black or orange platter surrounded by fake spider webs or plastic spiders. For a Halloween party, I sometimes stand them upright in a tall glass jar or a foam block covered in black tissue paper—it makes them look like a bouquet of witch fingers.
For complementary dishes, these pair beautifully with a warm apple cider or a pumpkin spice latte. If you are serving a full Halloween spread, they go well with other salty-sweet treats like caramel popcorn or chocolate-covered pretzels. I have also served them alongside a cheese board for a fun savory-sweet contrast—the salty pretzel and creamy chocolate play nicely with sharp cheddar or brie.
Storage: Store these pretzel rods in an airtight container at room temperature for up to 5 days. Do not refrigerate them—the moisture in the fridge can cause the white chocolate to bloom (develop white streaks) and the pretzel to lose its crunch. If you live in a humid climate, add a silica gel packet to the container to keep them crisp. I have stored them in a cool, dark pantry for up to a week, and they stayed perfectly fresh.
Freezing: You can freeze these for up to 2 months. Place them in a single layer on a baking sheet and freeze until solid, then transfer to a freezer-safe container with parchment between layers. To thaw, let them sit at room temperature for about 30 minutes. Do not microwave them to thaw—the chocolate will melt unevenly. I have frozen a batch for a Halloween party that got postponed, and they tasted just as good a month later.
One thing I love about these treats is that the flavors actually develop a bit over time. The salt from the pretzel melds with the sweet chocolate, and the almond flavor deepens. They are delicious on day one, but somehow even better on day three.
Nutritional Information & Benefits
These witch finger pretzel rods are a treat, so they are not exactly health food. But knowing what is in them helps you enjoy them mindfully. Here is the estimated nutritional breakdown for one pretzel rod:
| Nutrient | Amount per Serving (1 rod) |
|---|---|
| Calories | 180-200 |
| Total Fat | 10g |
| Saturated Fat | 6g |
| Carbohydrates | 22g |
| Sugar | 16g |
| Protein | 3g |
| Sodium | 180mg |
The almonds provide a small amount of healthy fats, vitamin E, and magnesium. White chocolate, while not a health food, does contain calcium and a little bit of iron. The pretzel rod gives you a quick source of energy from carbohydrates. If you are watching your sugar intake, you can use sugar-free white chocolate chips, though the texture will be slightly different.
For dietary considerations, these are vegetarian and can be made gluten-free by using gluten-free pretzel rods. They are not vegan if you use regular white chocolate, but dairy-free white chocolate chips are available. The main allergen concerns are dairy (white chocolate), gluten (pretzels), and tree nuts (almonds). I always mention this when bringing them to parties so everyone can make an informed choice.
Conclusion
These easy witch finger pretzel rods have become my go-to Halloween treat for good reason. They are quick, fun, and always get a reaction. Whether you are making them for a kids’ party, a spooky movie night, or just because you want something sweet and salty with a creepy twist, they deliver every time. The best part is how customizable they are—you can make them as simple or as elaborate as you want.
I love that this recipe came from a mistake. It reminds me that the best things in the kitchen often happen when we let go of the plan and follow the accident. So grab a bag of pretzel rods, some white chocolate, and a handful of almonds, and give these a try. Play around with the colors and decorations—make them your own. And when you do, I would love to hear about it. Drop a comment below and tell me how your witch fingers turned out, or share your own spooky twist on the recipe. Happy Halloween, and happy snacking!
Frequently Asked Questions
Can I use milk chocolate instead of white chocolate?
Absolutely. Milk chocolate works great and gives a different flavor profile. Just melt it carefully using the same method—30-second intervals at 50% power. The almond fingernails will stand out more against the darker chocolate, which can look even spookier.
Why did my white chocolate seize up?
White chocolate seizes when it gets too hot or when even a tiny drop of water gets into it. Always melt at low power and stir frequently. If it seizes, try stirring in a teaspoon of warm coconut oil or heavy cream. Sometimes it smooths out. If not, do not throw it away—use it as a spread or mix it into cookie dough.
Can I make these ahead of time for a party?
Yes, you can make them up to 5 days in advance. Store them in an airtight container at room temperature. Do not refrigerate them, or the chocolate may bloom. I usually make them the day before a party, and they are always a hit.
How do I get the almond fingernails to stay on?
Press the almond into the wet chocolate gently but firmly. The chocolate acts as glue. If the almond falls off after the chocolate sets, you can dab a little melted chocolate on the back and reattach it. Toasting the almonds first helps them stick better because the natural oils are more exposed.
Can I use candy melts instead of white chocolate?
Yes, candy melts work well and come in many colors. They are designed to melt smoothly and set firmly. However, they often have a waxier texture and a more artificial flavor than real white chocolate. For the best taste, I recommend real white chocolate chips from a quality brand.
Pin This Recipe!
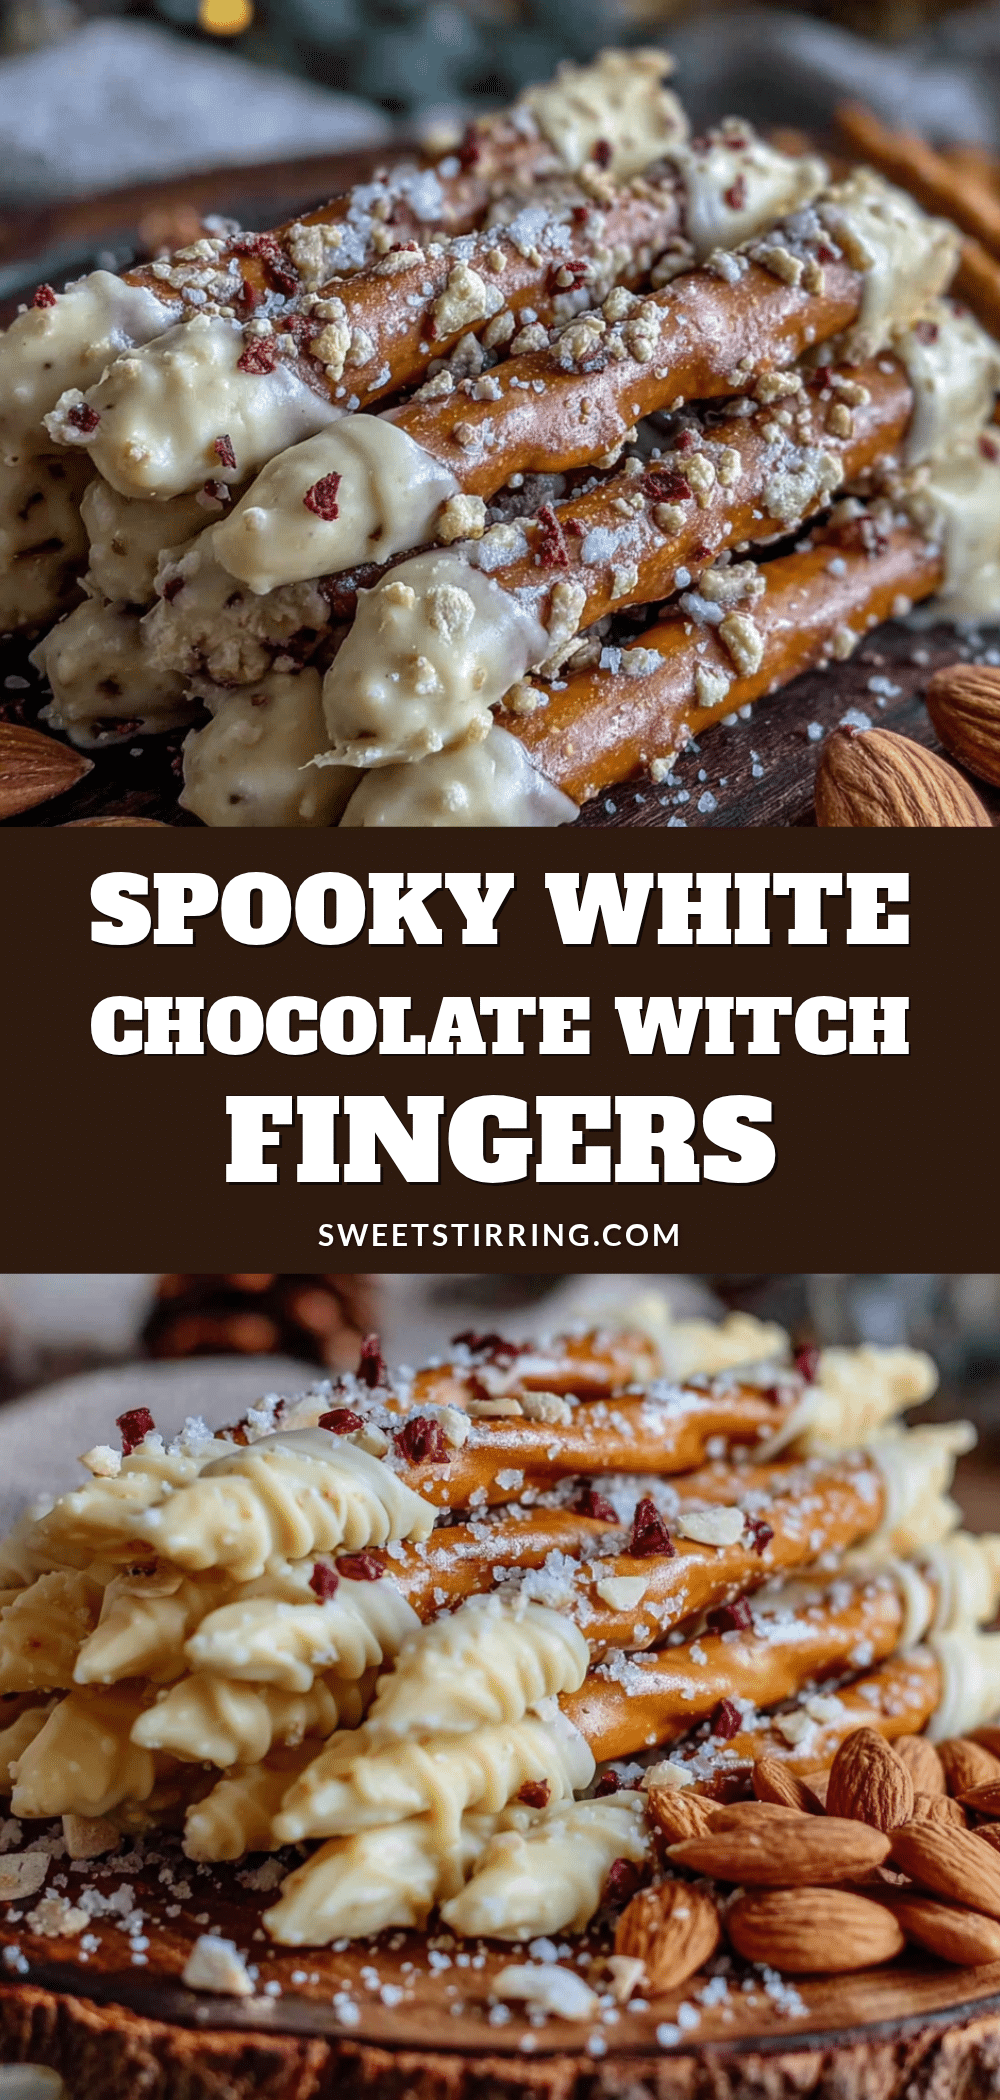
Easy Witch Finger Pretzel Rods: Best White Chocolate Treats

These spooky witch finger pretzel rods are a quick and easy Halloween treat made with white chocolate, pretzel rods, and slivered almonds for fingernails. Perfect for parties, they are salty, sweet, and delightfully creepy.
- Prep Time: 20 minutes
- Cook Time: 4 minutes
- Total Time: 45 minutes
- Yield: 12 servings 1x
- Category: Dessert
- Cuisine: American
Ingredients
- 12 standard-size pretzel rods
- 1 cup (about 6 ounces) white chocolate chips or melting wafers
- 1 teaspoon coconut oil or shortening (optional)
- 24 slivered almonds (about 1/4 cup)
- Red gel icing or red food coloring
- Green food coloring (optional)
Instructions
- Line a large baking sheet with parchment paper or a silicone mat.
- Toast the slivered almonds in a preheated 350°F (175°C) oven for 3-4 minutes until fragrant and lightly golden. Let cool completely.
- Melt the white chocolate chips in a microwave-safe bowl in 30-second intervals at 50% power, stirring after each interval, until smooth. If too thick, stir in 1 teaspoon coconut oil or shortening.
- Hold a pretzel rod at one end and dip it into the melted white chocolate, leaving about an inch uncoated at the top. Let excess drip off, then place on the prepared baking sheet. Repeat with all pretzels.
- While the chocolate is still wet, press a toasted slivered almond onto the tip of each dipped pretzel, angled slightly upward like a fingernail. Repeat for all pretzels.
- Using a toothpick or small piping bag, dab a small amount of red gel icing at the base of each almond to create a cuticle or bloody nail bed effect.
- Let the pretzel rods set at room temperature for 30-45 minutes until the chocolate is firm. Do not refrigerate.
- Optional: For green witch fingers, stir a few drops of green gel food coloring into the melted white chocolate before dipping.
Notes
Do not overheat white chocolate; it seizes easily. Have all ingredients ready before melting chocolate. Toasting almonds enhances flavor and helps them stick. Store in an airtight container at room temperature for up to 5 days. For a nut-free version, use dried banana chips or dried apple slivers.
Nutrition
- Serving Size: 1 pretzel rod
- Calories: 190
- Sugar: 16
- Sodium: 180
- Fat: 10
- Saturated Fat: 6
- Carbohydrates: 22
- Fiber: 1
- Protein: 3
Keywords: Halloween treats, witch fingers, pretzel rods, white chocolate, easy Halloween recipe, spooky snacks



