Love this? Save it for later!
Share the inspiration with your friends
This was supposed to be a simple batch of poached pears for a dinner party dessert. I had the wine, the cinnamon sticks, the whole fancy presentation planned out in my head. But the power flickered — twice — and I grabbed the vanilla extract instead of the red wine, and honestly, I was already running late and feeling that familiar kitchen panic rising in my chest. I stood there staring at the pot, vanilla mingling with the sugar and spices I’d already added, and I thought, well, this is going to be a disaster. What came out of that pot was nothing like the plan — and better.
The pears softened in a way I hadn’t expected, soaking up the vanilla and the warm spices without the wine’s tannins fighting for attention. My neighbor, Carol, who I’d invited over to help me taste-test (read: salvage) the mess, took one bite and went quiet. That’s the kind of silence you learn to trust in the kitchen. She asked me for the recipe before she even finished the first pear. I didn’t have one to give her — I’d made it up as I went along, panicking and improvising.
So I made them again the next weekend. And again the weekend after that. I tweaked the syrup ratio, swapped out the star anise for cardamom one time (good, but not the same), and eventually landed on this version. These homemade spiced pears in vanilla syrup became the thing I make when I want to feel like I’ve got my act together, even when I absolutely don’t. Maybe you’ve been there — standing in your kitchen with a half-baked idea and a timer counting down, wondering if you should just order takeout. Stick with me on this one. You’re going to want these in your pantry.
Why You’ll Love This Recipe
I’ve tested this recipe about seven times now — not because it’s complicated, but because I wanted to make sure it worked with different pear varieties, different spice blends, and even different sugar types. Let me tell you what I found.
- Quick & Easy: These spiced pears come together in under 45 minutes from start to finish. The active prep time is maybe 15 minutes — the rest is just letting the syrup do its thing on the stove.
- Simple Ingredients: You need pears, sugar, vanilla, cinnamon, and a few pantry spices. No trips to specialty stores, no hunting down obscure ingredients.
- Perfect for Gifting: These make the most beautiful homemade gifts. Put them in a mason jar with a ribbon, and you’ve got a present that looks like you spent hours on it — even though you didn’t.
- Crowd-Pleaser: I’ve served these over ice cream, alongside pound cake, and straight out of the jar at 10 PM. Every single person has asked for the recipe.
- Unbelievably Delicious: The texture — firm but tender, not mushy — and the vanilla-spice syrup that’s not too sweet? It’s the kind of thing that makes you close your eyes after the first bite.
What makes this different from other canned pear recipes is the syrup itself. Most recipes use a plain simple syrup or a heavy cinnamon syrup that overpowers the fruit. I spent time balancing the vanilla with the warm spices so the pear flavor still shines through. The vanilla isn’t just background noise here — it’s the main event, supported by cinnamon and cloves that add warmth without stealing the show.
This recipe is comfort food in a jar. It’s the kind of thing that makes a Tuesday night feel special, or turns a simple bowl of yogurt into something you’d pay for at a café. It’s also the recipe that taught me that mistakes in the kitchen sometimes lead to the best discoveries — and that’s worth sharing.
What Ingredients You Will Need
This recipe uses simple, honest ingredients that work together to create something greater than the sum of their parts. Most of these are pantry staples, which makes this recipe accessible any time of year — though pears are at their best from late summer through early winter.
For the Pears
- 6-8 firm, ripe pears (about 3 pounds) — Bosc or Anjou work best because they hold their shape during cooking. Bartlett pears can get a bit soft, so use them only if you plan to eat these within a week or two. Look for pears that yield slightly at the neck but aren’t mushy.
- 1 tablespoon fresh lemon juice — This prevents the pears from browning while you’re prepping them. I use bottled lemon juice in a pinch, but fresh really does taste brighter here.
For the Vanilla Syrup
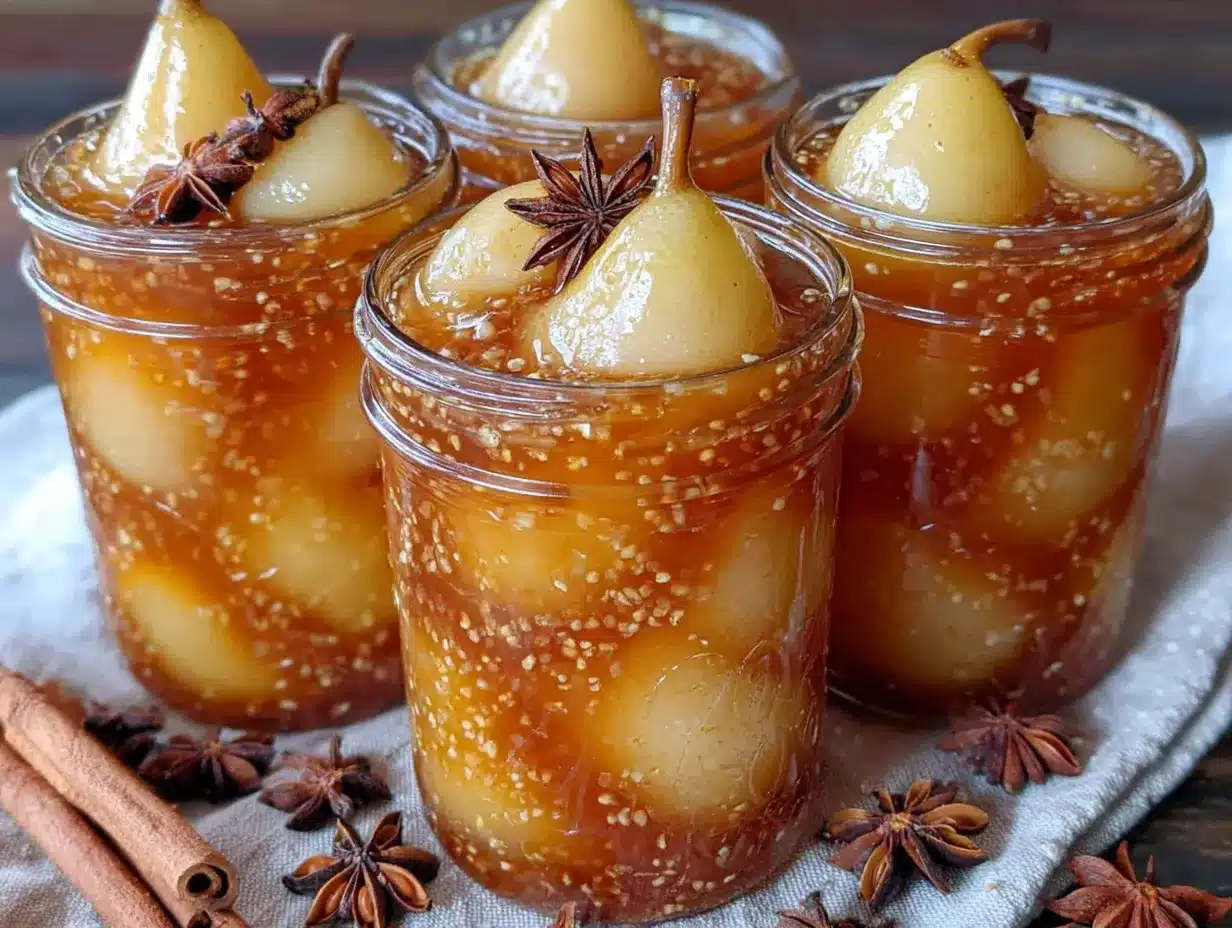
- 3 cups water — Filtered water makes a difference if your tap water has a strong mineral taste. I learned this the hard way when my first batch tasted faintly of chlorine.
- 2 cups granulated sugar — Regular white sugar lets the vanilla and spices shine. You can use organic cane sugar if you prefer, but avoid brown sugar here — it changes the color and flavor too much.
- 2 whole vanilla beans (or 3 tablespoons pure vanilla extract) — I recommend Nielsen-Massey vanilla beans for the best flavor, but honestly, even the ones from the bulk bin at my local grocery store worked fine. If using extract, add it after you remove the syrup from heat to preserve the volatile compounds.
- 3 cinnamon sticks — Cassia cinnamon is more common and gives a stronger, spicier flavor. Ceylon cinnamon is milder and sweeter — I’ve used both, and they both work, just different vibes.
- 1 teaspoon whole cloves — Whole cloves, not ground. Ground cloves will make your syrup cloudy and bitter. Trust me on this one — I made that mistake once and ended up with pear-flavored mud.
- 1 star anise (optional) — This adds a subtle licorice note that pairs beautifully with the vanilla. I add it about half the time, depending on my mood.
- Pinch of salt — Just a tiny pinch. Salt doesn’t make the pears salty — it balances the sweetness and makes the vanilla flavor pop.
Equipment Needed
You don’t need a fancy canning setup for this recipe, which is partly why I love it. Here’s what you’ll need:
- Large pot or Dutch oven (5-6 quart) — Heavy-bottomed is best to prevent the syrup from scorching. I use my enameled cast iron Dutch oven, but a stainless steel pot works fine too.
- Sharp paring knife and vegetable peeler — A good peeler makes the pear prep go so much faster. I’m partial to the Y-shaped peelers, but any sharp one will do.
- Melon baller or small spoon — For coring the pears from the bottom. You can use a regular teaspoon in a pinch.
- Canning jars with lids (4 half-pint or 2 pint jars) — Make sure they’re clean and sterilized. I run mine through the dishwasher on the sanitize cycle.
- Wide-mouth funnel — This makes filling the jars so much less messy. I bought mine for $3 at a kitchen supply store and it’s paid for itself a hundred times over.
- Water bath canner or large stockpot — For processing the jars. If you don’t have a canner, any pot deep enough to cover the jars with at least an inch of water will work.
- Jar lifter and magnetic lid lifter — These are worth the small investment. Trying to fish hot jars out of boiling water with tongs is a recipe for disaster — and I say that from experience.
Preparation Method
Take your time with the prep work — it makes the actual cooking so much smoother. Here’s how to do it.
- Prep the pears (10 minutes) — Peel the pears, leaving the stems intact. Using a melon baller or small spoon, core each pear from the bottom, working carefully to remove the seeds without breaking through the stem end. As you finish each pear, rub it with lemon juice to prevent browning. Place the prepped pears in a bowl of water with a splash of lemon juice while you finish the rest.
- Make the vanilla syrup (15 minutes) — In your large pot, combine the water, sugar, and a pinch of salt. Split the vanilla beans lengthwise with a sharp knife and scrape the seeds into the pot, then toss in the pods too. Add the cinnamon sticks, whole cloves, and star anise if using. Bring everything to a boil over medium-high heat, stirring occasionally until the sugar dissolves completely. Reduce the heat to low and let the syrup simmer for 10 minutes. The kitchen will start smelling incredible around minute 3 — that’s normal.
- Poach the pears (20 minutes) — Gently lower the pears into the simmering syrup using a slotted spoon. They should be mostly submerged — if they’re not, add a little more water. Place a round of parchment paper directly on the surface of the liquid (this helps keep the pears submerged and prevents them from discoloring). Simmer for 15-20 minutes, depending on the size and ripeness of your pears. You want them tender when pierced with a knife but not falling apart. Test one after 12 minutes to gauge where you’re at.
- Pack the jars (10 minutes) — Using a slotted spoon, carefully transfer the pears to your sterilized jars, standing them upright with the stem pointing up. Leave about 1/2 inch of headspace at the top. Remove the vanilla bean pods and cinnamon sticks from the syrup with tongs — you can tuck one cinnamon stick and a piece of vanilla pod into each jar for visual appeal. Ladle the hot syrup over the pears, maintaining that 1/2 inch headspace. Run a clean knife or bubble popper around the inside of each jar to release any trapped air bubbles.
- Process the jars (20 minutes) — Wipe the jar rims clean with a damp paper towel. Place the lids and screw bands on, tightening just until fingertip-tight — don’t overtighten. Lower the jars into your water bath canner or stockpot filled with enough water to cover the jars by at least an inch. Bring to a rolling boil, then process for 20 minutes (adjust for altitude if needed — add 5 minutes for every 1,000 feet above sea level).
- Cool and check seals (12 hours) — Using your jar lifter, carefully remove the jars and place them on a clean kitchen towel or cooling rack. Leave them undisturbed for 12-24 hours. You’ll hear the satisfying “pop” of the lids sealing as they cool. After they’re completely cool, press the center of each lid — it shouldn’t flex up or down. Store any unsealed jars in the refrigerator and use within 3 weeks.
Cooking Tips & Techniques
I’ve made this recipe enough times to have a few hard-won lessons to share. Here’s what I wish someone had told me before my first attempt.
Choose your pears wisely. The biggest mistake I made was using overly ripe pears because they were on sale. They turned into pear soup within 10 minutes of simmering. You want pears that are ripe but still firm — think the texture of a just-ripe avocado. If your pears are still hard and green, let them sit at room temperature for a day or two until they yield slightly at the neck.
Don’t skip the lemon juice bath. I know it seems fussy, but pears oxidize faster than apples, and once they turn brown, there’s no going back. I learned this the hard way when I got distracted by a phone call and came back to a bowl of brown pears. The lemon juice doesn’t affect the flavor — it just keeps things pretty.
Watch your simmer, not your boil. The syrup should be at a gentle simmer — little bubbles, not a rolling boil. Boiling the pears too aggressively will break them apart. I ruined my second batch this way, trying to speed things up. Slow and gentle is the way to go.
Test for doneness early. Start checking the pears at the 12-minute mark. Insert a sharp knife into the thickest part of a pear — it should slide in with slight resistance, like a ripe peach. If it goes in like butter, you’ve gone too far. If it meets firm resistance, give them another 3-5 minutes and test again.
Trust the process with the jars. I was terrified of canning at first — all those warnings about botulism made me nervous. But water bath canning for high-acid foods like this is very safe if you follow the basic rules: use clean jars, process for the full time, and check your seals. The pears in syrup have enough sugar and acidity to be shelf-stable when processed correctly.
Variations & Adaptations
One of the things I love about this recipe is how adaptable it is. Here are some variations I’ve tried over the years.
Spice it differently. Swap the star anise for a cardamom pod or two — it gives the pears a slightly floral, almost chai-like quality. I made a batch with cardamom and a strip of orange zest last fall, and it was absolutely perfect over vanilla ice cream. You could also add a piece of fresh ginger (about an inch, sliced) for a warm, peppery kick.
Make it honey-sweetened. Replace half the sugar with honey for a more complex sweetness. I used a local wildflower honey once, and the flavor was incredible — the honey added a floral note that paired beautifully with the vanilla. Just note that honey can make the syrup slightly darker and the flavor will change depending on the type of honey you use.
Try different pears. Bosc pears are my go-to because they hold their shape so well, but I’ve also made this with Forelle pears (the small, colorful ones) for a pretty presentation. Seckel pears are perfect for making these in half-pint jars as gifts — they’re naturally small and fit perfectly. Just adjust your cooking time based on the size of the pears.
Make it boozy. Add 1/4 cup of bourbon, brandy, or dark rum to the syrup after you remove it from the heat. The alcohol adds a warmth that’s especially nice in winter. I made a batch with bourbon for a holiday party, and people were spooning the syrup over everything — cheese, bread, even their coffee.
Refrigerator version. If you don’t want to deal with water bath canning, you can make a smaller batch and store it in the fridge for up to 3 weeks. Just skip the processing step — poach the pears, pack them into a clean jar, and refrigerate. The flavors actually get better after a day or two in the fridge.
Serving & Storage Suggestions
These spiced pears are incredibly versatile. Here’s how I like to use them.
Serve them warm or cold. I prefer them at room temperature or slightly warm — the vanilla syrup is more aromatic when it’s not cold. Spoon them over vanilla ice cream, pound cake, or cheesecake for an effortless dessert. They’re also amazing with yogurt and granola for breakfast — I’m not above eating them straight from the jar with a fork at 11 PM either.
Pair them with cheese. The sweetness of the pears and the warm spices are gorgeous with sharp cheddar, blue cheese, or aged gouda. Arrange sliced pears on a cheese board with some of the syrup drizzled over the cheese. Add some toasted walnuts and crusty bread, and you’ve got a showstopper appetizer with almost no effort.
Use the syrup. Don’t throw away the syrup when the pears are gone. It’s incredible in cocktails (try it in a bourbon smash), drizzled over pancakes or waffles, stirred into sparkling water for a fancy non-alcoholic drink, or used to sweeten iced tea. I’ve also brushed it over cake layers for extra moisture and flavor.
Storage instructions. Properly sealed jars will keep in a cool, dark pantry for up to 12 months. Once opened, refrigerate and use within 3 weeks. If any jars didn’t seal (the lid flexes when you press it), store them in the refrigerator and eat them first. The flavor actually improves after about a week — the spices mellow and the vanilla becomes more pronounced.
Reheating tips. To serve warm, gently heat the pears and syrup in a small saucepan over low heat for 3-4 minutes. Don’t boil them — you just want to take the chill off. You can also microwave individual servings for about 30 seconds.
Nutritional Information & Benefits
While these spiced pears are a treat, they do offer some nutritional benefits worth noting.
Estimated per serving (1 pear with about 2 tablespoons syrup): Calories: 185, Total Fat: 0g, Sodium: 2mg, Total Carbohydrates: 48g, Dietary Fiber: 4g, Sugars: 42g, Protein: 1g.
Pears are a good source of dietary fiber — one medium pear provides about 6 grams, which is about 24% of the daily recommended intake. Most of that fiber is in the skin, but even peeled pears retain some. The fiber helps with digestion and keeps you feeling full longer.
Vanilla has antioxidant properties — vanilla contains vanillin, a compound with antioxidant effects. While you’re not getting huge amounts from this recipe, every little bit helps. Plus, using real vanilla beans means you’re getting the full spectrum of flavor compounds, not just the artificial stuff.
Cinnamon may help with blood sugar regulation — some studies suggest cinnamon can help improve insulin sensitivity. Again, the amount in each serving is small, but it’s a nice bonus to an already delicious recipe.
Dietary considerations: This recipe is naturally gluten-free, dairy-free, and vegan. If you’re watching your sugar intake, you can reduce the sugar to 1 1/2 cups — the syrup will be thinner and less shelf-stable, but it still tastes great. I’ve made it with a sugar substitute once (allulose), and it worked okay for immediate eating but didn’t can well.
Conclusion
These homemade spiced pears in vanilla syrup started as a mistake in my kitchen — a happy accident that turned into one of my most-requested recipes. They’re the kind of thing that makes you look like you put in way more effort than you actually did, which is honestly my favorite kind of recipe. The vanilla syrup is warm and aromatic, the spices are cozy without being overwhelming, and the pears themselves stay perfectly tender.
I love that this recipe works for so many occasions — a fancy dessert, a homemade gift, a breakfast upgrade, or just something pretty to look at in your pantry. I hope you’ll make them your own, whether that means adding a splash of bourbon, swapping in cardamom for the star anise, or just enjoying them exactly as written.
If you try these spiced pears, I’d love to hear how they turned out. Drop a comment below and let me know what you served them with, or if you came up with a variation I should try. And if you’re looking for more canning projects, you might enjoy my easy apple butter recipe or my cranberry chutney with orange — both are perfect for filling out your pantry shelves.
Happy cooking, friends. Go make something delicious.
Frequently Asked Questions
Can I use vanilla extract instead of vanilla beans?
Yes, absolutely. Use 3 tablespoons of pure vanilla extract and add it after you remove the syrup from the heat. The flavor won’t be quite as intense as with whole vanilla beans, but it’s still delicious. If you’re canning, add the extract right before you fill the jars — the heat from the syrup will be enough to incorporate it without cooking off the flavor.
How long do these spiced pears last in the pantry?
Properly sealed jars will keep for up to 12 months in a cool, dark pantry. I always label mine with the date so I know which jars to use first. After opening, refrigerate and use within 3 weeks. If you notice any mold, off-odors, or the seal has broken, toss them — better safe than sorry.
Do I have to use a water bath canner?
Not necessarily. You can skip the water bath processing and store the pears in the refrigerator for up to 3 weeks. This is a great option if you’re making a small batch or don’t want to deal with the canning process. Just make sure your jars are clean and the pears are fully submerged in the syrup.
Can I use this recipe for other fruits?
Yes! The vanilla syrup works beautifully with apples, peaches, nectarines, and even plums. Adjust the cooking time based on the fruit — apples take about the same time as pears, while peaches and nectarines need only 8-10 minutes. Plums are quicker, about 5-7 minutes. The spice combination works well with all of them, though I might skip the star anise for peaches.
Why did my pears turn brown?
Browning usually happens for one of two reasons: either the pears weren’t fully submerged in the syrup during cooking, or they oxidized before you got them into the pot. Make sure you’re rubbing each pear with lemon juice as you prep them, and use that parchment paper round to keep them submerged during poaching. If the pears are peeking out of the syrup, add a little more water to cover them.
PrintHomemade Spiced Pears in Vanilla Syrup: Easy Canning Recipe
These homemade spiced pears in vanilla syrup are a happy accident turned into a beloved recipe. Firm pears are poached in a fragrant vanilla-spice syrup, then canned for a versatile treat perfect for desserts, gifts, or breakfast.
- Prep Time: 15 minutes
- Cook Time: 30 minutes
- Total Time: 45 minutes
- Yield: 4 servings (4 half-pint jars or 2 pint jars) 1x
- Category: Dessert
- Cuisine: American
Ingredients
- 6–8 firm, ripe pears (about 3 pounds), Bosc or Anjou recommended
- 1 tablespoon fresh lemon juice
- 3 cups water
- 2 cups granulated sugar
- 2 whole vanilla beans (or 3 tablespoons pure vanilla extract)
- 3 cinnamon sticks
- 1 teaspoon whole cloves
- 1 star anise (optional)
- Pinch of salt
Instructions
- Prep the pears: Peel the pears, leaving the stems intact. Using a melon baller or small spoon, core each pear from the bottom, working carefully to remove the seeds without breaking through the stem end. As you finish each pear, rub it with lemon juice to prevent browning. Place the prepped pears in a bowl of water with a splash of lemon juice while you finish the rest.
- Make the vanilla syrup: In a large pot, combine the water, sugar, and a pinch of salt. Split the vanilla beans lengthwise with a sharp knife and scrape the seeds into the pot, then toss in the pods too. Add the cinnamon sticks, whole cloves, and star anise if using. Bring everything to a boil over medium-high heat, stirring occasionally until the sugar dissolves completely. Reduce the heat to low and let the syrup simmer for 10 minutes.
- Poach the pears: Gently lower the pears into the simmering syrup using a slotted spoon. They should be mostly submerged — if they’re not, add a little more water. Place a round of parchment paper directly on the surface of the liquid. Simmer for 15-20 minutes, depending on the size and ripeness of your pears. You want them tender when pierced with a knife but not falling apart. Test one after 12 minutes to gauge where you’re at.
- Pack the jars: Using a slotted spoon, carefully transfer the pears to your sterilized jars, standing them upright with the stem pointing up. Leave about 1/2 inch of headspace at the top. Remove the vanilla bean pods and cinnamon sticks from the syrup with tongs — you can tuck one cinnamon stick and a piece of vanilla pod into each jar for visual appeal. Ladle the hot syrup over the pears, maintaining that 1/2 inch headspace. Run a clean knife or bubble popper around the inside of each jar to rel…
- Process the jars: Wipe the jar rims clean with a damp paper towel. Place the lids and screw bands on, tightening just until fingertip-tight — don’t overtighten. Lower the jars into your water bath canner or stockpot filled with enough water to cover the jars by at least an inch. Bring to a rolling boil, then process for 20 minutes (adjust for altitude if needed — add 5 minutes for every 1,000 feet above sea level).
- Cool and check seals: Using your jar lifter, carefully remove the jars and place them on a clean kitchen towel or cooling rack. Leave them undisturbed for 12-24 hours. You’ll hear the satisfying ‘pop’ of the lids sealing as they cool. After they’re completely cool, press the center of each lid — it shouldn’t flex up or down. Store any unsealed jars in the refrigerator and use within 3 weeks.
Notes
Choose pears that are ripe but still firm. Don’t skip the lemon juice bath to prevent browning. Simmer gently, not boil. Test for doneness early at 12 minutes. For a refrigerator version, skip the water bath processing and store in the fridge for up to 3 weeks. The syrup can be used in cocktails, over pancakes, or in sparkling water.
Nutrition
- Serving Size: 1 pear with about 2
- Calories: 185
- Sugar: 42
- Sodium: 2
- Carbohydrates: 48
- Fiber: 4
- Protein: 1
Keywords: spiced pears, vanilla syrup, canning recipe, homemade pears, easy canning, pear dessert, vanilla pears, cinnamon pears, holiday gift, water bath canning



