Love this? Save it for later!
Share the inspiration with your friends
Last Fourth of July, I was sitting on a crowded park bench, trying to enjoy the fireworks, when I overheard the quietest man in the crowd—yes, the one you’d least expect—talking passionately about his “secret” red velvet flag cake. Now, I wasn’t expecting baking wisdom from a guy who spent the evening sketching buildings in his notebook, but there I was, notebook in hand, captivated by his detailed description of perfect layers and that tangy cream cheese frosting. He described it like he’d been baking it for decades, despite the fact he admitted to being a “terrible cook” otherwise. Honestly, it felt like a little baking treasure shared in the least likely place.
What struck me was how this recipe wasn’t just about mixing ingredients; it was about creating a showstopper—bright red layers separated by clouds of creamy frosting, arranged to resemble the American flag for a festive, fun presentation. I tried it out that week, accidentally dropping a layer on the kitchen floor (don’t ask), but the results were worth every crumb and mess. Maybe you’ve been there—trying to make something special with limited time and a little kitchen chaos. This perfect red velvet flag cake with cream cheese frosting is the kind of recipe that sticks with you, both for its stunning looks and that rich, velvety flavor that’s just cozy enough to make you smile. Let me tell you, once you try this, you’ll find yourself making it for more than just holidays.
Why You’ll Love This Recipe
Having baked this perfect red velvet flag cake with cream cheese frosting multiple times, I can say it’s a winner for so many reasons. I’ve tweaked it to balance flavor, texture, and ease, making it a reliable favorite in my kitchen. Here’s why it’s truly special:
- Quick & Easy: It comes together in about 1 hour and 30 minutes, which is great when you want a showstopper without spending all day in the kitchen.
- Simple Ingredients: You don’t need any exotic items—just pantry staples and a few fresh ingredients, so no last-minute grocery runs.
- Perfect for Celebrations: Whether it’s Independence Day, birthdays, or any festive occasion, this cake’s flag design brings a cheerful vibe to the table.
- Crowd-Pleaser: Friends and family rave about the moist, tender crumb paired with the tangy, smooth cream cheese frosting—it’s a hit with both kids and adults.
- Unbelievably Delicious: The subtle cocoa flavor combined with the vibrant red color and luscious frosting gives you a slice of comfort food with flair.
What sets this recipe apart is the layering technique and the perfectly balanced cream cheese frosting that’s neither too sweet nor too tangy. I also like to add a pinch of espresso powder to the batter for a deeper flavor profile—it’s a little trick I learned from experimenting in my own kitchen. This isn’t just another red velvet cake; it’s a reliably stunning centerpiece that’ll have you closing your eyes with delight after each bite. And honestly, it’s the kind of recipe that makes you want to host more get-togethers just to show it off.
What Ingredients You Will Need
This recipe uses straightforward, wholesome ingredients that come together to create that signature red velvet flavor and creamy frosting. Most are pantry basics, making it easy to whip up anytime. Here’s what you’ll need:
- For the Cake Batter:
- All-purpose flour – 2 ½ cups (315 grams), sifted
- Granulated sugar – 1 ½ cups (300 grams)
- Unsweetened cocoa powder – 1 tablespoon (use a good Dutch-processed if possible for richer flavor)
- Baking soda – 1 teaspoon
- Salt – ½ teaspoon
- Buttermilk – 1 cup (240 ml), room temperature (adds tenderness and tang)
- Vegetable oil – 1 cup (240 ml), neutral-flavored like canola or sunflower
- Large eggs – 2, room temperature
- Red food coloring – 2 tablespoons (liquid or gel; gel tends to give a deeper color)
- Vanilla extract – 1 teaspoon (pure vanilla, if you can)
- White vinegar – 1 teaspoon (helps with the red color and texture)
- Instant espresso powder – ½ teaspoon (optional, but adds depth)
- For the Cream Cheese Frosting:
- Cream cheese – 16 ounces (450 grams), softened (I recommend full-fat for best texture)
- Unsalted butter – ½ cup (115 grams), softened
- Powdered sugar – 4 cups (480 grams), sifted to avoid lumps
- Vanilla extract – 1 teaspoon
- Pinch of salt (to balance sweetness)
Substitution tips: If you don’t have buttermilk, mix 1 cup milk with 1 tablespoon lemon juice or white vinegar and let it sit for 5 minutes. For a dairy-free frosting, swap cream cheese and butter with plant-based alternatives, but expect a slightly different texture. I usually stick with the classic ingredients because that’s where the magic is.
Equipment Needed
To make this perfect red velvet flag cake with cream cheese frosting, you’ll need a few essential tools that most home bakers already have:
- Two 9-inch round cake pans: For evenly sized layers; if you don’t have two, bake layers one at a time, but it takes longer.
- Mixing bowls: At least two—one for dry ingredients and one for wet.
- Electric mixer or stand mixer: This helps with smooth batter and silky frosting. Whisk attachment works best for frosting.
- Measuring cups and spoons: Accuracy matters here, especially for flour and cocoa.
- Rubber spatula: For folding ingredients and scraping bowls.
- Cooling racks: To cool cake layers evenly and prevent sogginess.
- Offset spatula or butter knife: For spreading frosting neatly.
If you’re on a budget, you can substitute a hand mixer for a stand mixer. I’ve even frosted with a spoon when desperate (don’t laugh), but it’s worth investing in at least a basic electric mixer for ease and consistency. Keeping your pans greased and lined with parchment paper is a must to avoid sticking. I learned that the hard way after my first disaster baking this cake.
Preparation Method
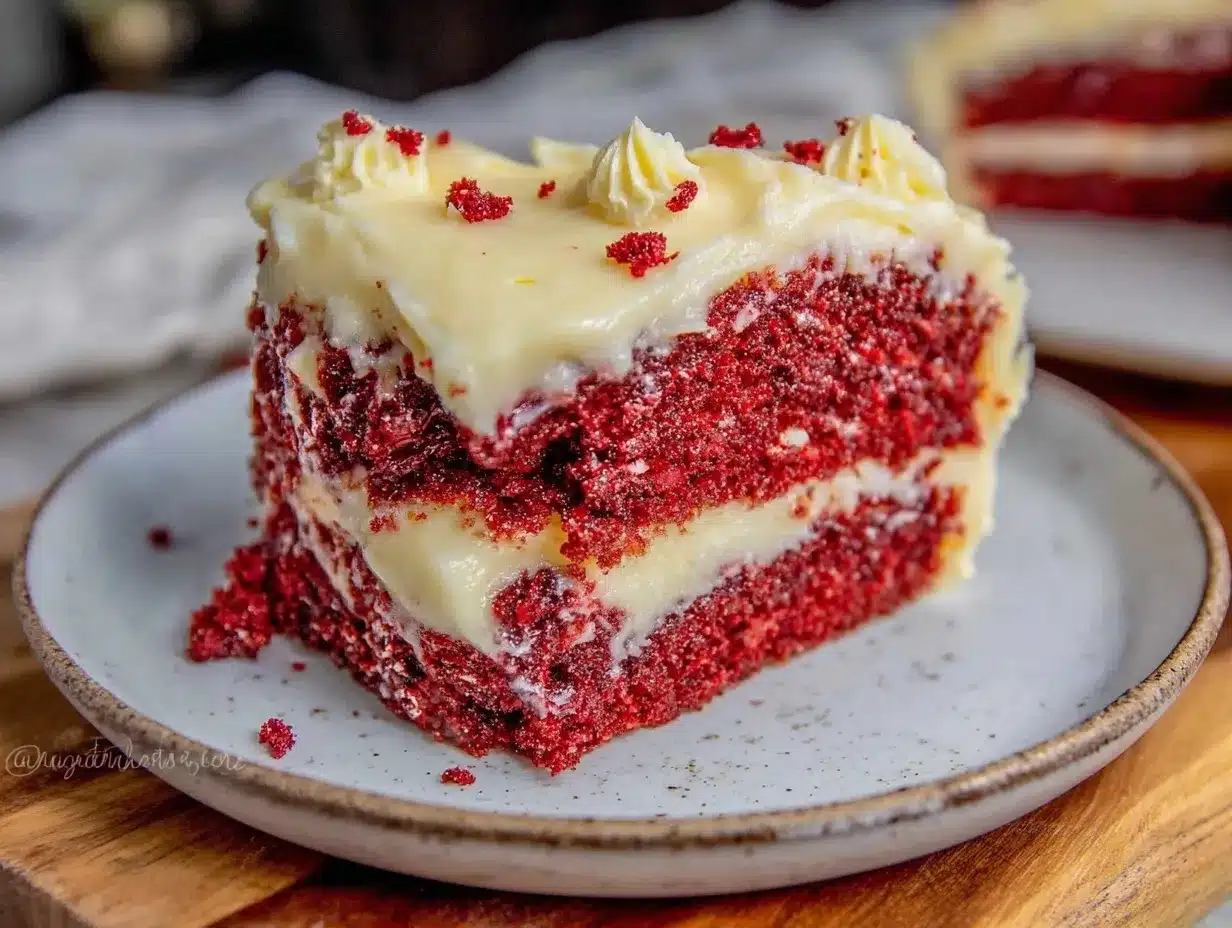
- Preheat your oven to 350°F (175°C). Grease and line two 9-inch round cake pans with parchment paper. This step is vital to get perfect layers out without a hitch. (Time: 10 minutes)
- Sift together the dry ingredients: In a large bowl, sift 2 ½ cups flour, 1 ½ cups sugar, 1 tablespoon cocoa powder, 1 teaspoon baking soda, and ½ teaspoon salt. Sifting avoids lumps and ensures even mixing. (Time: 5 minutes)
- Mix the wet ingredients: In another bowl, whisk together 1 cup buttermilk, 1 cup vegetable oil, 2 large eggs, 2 tablespoons red food coloring, 1 teaspoon vanilla extract, 1 teaspoon white vinegar, and ½ teaspoon instant espresso powder if using. The batter should look bright and smooth. (Time: 5 minutes)
- Combine wet and dry: Slowly pour the wet mixture into the dry ingredients while stirring gently with a spatula or mixer on low speed. Don’t overmix—it’s okay if a few streaks remain. Overmixing can make the cake tough. The batter should be thick but pourable. (Time: 3-4 minutes)
- Divide batter evenly: Pour the batter into prepared pans, smoothing the tops with a spatula. I like to weigh the batter in each pan to keep layers uniform—about 600 grams per pan works well. (Time: 2 minutes)
- Bake: Place pans in the oven and bake for 30-35 minutes, or until a toothpick inserted comes out clean and the cakes spring back when lightly pressed. Ovens vary, so start checking at 28 minutes. (Time: 30-35 minutes)
- Cool layers: Let cakes cool in pans for 10 minutes, then transfer to wire racks to cool completely. This step prevents frosting from melting and sliding off. (Time: 1 hour)
- Prepare the cream cheese frosting: In a large bowl, beat 16 ounces softened cream cheese and ½ cup softened butter on medium speed until smooth and creamy. Gradually add 4 cups powdered sugar, about a cup at a time, beating on low speed after each addition. Mix in 1 teaspoon vanilla extract and a pinch of salt. The frosting should be thick but spreadable. (Time: 10 minutes)
- Assemble the flag cake: Trim the cake tops if domed to make flat layers. Place one red velvet layer on your serving plate. Spread about ½ cup frosting evenly over the layer. Repeat layering and frosting with the second cake. Reserve some frosting for the sides and decoration.
- Create the flag design: Use the frosting to cover the entire cake smoothly. Then, using a piping bag or a small spatula, add stripes of frosting and arrange blueberries and sliced strawberries to mimic the stars and stripes of the American flag. (Time: 15-20 minutes)
Pro tip: Keep your frosting chilled if your kitchen is warm, but don’t let it get too stiff—soften with a quick whisk if needed. I once had frosting turn runny mid-assembly and had to refrigerate the whole cake for 30 minutes to firm it up before trying again.
Cooking Tips & Techniques
Getting this red velvet flag cake just right takes a few tricks I’ve learned over many bakes. Here are some of the most helpful:
- Use room temperature ingredients: Eggs, buttermilk, and butter soften more easily and combine better, giving you a smoother batter and frosting.
- Don’t skip sifting: Cocoa powder and flour clump easily. Sifting ensures a light, tender crumb.
- Mix batter gently: Overmixing develops gluten and makes the cake dense, which is the opposite of what you want here.
- Bake in the center of the oven: This helps even heat circulation. Avoid opening the oven door too early to prevent sinking layers.
- Trim cake domes for even layers: I always end up with a lopsided cake if I don’t. A serrated knife works best for clean cuts.
- Keep frosting consistency just right: Too soft and it slides off; too stiff and it’s hard to spread. If it’s too thick, add a teaspoon of milk; if too thin, add a bit more powdered sugar.
- Chill the cake between steps: If your kitchen is warm or if frosting gets messy, refrigerate the cake briefly to firm up layers and frosting.
Honestly, I’ve had my fair share of frosting mishaps and collapsing layers, but patience and practice really pay off. After a few tries, you’ll get the hang of balancing texture with those vivid red layers and creamy frosting.
Variations & Adaptations
This recipe is flexible and lends itself well to different twists, depending on your taste or dietary needs:
- Gluten-Free Option: Swap the all-purpose flour with a 1:1 gluten-free baking flour blend. The texture will be slightly different but still delicious.
- Vegan Version: Use dairy-free cream cheese and butter alternatives, flax eggs (1 tablespoon ground flaxseed + 3 tablespoons water per egg), and plant-based milk instead of buttermilk.
- Flavor Variations: Add orange zest to the batter for a citrusy note or swap the espresso powder with cinnamon for a warm spice twist.
- Mini Flag Cakes: Use smaller pans or cupcake liners to create individual flag cakes—perfect for parties or kids’ lunches.
- Alternative Decorations: Instead of strawberries and blueberries, try raspberries and blackberries for a slightly different berry flavor and color contrast.
Personally, I once tried a version with a layer of raspberry jam between the layers for extra tartness—worked wonderfully, though I had to adjust frosting sweetness a bit. It made the cake feel even more special and fresh.
Serving & Storage Suggestions
Serve this perfect red velvet flag cake slightly chilled or at room temperature. The frosting softens beautifully after about 15-20 minutes out of the fridge, making each bite melt-in-your-mouth delightful. For presentation, a simple white cake stand highlights the vibrant colors best.
This cake pairs well with light beverages like iced tea, sparkling water with a splash of lemon, or even a mild coffee. It’s sweet but not overwhelming, so fresh fruit or a crisp salad balances the meal nicely.
Store leftover cake covered in the refrigerator for up to 3-4 days. To freeze, wrap the cake or individual layers tightly in plastic wrap and foil; it keeps well for up to 2 months. Thaw in the fridge overnight before serving.
When reheating slices, let them come to room temperature to bring back the soft crumb texture. I find that the flavors actually deepen overnight, making next-day slices even better, so patience pays off!
Nutritional Information & Benefits
One slice (1/12th of cake) of this red velvet flag cake with cream cheese frosting typically contains around 350-400 calories, with moderate amounts of fat and sugar. The cake delivers a good dose of calcium and protein from the cream cheese and eggs.
Key ingredients like buttermilk provide probiotics and calcium, while cocoa powder adds antioxidants. Using vegetable oil keeps the cake moist without adding saturated fat, which makes it a tad lighter than butter-based cakes.
Note that this recipe contains gluten and dairy, so it’s not suitable for those with allergies unless you make the adaptations mentioned earlier. For those watching sugar intake, you can reduce powdered sugar in the frosting slightly, but keep in mind the balance of sweetness and tang is crucial for that classic flavor.
From my experience, this cake is a treat worth savoring, best enjoyed in moderation as part of a balanced diet. It’s a comforting dessert that brings people together, which for me, is the best kind of nourishment.
Conclusion
In the end, this perfect red velvet flag cake with cream cheese frosting isn’t just a dessert—it’s a celebration on a plate. It’s the kind of recipe that’s easy enough for a home baker but impressive enough to make guests do a double-take. I love how it combines classic flavors with a fun, patriotic twist that feels festive all year round, not just on holidays.
Feel free to make it your own—whether that’s adding a personal touch to the frosting, trying out different decorations, or adjusting sweetness to your liking. I hope you find as much joy in baking and sharing this cake as I have. And hey, don’t be afraid of a little kitchen mess along the way; it’s all part of the story.
If you try this recipe, I’d love to hear how it turned out or what creative spins you added. Happy baking, and may your kitchen be filled with laughter and the sweet smell of red velvet!
Frequently Asked Questions
- Can I make this cake without red food coloring?
You can, but the signature red color won’t be as vibrant. Some people use beet juice for natural coloring, but the flavor might change slightly.
- How do I prevent the cream cheese frosting from melting?
Keep the frosting chilled before spreading and avoid over-beating. If your kitchen is warm, refrigerate the cake after frosting to help it set.
- Can I bake this cake in a different size pan?
Yes, but adjust the baking time accordingly. For example, a 9×13-inch pan will require about 35-40 minutes, and a cupcake version bakes in about 18-20 minutes.
- Is buttermilk essential in this recipe?
Buttermilk adds moisture and tanginess, but if you don’t have it, you can make a substitute by mixing milk with a tablespoon of lemon juice or vinegar.
- How far in advance can I make this cake?
You can bake the layers a day or two ahead and store them wrapped tightly in the refrigerator. Frosting and assembling on the day you plan to serve yields the best results.
Pin This Recipe!
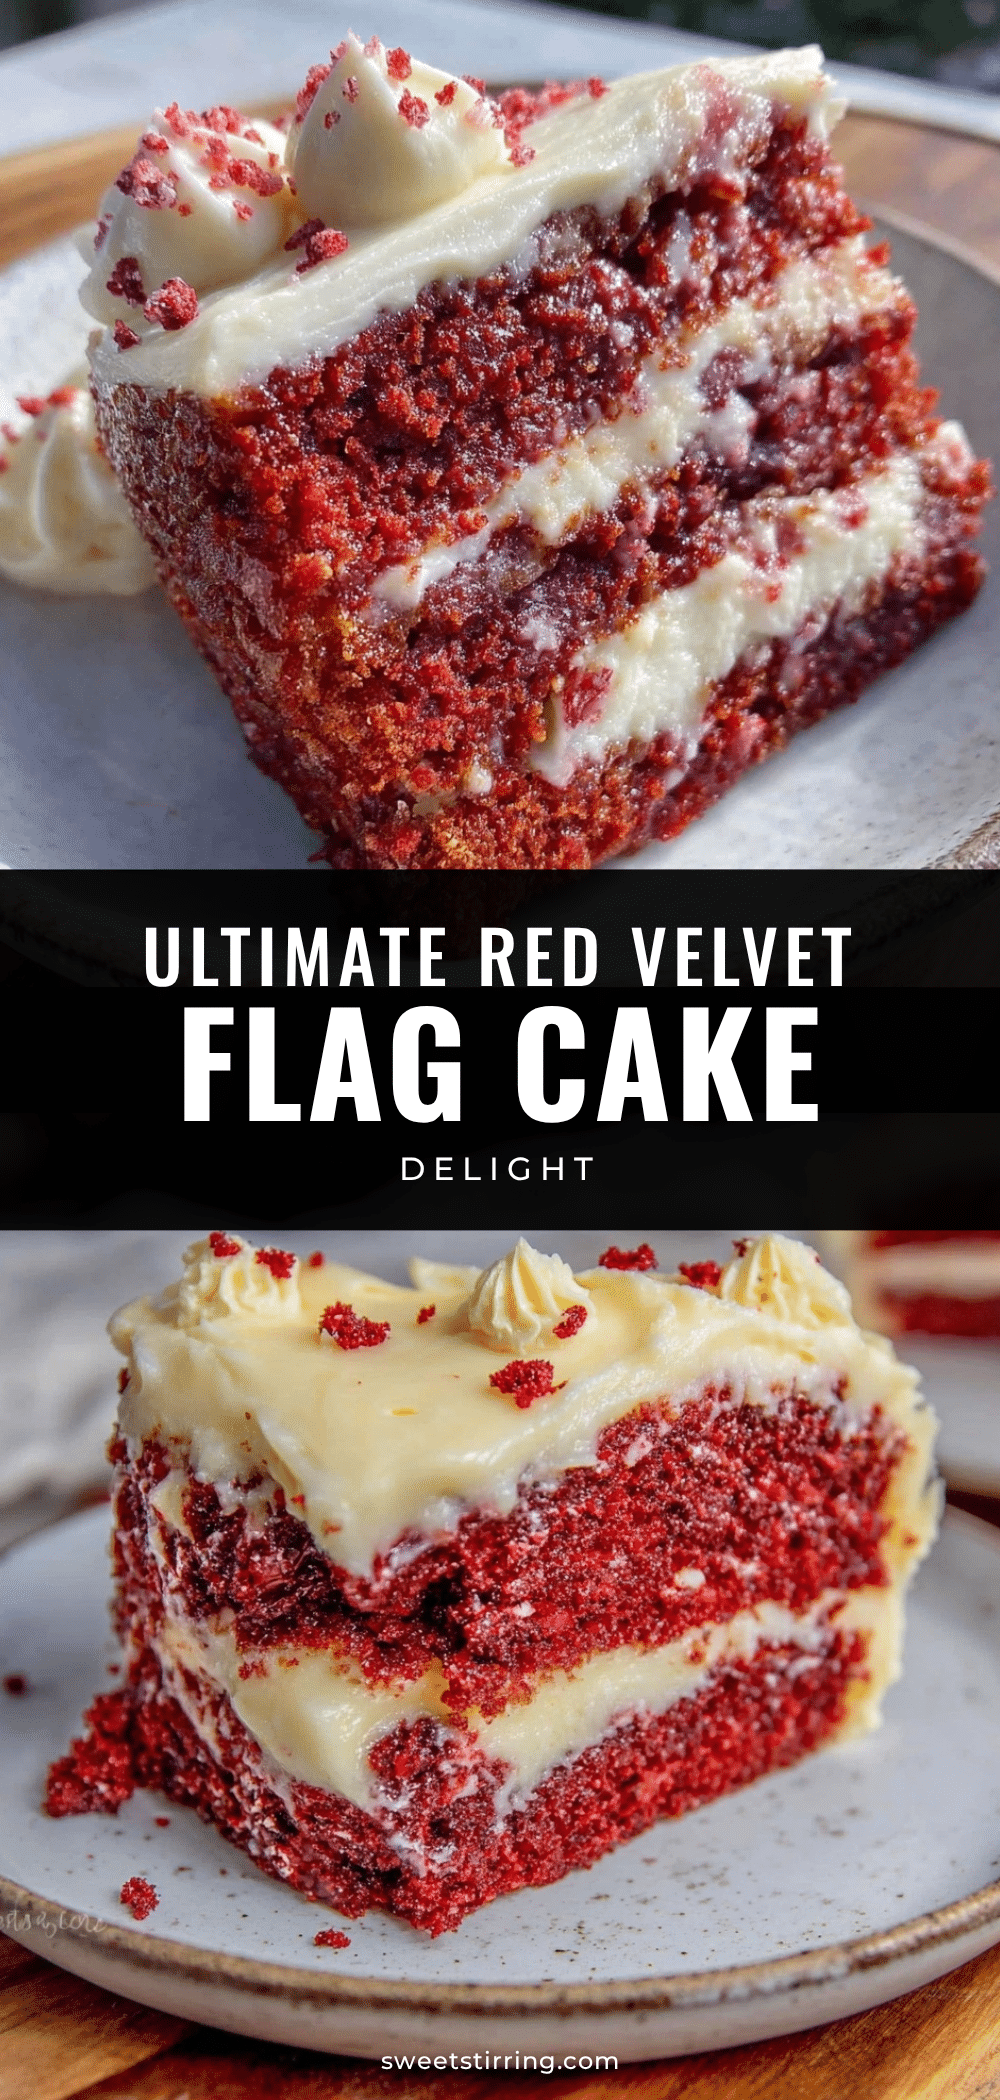
Perfect Red Velvet Flag Cake with Cream Cheese Frosting
A festive and moist red velvet cake with tangy cream cheese frosting, designed to resemble the American flag. Perfect for celebrations and easy to make with simple ingredients.
- Prep Time: 30 minutes
- Cook Time: 35 minutes
- Total Time: 1 hour 30 minutes
- Yield: 12 servings 1x
- Category: Dessert
- Cuisine: American
Ingredients
- 2 ½ cups (315 grams) all-purpose flour, sifted
- 1 ½ cups (300 grams) granulated sugar
- 1 tablespoon unsweetened cocoa powder (preferably Dutch-processed)
- 1 teaspoon baking soda
- ½ teaspoon salt
- 1 cup (240 ml) buttermilk, room temperature
- 1 cup (240 ml) vegetable oil (neutral-flavored like canola or sunflower)
- 2 large eggs, room temperature
- 2 tablespoons red food coloring (liquid or gel)
- 1 teaspoon vanilla extract
- 1 teaspoon white vinegar
- ½ teaspoon instant espresso powder (optional)
- 16 ounces (450 grams) cream cheese, softened (full-fat recommended)
- ½ cup (115 grams) unsalted butter, softened
- 4 cups (480 grams) powdered sugar, sifted
- 1 teaspoon vanilla extract (for frosting)
- Pinch of salt (for frosting)
Instructions
- Preheat oven to 350°F (175°C). Grease and line two 9-inch round cake pans with parchment paper.
- Sift together the dry ingredients: flour, sugar, cocoa powder, baking soda, and salt.
- In another bowl, whisk the wet ingredients: buttermilk, vegetable oil, eggs, red food coloring, vanilla extract, white vinegar, and espresso powder if using.
- Slowly pour the wet mixture into the dry ingredients while stirring gently. Mix until just combined; do not overmix.
- Divide the batter evenly between the prepared pans, smoothing the tops.
- Bake for 30-35 minutes or until a toothpick inserted comes out clean and cakes spring back when lightly pressed.
- Cool cakes in pans for 10 minutes, then transfer to wire racks to cool completely.
- For the frosting, beat cream cheese and butter until smooth and creamy. Gradually add powdered sugar, beating on low after each addition. Mix in vanilla extract and a pinch of salt until thick and spreadable.
- Trim domed tops of cakes to create flat layers. Place one layer on a serving plate and spread about ½ cup frosting evenly over it. Repeat with the second layer.
- Cover the entire cake with frosting smoothly. Decorate with stripes of frosting and arrange blueberries and sliced strawberries to mimic the American flag design.
- Keep frosting chilled if kitchen is warm; refrigerate cake if frosting becomes too soft.
Notes
Use room temperature ingredients for best results. Do not overmix batter to avoid dense cake. Chill frosting if too soft and trim cake domes for even layers. For gluten-free or vegan adaptations, see variations. Keep frosting chilled to prevent melting.
Nutrition
- Serving Size: 1 slice (1/12th of c
- Calories: 375
- Sugar: 38
- Sodium: 320
- Fat: 18
- Saturated Fat: 7
- Carbohydrates: 52
- Fiber: 1
- Protein: 5
Keywords: red velvet cake, cream cheese frosting, flag cake, Fourth of July dessert, patriotic cake, easy red velvet, homemade frosting