Love this? Save it for later!
Share the inspiration with your friends
“You know that moment when the afternoon sun is relentless, and the only thing on your mind is something cold and sweet?” That was me last July, standing in my tiny apartment kitchen with a melting ice cream cone in one hand and a sticky phone in the other. I had promised myself a refreshing treat but didn’t want to dive into the usual store-bought sugar bombs. Honestly, I was craving something healthier but still fun—something that wouldn’t break the bank.
Then, out of nowhere, my neighbor, Mr. Jenkins (the retired science teacher who’s always tinkering with wild food experiments), knocked on my door. He handed me a tiny, slightly cracked popsicle mold and said, “Try these fruit popsicles I whipped up. Cheap, fresh, and actually good for you.” I was skeptical. I mean, homemade fruit popsicles? Could they really beat the fancy ones with all the colors and artificial flavors?
Well, one bite later, I was hooked. The blend of real fruit, a hint of natural sweetness, and that icy chill was exactly what summer afternoons needed. Not to mention, these popsicles cost less than pennies per serving, which meant I could keep making them all season long without guilt. Maybe you’ve been there—wanting a simple, healthy cool-down that feels a little like a treat without the fuss. That’s exactly what these refreshing healthy pennies per serving fruit popsicles deliver, and let me tell you, they’ve stuck with me ever since.
Why You’ll Love This Recipe
After testing countless homemade frozen treats, this fruit popsicles recipe stands out for so many reasons. It’s simple, budget-friendly, and honestly, it tastes better than most store-bought options that are loaded with preservatives.
- Quick & Easy: Comes together in under 15 minutes, perfect for those spontaneous summer cravings or busy afternoons.
- Simple Ingredients: Uses fresh fruit and natural sweeteners you probably have on hand—no special trips needed.
- Perfect for Summer: Ideal for backyard barbecues, pool parties, or just chilling on your porch with a good book.
- Crowd-Pleaser: Kids adore these, and adults appreciate the clean, refreshing flavors.
- Unbelievably Delicious: The real fruit chunks and subtle zing make it a next-level frozen treat.
What really makes this recipe different? It’s the balance—no overpowering sweetness, just bright, fresh fruit flavor with a touch of natural sweetener to please your taste buds. Plus, the popsicles are easy to customize with whatever fruit is in season or on sale, making them a thrifty and tasty staple for summer. Honestly, I love how these popsicles bring back the simple joys of childhood summers but with a grown-up twist that’s good for the body and wallet.
What Ingredients You Will Need
This recipe thrives on simple, wholesome ingredients that combine to create a bold flavor and refreshing texture without the fuss. Most are pantry staples or fresh produce you can grab easily at the store or farmers market.
- Fresh Fruit (2 cups total): Choose ripe berries, mango chunks, peaches, or watermelon cubes (in summer, swap with fresh berries for peak sweetness).
- Fresh Lemon Juice (2 tablespoons): Adds a bright, tangy contrast that lifts the fruit flavors.
- Honey or Maple Syrup (2 tablespoons): Natural sweetener to balance tartness (adjust to taste; use agave syrup for a vegan option).
- Coconut Water or Plain Water (1 cup): Keeps the popsicles light and hydrating (I recommend using natural coconut water brand like Harmless Harvest for best flavor).
- Optional Mint Leaves (a few sprigs): For a refreshing herbal hint.
- Chia Seeds (1 tablespoon): Adds subtle texture and a nutritional boost (great if you want a bit of crunch and fiber).
Substitution tips: For a dairy-free and allergy-friendly version, coconut water works perfectly. If you want a creamier option, try blending in some Greek yogurt or a dairy-free alternative. And if you don’t have fresh lemon, a splash of lime juice works just as well.
Equipment Needed
- Popsicle Molds: Essential for shaping your frozen treats. If you don’t have molds, small paper cups with wooden sticks work fine.
- Blender or Food Processor: For pureeing the fruit mixture smoothly.
- Measuring Cups and Spoons: To keep your ingredient ratios spot on.
- Mixing Bowl: For combining ingredients before filling the molds.
- Freezer: Obviously, you’ll need a freezer with enough space to hold your molds upright.
Personally, I’ve used both fancy silicone molds and the simple plastic ones you find at any grocery store. Silicone molds make it easier to pop the popsicles out without cracking them, but the plastic molds are budget-friendly and do the job just fine. Keeping your molds clean and dry before use helps avoid popsicles sticking too much, and rinsing them briefly in warm water before unmolding can save you some frustration.
Preparation Method
- Prepare the Fruit: Wash and chop your chosen fresh fruit into small chunks. Aim for about 2 cups (300 grams) total. If you want a smoother popsicle, blend all the fruit; for chunkier texture, reserve a handful of pieces to stir in later. (5 minutes)
- Blend the Base: In a blender, combine the fruit, fresh lemon juice (2 tablespoons), honey or maple syrup (2 tablespoons), and coconut water or plain water (1 cup). Blend until mostly smooth but still slightly textured. This should have a bright, fruity aroma. (3 minutes)
- Add Optional Ingredients: If using chia seeds or mint, stir them into the mixture now. Chia seeds will thicken the mixture slightly after sitting, so don’t add too early. (1 minute)
- Fill the Molds: Pour the fruit mixture into your popsicle molds, leaving a little space at the top to allow for expansion during freezing. Insert sticks. If you reserved fruit chunks, gently press them into the molds before freezing for extra texture. (5 minutes)
- Freeze: Place the molds upright in the freezer. Freeze for at least 4-6 hours or overnight for best results. (Time varies)
- Unmold and Serve: To remove popsicles, briefly dip the mold in warm water (5-10 seconds) to loosen. Gently pull the stick out. Enjoy immediately or keep frozen for later. (2 minutes)
Pro Tip: If your freezer is super cold, sometimes the popsicles freeze too hard. Let them sit out for a couple minutes before eating to soften slightly for easier biting. Also, don’t forget to label your popsicle molds if you’re making multiple flavors!
Cooking Tips & Techniques
Making these fruit popsicles is straightforward, but a few tricks can make your results truly shine. First, balance is everything. Too much sweetener can overpower fresh fruit; too little can make the popsicles icy and bland. Taste your blend before freezing and adjust accordingly.
When blending, don’t overdo it if you want a little fruit texture—that’s what makes these popsicles feel homemade and fresh. On the other hand, if you want a smooth, creamy texture, blend a bit longer and consider adding a spoonful of yogurt or banana for creaminess.
Freezing time is another key point. Rushing the process by increasing freezer temperature often leads to icy, hard popsicles. Patience pays off here! Also, placing the molds on a flat surface ensures even freezing without leaning.
Last, when unmolding, warm water is your friend. But don’t soak the molds or the popsicles will start melting before you can serve. A quick dip is perfect.
I remember the first time I forgot to leave space in the molds—the mixture overflowed and made a mess all over the freezer shelf. Lesson learned: always leave a bit of breathing room for expansion!
Variations & Adaptations
These fruit popsicles are incredibly versatile. Here are a few ways to customize based on your mood or dietary needs:
- Berry Medley: Use a mix of strawberries, blueberries, and raspberries for a colorful, antioxidant-rich treat.
- Tropical Twist: Swap water for coconut milk and add pineapple and mango chunks for a creamy, island-inspired flavor.
- Green Goodness: Add a handful of spinach or kale to the blend for a nutrient boost without sacrificing taste.
- Low-Sugar Option: Skip the added sweetener and rely on naturally sweet fruits like ripe peaches or bananas.
- Alcohol Infused: For adults only, mix in a splash of your favorite light rum or vodka before freezing for a grown-up summer refreshment.
One version I love is the frozen watermelon-mint popsicle with a squeeze of lime—super refreshing on a hot day. If allergies are a concern, always check your sweetener source, and coconut water is a great hypoallergenic base.
Serving & Storage Suggestions
Serve these fruit popsicles straight from the freezer for maximum chill and refreshment. They’re perfect as is or paired with a light summer salad or grilled chicken for a casual meal.
Store any extras in an airtight container or tightly sealed popsicle molds in the freezer. They keep well for up to 2 weeks without losing flavor. When reheating, just let them soften at room temperature for 5 minutes before enjoying.
Over time, the flavors deepen a bit in the freezer, making them even tastier after a day or two. If you notice any freezer burn, just trim it off before serving.
Nutritional Information & Benefits
These fruit popsicles are a low-calorie, hydrating treat packed with vitamins and antioxidants. Depending on the fruit choice, a single popsicle averages about 50-70 calories, with natural sugars from fruit and a small amount of added sweetener.
Key benefits include vitamin C, fiber, and hydration from the fruit and coconut water base. Using natural sweeteners avoids refined sugars, making them a better option for kids and adults alike.
They are naturally gluten-free, dairy-free (unless you add dairy), and vegan if you choose plant-based sweeteners and liquids. Just watch for chia seeds if you have seed allergies.
From my wellness perspective, these popsicles are a guilt-free way to enjoy a sweet treat that supports hydration and nutrition during hot months.
Conclusion
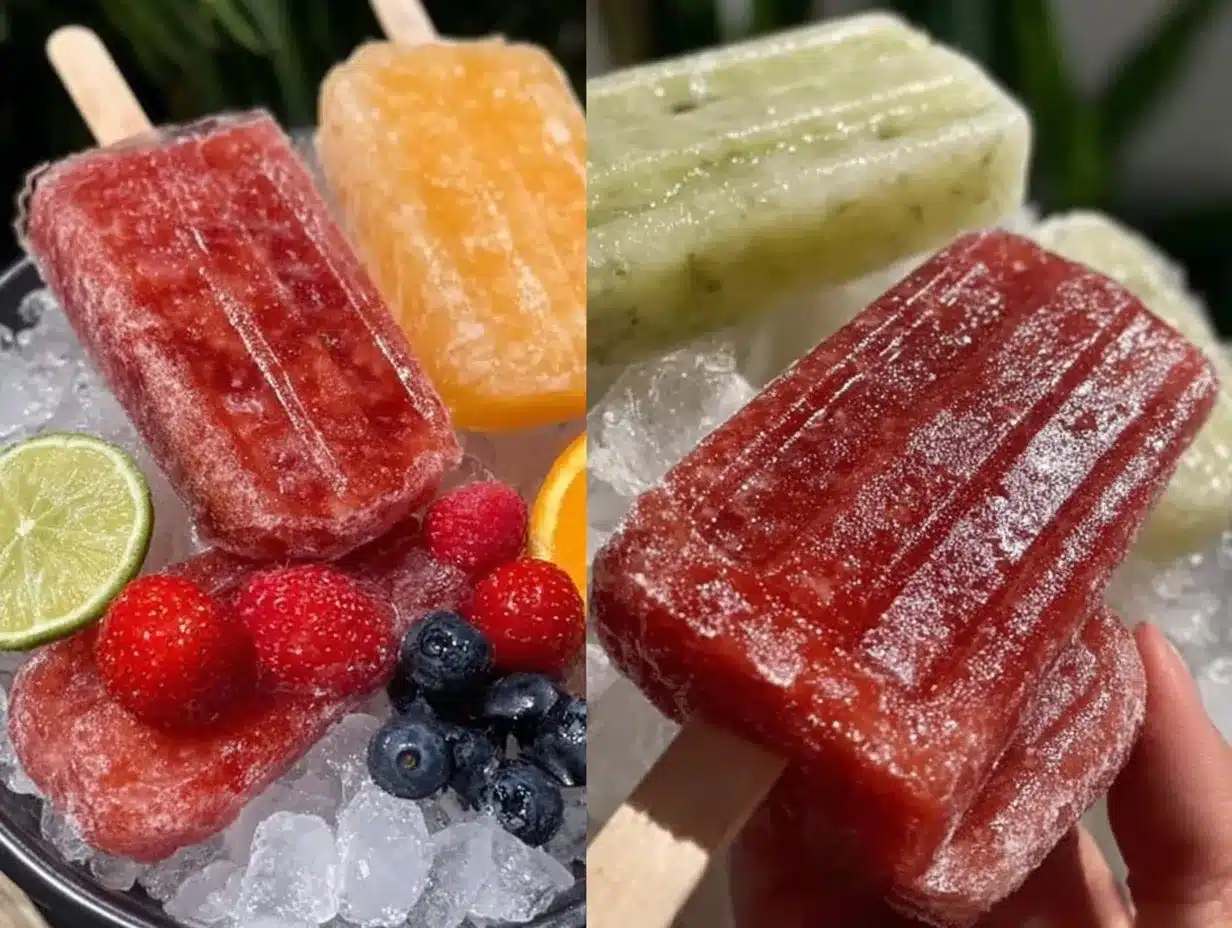
Refreshing healthy pennies per serving fruit popsicles are a summer must-have: affordable, delicious, and simple to make. Whether you’re cooling off after a long day or surprising the kids with a homemade treat, this recipe hits all the right notes.
Feel free to experiment with your favorite fruits and tweaks to make it truly yours. I love how this recipe brings back joyful memories of warm afternoons with a modern, health-conscious twist.
If you try this recipe, I’d love to hear how you customized it or any fun flavors you created—leave a comment or share your photos! Here’s to many cool, sweet moments ahead.
FAQs
Can I use frozen fruit instead of fresh?
Yes! Frozen fruit works well and can make the popsicles even more refreshing. Just thaw slightly before blending for best texture.
How long do these fruit popsicles last in the freezer?
They stay fresh for up to two weeks when stored in airtight containers or sealed molds.
Can I make these popsicles without any added sweetener?
Absolutely. If your fruit is ripe and naturally sweet, you can skip the sweetener altogether for a more natural taste.
What can I use if I don’t have popsicle molds?
Small paper cups or silicone muffin cups with wooden sticks or spoons work great as alternatives.
Is it okay to add yogurt to make creamy popsicles?
Definitely! Adding Greek yogurt or a dairy-free alternative will give your popsicles a creamy texture and boost protein content.
Pin This Recipe!

Refreshing Healthy Pennies Per Serving Fruit Popsicles
A simple, budget-friendly homemade fruit popsicles recipe perfect for summer, using fresh fruit and natural sweeteners for a refreshing and healthy treat.
- Prep Time: 15 minutes
- Cook Time: 4-6 hours (freezing time)
- Total Time: 4 hours 15 minutes to 6 hours 15 minutes
- Yield: 6 popsicles 1x
- Category: Dessert
- Cuisine: American
Ingredients
- 2 cups fresh fruit (berries, mango chunks, peaches, or watermelon cubes)
- 2 tablespoons fresh lemon juice
- 2 tablespoons honey or maple syrup (adjust to taste; use agave syrup for vegan option)
- 1 cup coconut water or plain water
- Optional: a few sprigs of mint leaves
- 1 tablespoon chia seeds
Instructions
- Wash and chop your chosen fresh fruit into small chunks, about 2 cups total. For smoother popsicles, blend all fruit; for chunkier texture, reserve some pieces to stir in later. (5 minutes)
- In a blender, combine the fruit, lemon juice, honey or maple syrup, and coconut water or plain water. Blend until mostly smooth but still slightly textured. (3 minutes)
- If using chia seeds or mint, stir them into the mixture now. (1 minute)
- Pour the fruit mixture into popsicle molds, leaving space at the top for expansion. Insert sticks. If reserved fruit chunks, press them into molds before freezing. (5 minutes)
- Freeze molds upright for at least 4-6 hours or overnight for best results.
- To unmold, briefly dip molds in warm water for 5-10 seconds and gently pull out the popsicles. Serve immediately or keep frozen. (2 minutes)
Notes
Leave space in molds for expansion to avoid overflow. Use warm water to loosen popsicles before unmolding. Adjust sweetness to taste. For creamier popsicles, add Greek yogurt or dairy-free alternative. Frozen fruit can be used but thaw slightly before blending.
Nutrition
- Serving Size: 1 popsicle
- Calories: 5070
- Sugar: 12
- Sodium: 5
- Fat: 0.2
- Carbohydrates: 15
- Fiber: 2
- Protein: 1
Keywords: fruit popsicles, healthy popsicles, homemade frozen treats, summer dessert, natural sweetener, budget-friendly, refreshing snack