Love this? Save it for later!
Share the inspiration with your friends
My neighbor, Sarah, wasn’t trying to impress anyone. I’d stopped by to borrow a ladder on a crisp October afternoon, and the smell of warm chocolate and vanilla hit me before I even got through her screen door. She was standing in her kitchen, flour on her cheek, pulling this gigantic cookie cake out of the oven. It had these little pointed ears and a tail made of chocolate. “Oh, it’s just something for the kids’ Halloween party,” she said, waving her hand like it was nothing. But let me tell you, I stood there frozen, staring at this black cat cookie cake, and I knew I wouldn’t rest until I figured out how to make it myself. The casualness of it all—that’s what got me. She made something spectacular look like an afterthought. I mean, maybe you’ve been there, watching someone create magic without even realizing it. That day, I practically begged her for the recipe, and after a few tweaks and trials in my own kitchen, I landed on this version. It’s the kind of dessert that makes people stop mid-sentence and just stare. Honestly, it’s become my go-to Halloween treat, and I keep making it because it brings that same surprised joy to my table every single time.
Why You’ll Love This Recipe
This Spooky Black Cat Halloween Cookie Cake with Oreo Crumbs isn’t just another Halloween dessert. It’s a showstopper that’s deceptively simple to pull together. I’ve tested this recipe multiple times, tweaking the chocolate-to-oreo ratio until it was just right, and I can tell you with confidence—it works every single time.
- Quick & Easy: From start to finish, you’re looking at about 45 minutes. No complicated decorating skills required. You just shape the dough, bake, and decorate.
- Simple Ingredients: You probably have most of these in your pantry right now. Butter, sugar, flour, eggs, and a package of Oreos. No fancy extracts or hard-to-find decorations.
- Perfect for Halloween Parties: Whether it’s a classroom celebration, a spooky movie night, or a potluck, this cookie cake gets all the attention. Kids and adults both lose their minds over it.
- Crowd-Pleaser: The combination of soft, chewy cookie cake with crunchy Oreo crumbs is honestly irresistible. I’ve seen people go back for thirds.
- Unbelievably Delicious: The texture is next-level. The edges are slightly crisp, the center is soft and gooey, and every bite has those little pockets of Oreo crunch. It’s comfort food at its best.
What makes this recipe different from the rest? It’s the way the Oreo crumbs get folded into the dough, creating this beautiful speckled effect that looks like a cat’s fur. Plus, the shape is built right into the dough—no carving or cutting after baking. You just shape it before it goes in the oven. It’s genius, honestly. And it’s the kind of recipe that makes you feel like a baking rockstar without the stress.
What Ingredients You Will Need
This recipe uses simple, wholesome ingredients to deliver bold chocolate flavor and that satisfying Oreo crunch. Most of these are pantry staples, so you might not even need a grocery run.
For the Cookie Cake Dough
- 1 cup (2 sticks) unsalted butter, softened (I prefer using Land O’Lakes for consistent results)
- 1 cup granulated sugar (adds sweetness and helps with browning)
- 1/2 cup packed light brown sugar (adds moisture and a hint of molasses flavor)
- 2 large eggs, room temperature (room temperature eggs incorporate better into the batter)
- 1 teaspoon vanilla extract (pure vanilla extract makes a difference, but imitation works fine too)
- 2 1/2 cups all-purpose flour (spoon and level for accuracy)
- 1/2 cup unsweetened cocoa powder (I recommend Hershey’s Special Dark for a deeper color)
- 1 teaspoon baking soda
- 1/2 teaspoon salt
- 1 cup Oreo crumbs (about 8-10 Oreos, crushed into small pieces—not powder)
For the Decoration
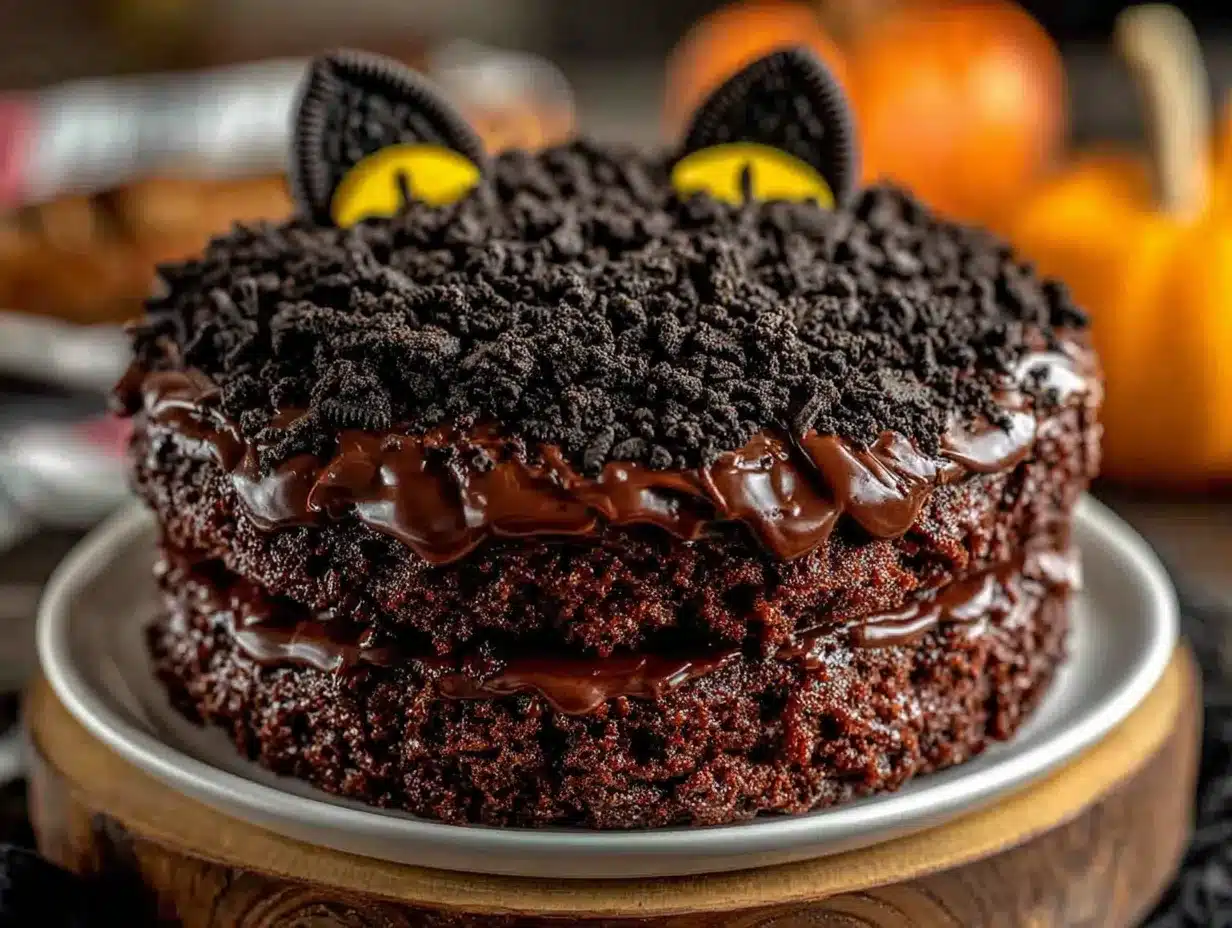
- 1/2 cup Oreo crumbs (for coating the outside, about 4-5 more Oreos)
- Black gel food coloring (optional, for a darker “cat” look)
- Candy eyes (the kind you find at baking supply stores or online)
- Pink or red icing (for the nose and mouth)
- Black licorice strings (for whiskers, or use black icing)
Ingredient Selection Tips: Look for Oreos that are fresh and crunchy, not stale. If you’re using double-stuffed Oreos, that’s fine—just know the filling will add a bit more sweetness to the crumbs. For the cocoa powder, I’ve tried both natural and Dutch-processed, and both work well. Dutch-processed gives a darker, more dramatic color that’s perfect for a black cat.
Substitution Guidance: If you’re dairy-free, you can substitute the butter with a high-quality vegan butter stick (not the spreadable kind). For a gluten-free version, use a 1:1 gluten-free flour blend. The texture will be slightly different, but still delicious. And if you don’t have Oreos, any chocolate sandwich cookie will work—just scrape out the filling if you want a less sweet crumb.
Equipment Needed
You don’t need a lot of fancy equipment for this recipe, which is part of its charm. Here’s what you’ll need:
- Large mixing bowl (I use a glass bowl because it doesn’t hold onto odors)
- Electric hand mixer or stand mixer (a hand mixer works perfectly, but a stand mixer makes creaming the butter and sugar even easier)
- Baking sheet (a standard half-sheet pan works great)
- Parchment paper (essential for easy cleanup and preventing sticking)
- Measuring cups and spoons
- Rolling pin or food processor (for crushing Oreos—I prefer the food processor for consistency)
- Offset spatula or butter knife (for shaping the dough)
- Cooling rack
Budget-Friendly Options: If you don’t have a food processor, just put the Oreos in a zip-top bag and crush them with a rolling pin. It’s a little more work, but it’s oddly satisfying. And if you don’t have an offset spatula, a regular butter knife works just fine for shaping the cat.
Personal Experience: I’ve made this recipe with both a hand mixer and a stand mixer, and honestly, the hand mixer gives me more control. The dough is thick, so a stand mixer can sometimes overwork it. Plus, cleanup is faster with a hand mixer. Just a thought!
Preparation Method
Alright, let’s get to the fun part. Follow these steps, and you’ll have a spooky black cat cookie cake that’s almost too cute to eat. Almost.
- Preheat your oven to 350°F (175°C). Line a baking sheet with parchment paper and set it aside. I like to measure out my parchment so it lays flat—no curling edges.
- Crush the Oreos. For the dough, you’ll need 1 cup of Oreo crumbs (about 8-10 cookies). For the coating, you’ll need another 1/2 cup (about 4-5 cookies). Place the cookies in a food processor and pulse until you have small crumbs. You want some texture—don’t turn them into dust. Set aside the coating crumbs in a shallow dish.
- Cream the butter and sugars. In a large mixing bowl, beat the softened butter, granulated sugar, and brown sugar together on medium speed until light and fluffy. This takes about 2-3 minutes. You’ll know it’s ready when it looks pale and the texture is smooth. Scrape down the sides of the bowl with a spatula.
- Add the eggs and vanilla. Beat in the eggs one at a time, making sure each is fully incorporated before adding the next. Then add the vanilla extract and mix until combined. The mixture might look a little curdled at this point—don’t worry, that’s normal.
- Mix the dry ingredients. In a separate bowl, whisk together the flour, cocoa powder, baking soda, and salt. If you’re using black gel food coloring for a darker cat, you can add a few drops to the dry ingredients now. It helps distribute the color evenly.
- Combine wet and dry. Gradually add the dry ingredients to the wet mixture, mixing on low speed until just combined. Be careful not to overmix—stop as soon as you don’t see any more streaks of flour. The dough will be thick and slightly sticky.
- Fold in the Oreo crumbs. Gently fold the 1 cup of Oreo crumbs into the dough using a spatula. You want them distributed evenly throughout the dough. I like to use a folding motion—cut through the dough, lift, and turn. It prevents overmixing.
- Shape the black cat. Transfer the dough to the prepared baking sheet. Using your hands or an offset spatula, shape the dough into a cat silhouette. Start with a large round or oval for the body. Then, shape a smaller circle for the head on top. Pinch two pointed ears at the top of the head. Add a long, curved tail on one side. Don’t worry about perfection—cats come in all shapes and sizes. The dough will spread slightly as it bakes, so make your cat slightly thicker and more compact than you want the final result to be. Aim for about 1/2 to 3/4 inch thickness.
- Bake. Place the baking sheet in the preheated oven and bake for 12-15 minutes. The edges should be set and the center should look slightly underdone—it will continue to cook as it cools. For a softer, gooier cookie cake, bake on the shorter side. For a firmer cookie, go longer. I usually bake mine for 13 minutes.
- Cool completely. Let the cookie cake cool on the baking sheet for 10 minutes, then transfer it to a cooling rack to cool completely. This is important—if you try to decorate it while it’s warm, the icing will melt and the candy eyes will slide off.
- Decorate. Once the cookie cake is completely cool, it’s time to bring your black cat to life. Spread the reserved Oreo crumbs over the body and head of the cat, pressing them gently into the surface. This gives the cat a “furry” texture. Attach the candy eyes using a dab of icing. Use pink or red icing to draw a small nose and a little mouth. For whiskers, use black licorice strings or pipe them with black icing. You can also add a little bow or a collar if you’re feeling fancy.
Sensory Cues: When you cream the butter and sugar, you’re looking for a light, fluffy texture that looks like pale sand. When you add the dry ingredients, the dough should come together into a cohesive mass that’s slightly firm but pliable. When it bakes, your kitchen will smell like a chocolate dream—warm, rich, and slightly sweet from the Oreos. The edges of the cookie cake will look set and slightly cracked, while the center will still look soft and puffy.
Troubleshooting: If your dough is too sticky to shape, refrigerate it for 15-20 minutes. If it’s too dry, add a tablespoon of milk. If the cat shape spreads too much during baking, your dough was too warm—next time, chill it for 30 minutes before baking. And if the edges brown too quickly, your oven might run hot. I learned this the hard way when my first cat came out looking more like a blob than a feline.
Cooking Tips & Techniques
I’ve made this recipe probably a dozen times now, and I’ve learned a few things along the way. Let me share some of my hard-earned wisdom.
The Oreo Crushing Technique: For the best texture, you want a mix of fine crumbs and small chunks. If you crush the Oreos too fine, they’ll disappear into the dough. Too chunky, and the cookie cake won’t hold together well. I pulse my food processor about 8-10 times. You should still see tiny pieces of the chocolate wafer and the cream filling.
Shaping the Cat: This is where most people get nervous, but trust me, it’s forgiving. I use my hands to form the basic shape, then an offset spatula to smooth the edges. If the dough cracks, just press it back together. The Oreo coating will cover any imperfections. One time, my cat’s tail broke off during shaping, and I just pressed it back on. After baking, you couldn’t even tell.
Timing and Multitasking: While the butter and eggs come to room temperature, crush your Oreos and measure your dry ingredients. This way, once you start mixing, everything flows smoothly. I also like to line my baking sheet and have my decorating supplies ready before I start. The actual mixing and shaping takes about 15 minutes, and the baking takes 12-15 minutes. It’s a quick process, so being organized helps.
Common Mistakes to Avoid: Don’t overmix the dough after adding the flour. Overmixing develops gluten, which makes the cookie cake tough. Mix until just combined. Also, don’t skip the cooling step. I know it’s tempting to decorate right away, but a warm cookie cake is fragile. I made that mistake once, and my cat ended up with a melted face. Not a good look.
Consistency Tips: For consistent results, use a kitchen scale to measure your flour and sugar. Flour can be surprisingly variable when measured by volume. If you don’t have a scale, spoon the flour into your measuring cup and level it off with a knife. Don’t scoop directly from the bag—that packs the flour and gives you too much.
Variations & Adaptations
One of the best things about this recipe is how adaptable it is. Here are some variations I’ve tried and loved.
Dietary Variations: For a gluten-free version, use a 1:1 gluten-free flour blend. I’ve tried this with Bob’s Red Mill, and it worked beautifully. The texture was slightly more crumbly, but the taste was spot on. For a dairy-free version, substitute the butter with a vegan butter stick. Just make sure it’s the stick form, not the spreadable kind in a tub. The spreadable kind has too much water and will affect the texture.
Seasonal Adaptations: This recipe isn’t just for Halloween! For a winter version, shape the dough into a snowman and use white icing and mini chocolate chips for the face. For spring, shape it into a bunny and use pastel-colored M&Ms for decoration. For a birthday party, shape it into a number or a star. The possibilities are endless.
Flavor Twists: If you want to change up the flavor, try using mint Oreos instead of regular ones. The mint and chocolate combination is incredible. Or use peanut butter Oreos for a salty-sweet twist. You can also add 1/2 cup of chocolate chips to the dough for extra chocolatey goodness. I once made a version with white chocolate chips and dried cranberries, and it was surprisingly good—like a chocolate cookie with little bursts of tartness.
Different Cooking Methods: If you don’t want to shape the dough into a cat, you can press it into a 9-inch round cake pan and bake it for 20-25 minutes. Then decorate it like a round Halloween cake with spiderweb icing. Or make individual cat-shaped cookies by cutting the dough with a cat-shaped cookie cutter and baking for 8-10 minutes.
Personal Variation: My favorite variation is adding a layer of cream cheese frosting between two cookie cakes to make a sandwich. It’s decadent and ridiculous, but for a special occasion, it’s absolutely worth it. I made this for my niece’s Halloween party, and the kids went wild.
Serving & Storage Suggestions
This Spooky Black Cat Halloween Cookie Cake is best served at room temperature. The texture is soft and chewy, and the Oreo crumbs on top stay crunchy. I like to serve it on a large platter or a wooden cutting board, surrounded by a few extra candy eyes and some Halloween-themed napkins. It makes for a great centerpiece.
Complementary Dishes: This cookie cake pairs beautifully with a glass of cold milk or a warm cup of hot chocolate. For a Halloween party spread, serve it alongside other spooky treats like mummy hot dogs or pumpkin dip with ginger snaps. The sweetness of the cookie cake balances the savory snacks perfectly.
Storage Instructions: Store any leftover cookie cake in an airtight container at room temperature for up to 3 days. If you stack pieces, place a sheet of parchment paper between them to prevent sticking. Do not refrigerate—the refrigerator dries out the cookie cake and makes it hard.
Freezing Instructions: You can freeze the baked, undecorated cookie cake for up to 2 months. Wrap it tightly in plastic wrap, then in aluminum foil. When you’re ready to serve, thaw it at room temperature, then decorate. You can also freeze the raw dough for up to 1 month. Shape it into the cat silhouette on a parchment-lined baking sheet, freeze until solid, then wrap and store. Bake directly from frozen, adding 2-3 minutes to the baking time.
Reheating Tips: If you want to enjoy the cookie cake warm, pop a piece in the microwave for 10-15 seconds. It will be soft and gooey, just like it came out of the oven. For a larger piece, reheat in a 300°F oven for 5 minutes.
Flavor Development: Honestly, this cookie cake tastes even better the next day. The flavors meld together, and the texture becomes even more chewy and fudgy. I’ve been known to make it a day ahead of time on purpose.
Nutritional Information & Benefits
Let’s be real—this is a treat, not a health food. But that doesn’t mean you can’t enjoy it mindfully. Here’s the estimated nutritional breakdown per serving (assuming 8 servings):
| Nutrient | Amount per Serving |
|---|---|
| Calories | 420 |
| Total Fat | 22g |
| Saturated Fat | 12g |
| Cholesterol | 65mg |
| Sodium | 320mg |
| Total Carbohydrates | 54g |
| Dietary Fiber | 2g |
| Sugars | 32g |
| Protein | 5g |
Health Benefits: The cocoa powder in this recipe contains antioxidants called flavonoids, which can help reduce inflammation and improve heart health. The Oreos, well, they bring joy—and that counts for something! Eggs provide protein and essential vitamins like B12 and D. And butter contains vitamin A, which is good for eye health. All things considered, this is a dessert that can be part of a balanced diet when enjoyed in moderation.
Dietary Considerations: This recipe contains gluten, dairy, and eggs. For a gluten-free version, use a gluten-free flour blend. For a dairy-free version, use vegan butter. For an egg-free version, substitute each egg with a flax egg (1 tablespoon ground flaxseed mixed with 3 tablespoons water, let sit for 5 minutes). The texture will be slightly different, but still delicious.
Potential Allergens: This recipe contains wheat, dairy, eggs, and soy (from the Oreos). Oreos are also processed in facilities that handle peanuts and tree nuts, so if you have severe allergies, check the packaging.
Personal Wellness Perspective: I believe in the 80/20 rule—eat nourishing foods 80% of the time, and enjoy treats like this the other 20%. This cookie cake is perfect for celebrations, and sharing it with loved ones makes it even more special. Food is about connection and joy, not just fuel.
Conclusion
This Spooky Black Cat Halloween Cookie Cake with Oreo Crumbs is more than just a dessert—it’s an experience. It’s the kind of recipe that brings people together, makes kids squeal with delight, and creates memories that last long after the last crumb is gone. I’ve made it for Halloween parties, classroom celebrations, and cozy family nights, and every single time, it’s been a hit.
I encourage you to make this recipe your own. Adjust the shape, try different decorations, experiment with flavors. The beauty of this cookie cake is that it’s forgiving and flexible. Don’t stress about making the perfect cat—imperfections add character. A lopsided ear or a slightly crooked tail just makes your cat unique.
Honestly, this recipe holds a special place in my heart because it reminds me of that afternoon at Sarah’s house, standing in her kitchen and discovering that magic can happen in the most ordinary moments. I hope this cookie cake brings you and your loved ones the same joy it’s brought me. So go ahead, preheat that oven, and let’s make some spooky magic together!
Have you tried this recipe? I’d love to hear about your black cat creations! Drop a comment below, share your photos, and let me know if you tried any fun variations. Don’t forget to pin this recipe for later and share it with your Halloween-loving friends. Happy baking, and have a spooktacular Halloween!
Frequently Asked Questions
Can I use a different type of cookie for the crumbs?
Absolutely! While Oreos give the best color and flavor for a black cat, you can use any chocolate sandwich cookie. If you want a different look, try using golden Oreos or even chocolate chip cookies crushed up. The texture will be slightly different, but the taste will still be delicious.
How do I prevent the cookie cake from spreading too much?
This is a common issue, and I’ve dealt with it myself. The key is to chill the shaped dough for 15-20 minutes before baking. Also, make sure your butter is softened but not melted. If your kitchen is warm, the dough will spread more. And don’t press the dough too thin—aim for about 1/2 to 3/4 inch thickness.
Can I make this recipe ahead of time?
Yes! You can bake the cookie cake a day ahead and store it in an airtight container at room temperature. Decorate it just before serving for the best presentation. You can also freeze the baked, undecorated cookie cake for up to 2 months. Just thaw, decorate, and serve.
What if I don’t have candy eyes?
No problem! You can make eyes using black and white icing. Pipe two small white circles, then add smaller black circles for the pupils. Or use mini chocolate chips for the eyes. If you’re feeling creative, you can even use sliced almonds for a whimsical look.
Can I make this recipe vegan?
Yes, with a few substitutions. Use vegan butter sticks instead of regular butter. Replace each egg with a flax egg (1 tablespoon ground flaxseed mixed with 3 tablespoons water). And make sure your Oreos are vegan—regular Oreos are accidentally vegan, but double-check the packaging. The texture will be slightly denser, but the flavor will still be amazing.
Pin This Recipe!
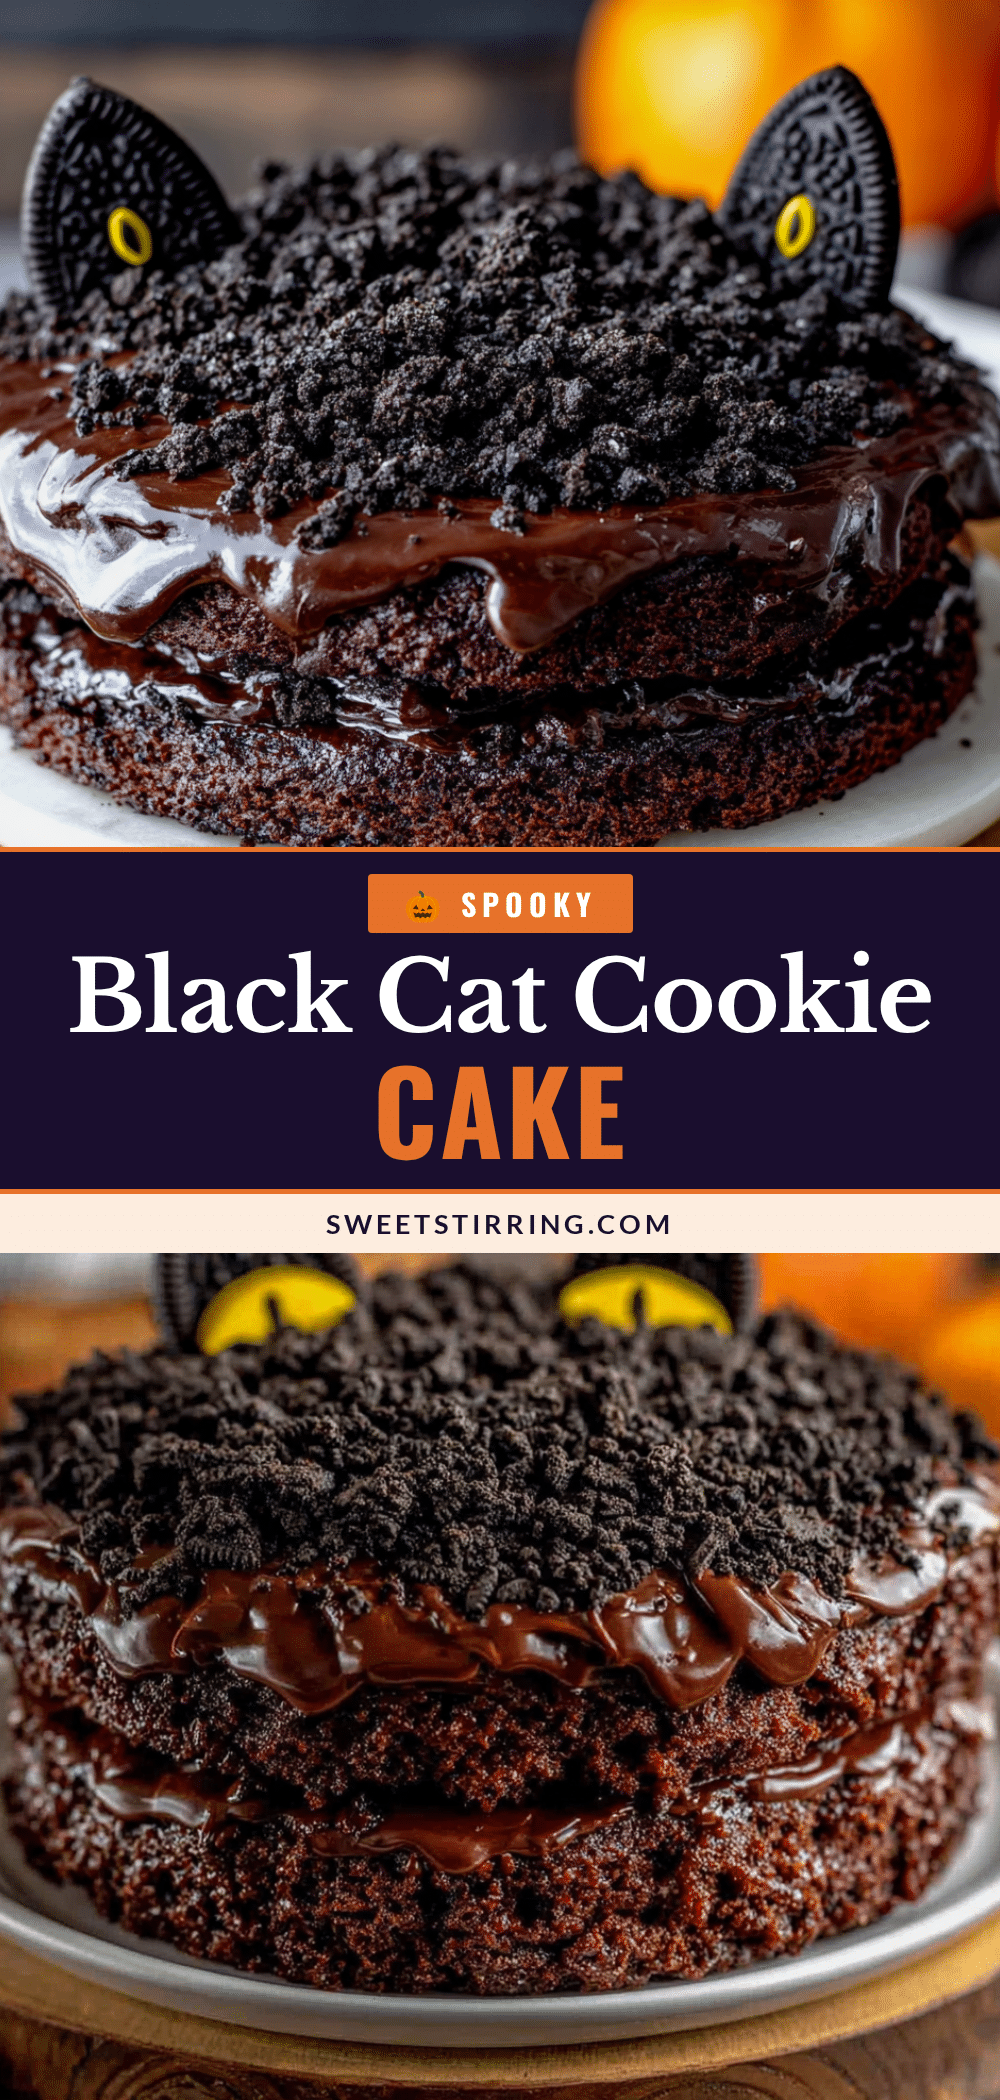
Spooky Black Cat Halloween Cookie Cake with Oreo Crumbs
A showstopping Halloween dessert that’s deceptively simple to make. This soft, chewy chocolate cookie cake is studded with Oreo crumbs and shaped like a black cat, then decorated with candy eyes and licorice whiskers.
- Prep Time: 15 minutes
- Cook Time: 13 minutes
- Total Time: 45 minutes
- Yield: 8 servings 1x
- Category: Dessert
- Cuisine: American
Ingredients
- 1 cup (2 sticks) unsalted butter, softened
- 1 cup granulated sugar
- 1/2 cup packed light brown sugar
- 2 large eggs, room temperature
- 1 teaspoon vanilla extract
- 2 1/2 cups all-purpose flour
- 1/2 cup unsweetened cocoa powder
- 1 teaspoon baking soda
- 1/2 teaspoon salt
- 1 cup Oreo crumbs (about 8–10 Oreos, crushed)
- 1/2 cup Oreo crumbs (for coating, about 4–5 Oreos)
- Black gel food coloring (optional)
- Candy eyes
- Pink or red icing
- Black licorice strings (or black icing)
Instructions
- Preheat oven to 350°F (175°C). Line a baking sheet with parchment paper.
- Crush Oreos: For dough, pulse 8-10 Oreos in a food processor until small crumbs form (not powder). Set aside 1/2 cup for coating in a shallow dish.
- In a large bowl, beat softened butter, granulated sugar, and brown sugar on medium speed until light and fluffy, about 2-3 minutes.
- Beat in eggs one at a time, then add vanilla extract and mix until combined.
- In a separate bowl, whisk together flour, cocoa powder, baking soda, and salt. If using black gel food coloring, add a few drops to the dry ingredients.
- Gradually add dry ingredients to wet mixture, mixing on low speed until just combined. Do not overmix.
- Gently fold in 1 cup of Oreo crumbs using a spatula until evenly distributed.
- Transfer dough to prepared baking sheet. Shape into a cat silhouette: a large oval for the body, a smaller circle for the head on top, pinch two pointed ears, and add a curved tail on one side. Aim for 1/2 to 3/4 inch thickness.
- Bake for 12-15 minutes. Edges should be set, center slightly underdone. Cool on baking sheet for 10 minutes, then transfer to a cooling rack to cool completely.
- Once cool, spread reserved Oreo crumbs over the body and head, pressing gently. Attach candy eyes with a dab of icing. Use pink or red icing for nose and mouth. Add whiskers with black licorice strings or black icing.
Notes
For a darker cat color, use Dutch-processed cocoa powder and black gel food coloring. Chill the shaped dough for 15-20 minutes if it’s too sticky or to prevent spreading. The cookie cake tastes even better the next day.
Nutrition
- Serving Size: 1 slice (1/8 of cake
- Calories: 420
- Sugar: 32
- Sodium: 320
- Fat: 22
- Saturated Fat: 12
- Carbohydrates: 54
- Fiber: 2
- Protein: 5
Keywords: Halloween, cookie cake, black cat, Oreo, chocolate, spooky, party dessert