Love this? Save it for later!
Share the inspiration with your friends
I was fixing the dripping faucet in my kitchen sink when Arthur, the retired actuary who lives next door, started talking about chicken tenders. It was a Tuesday afternoon, and I was covered in grease and frustration, wrench in hand, wondering if I’d ever get that old pipe to stop groaning. Arthur wasn’t a cook. He was a man who ate toast for dinner and considered ketchup a vegetable group. So when he leaned over the fence, holding a mug of tea, and said, “You know what fixes a bad day? Crispy Parmesan baked chicken tenders,” I almost laughed.
He didn’t just say the name of the dish. He described the sound. He told me about the specific crunch that happens when the panko and parmesan crust hits the hot air of the oven. He said it sounded like stepping on dry autumn leaves, which seemed like a weird thing to associate with dinner, but something in his tone made me stop tightening the wrench. He walked over then, wiping his hands on a rag, and pulled a napkin out of his pocket. It was stained with what looked like olive oil and paprika.
I wiped my hands on my jeans, trying not to get grease on his nice linen shirt, and he scribbled down the ratios. He emphasized that the secret wasn’t the chicken itself, but the double-dip in the almond flour and parmesan mixture before hitting the oven. He said he’d been making them for his wife since she got sick, and they became their way of staying connected when words failed. I took the napkin, feeling a strange lump in my throat, and promised to try it that weekend.
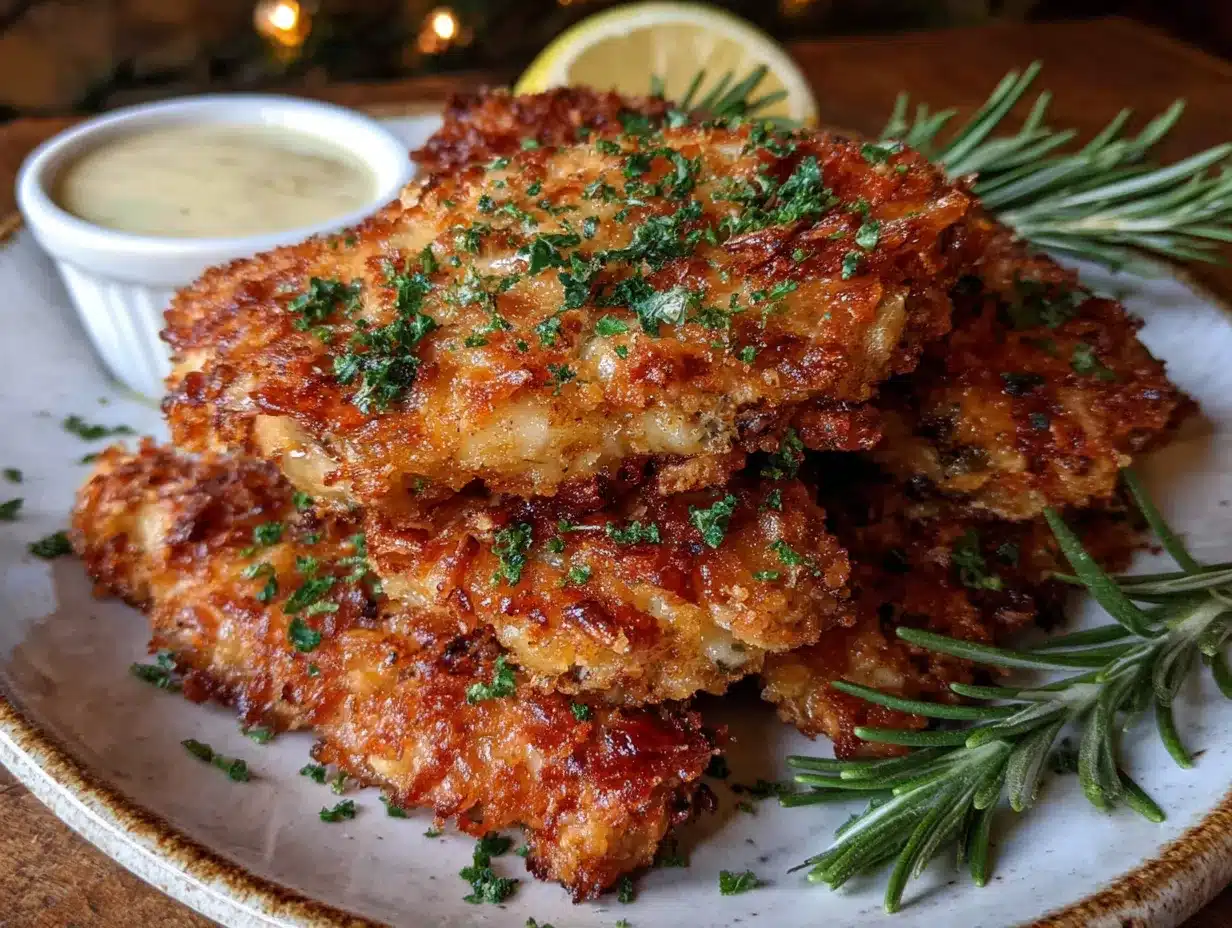
Honestly, I thought it would be a flop. I’m used to soggy, breaded chicken that falls apart the second you pick it up. But that Friday, I made them. The smell filled the house, and when I took the tray out, they were golden, shattering slightly when I tapped them with a fork. I cut one open, steam rising up, and took a bite. It was savory, salty, and impossibly crisp without a single drop of oil.
Arthur was right. It wasn’t just dinner; it was comfort. Maybe you’ve been there, looking for a simple meal that feels like a hug from the inside. That napkin is still on my fridge, right next to a grocery list. I make these tenders now because they remind me that good things come from the most unexpected places, usually from people who don’t think of themselves as chefs. If you’re looking for a weeknight win that actually tastes homemade, this is it.
Why You’ll Love This Recipe
Let’s face it, most baked chicken recipes end up dry or bland. Not this one. I’ve tested this Crispy Parmesan Baked Chicken Tenders recipe over a dozen times, tweaking the flour blend and temperature settings until it was perfect. The result is a tender, juicy chicken strip with a crust that stays crunchy even after sitting for a few minutes.
Here is why this recipe stands out from the rest:
- Quick & Easy: You can have dinner on the table in under 25 minutes. It is perfect for busy weeknights when you are tired and just want something hot and delicious.
- Simple Ingredients: No fancy grocery trips needed. You likely already have panko, parmesan, and almond flour in your pantry. It uses wholesome staples that you trust.
- Perfect for Kids and Picky Eaters: This is the kind of meal that turns around kids who refuse to eat vegetables. It’s familiar, crunchy, and savory.
- Crowd-Pleaser: I’ve served these at potlucks and family gatherings, and the tray always disappears first. Adults love the nutty flavor of the almond flour, while kids love the classic chicken taste.
- Unbelievably Delicious: The texture is next-level. The combination of sharp parmesan and buttery almond flour creates a flavor profile that is richer than traditional breadcrumbs but lighter on the stomach.
What makes this different from other baked chicken recipes is the coating. Most people use plain breadcrumbs, which can get soggy. By using a mix of fine almond flour and panko, you get a dual-layer crunch. The almond flour holds the seasoning and parmesan close to the chicken, while the panko provides the structural crunch. I also add a touch of baking powder to the dry mix, which helps the coating puff up slightly and stay airy.
This isn’t just good chicken; it is the kind that makes you close your eyes after the first bite. It’s comfort food reimagined—healthier, faster, but with the same soul-soothing satisfaction. It’s perfect for impressing guests without stress, or turning a simple meal into something memorable.
What Ingredients You Will Need
This recipe uses simple, wholesome ingredients to deliver bold flavor and satisfying texture without the fuss. The magic here is in the balance of fats and proteins in the coating. You don’t need heavy cream or egg washes that make the breading heavy. Instead, we rely on the natural oils in the almond flour and the fat in the butter spray to get that golden color.
Here is what you need to gather before you start:
For the Chicken
- Chicken breasts: 1.5 lbs, trimmed of excess fat. I prefer buying boneless, skinless breasts because they are uniform in size, which helps them cook evenly. If you can find organic, even better.
- Buttermilk: 1 cup. This is crucial for tenderizing the meat. The acidity breaks down the proteins slightly, ensuring the chicken doesn’t turn into rubber. If you don’t have buttermilk, you can make a substitute by adding a tablespoon of lemon juice to regular milk and letting it sit for ten minutes.
- Seasoning for the buttermilk: 1 teaspoon of garlic powder, 1 teaspoon of onion powder, and ½ teaspoon of black pepper. This adds depth to the chicken itself, not just the crust.
For the Crispy Coating
- Fine almond flour: 1 cup. I recommend using a brand like Blue Diamond or store-brand blanched almond flour. It creates a fine, sandy texture that adheres well to the chicken. This is the secret to the rich, nutty flavor.
- Panko breadcrumbs: ½ cup. Use Japanese-style panko for extra crunch. Regular breadcrumbs will make the coating dense. Look for brands that are light and airy.
- Grated Parmesan cheese: ½ cup. Use freshly grated parmesan from the block, not the stuff in the green shaker can. The pre-grated stuff has anti-caking agents that prevent it from melting properly into the crust.
- Garlic powder: 1 teaspoon. Adds a savory punch that complements the cheese.
- Onion powder: 1 teaspoon. Adds sweetness and complexity.
- Salt: 1 teaspoon. Adjust to taste, but don’t skip it. The cheese is salty, so start with less if you are watching sodium.
- Baking powder: 1 teaspoon. This is the game-changer. It creates tiny air pockets in the coating, making it lighter and crispier.
For the Finish
- Butter or olive oil spray: You need this to help the coating brown in the oven. Without it, the almond flour might stay pale. I use a light olive oil spray for a healthier option, but butter spray gives a richer flavor.
If you are gluten-free, you can swap the panko for gluten-free panko or extra almond flour. If you are dairy-free, you can swap the parmesan for nutritional yeast, which adds a similar cheesy, umami flavor. For a nut-free option, you can use crushed cornflakes instead of almond flour, though the flavor profile will be different.
Equipment Needed
You don’t need a lot of fancy tools to make these tenders, but having the right setup makes the process smoother.
- Baking sheet: A standard 13×18 inch sheet pan is ideal. Line it with parchment paper for easy cleanup. I also recommend using a wire rack placed on top of the baking sheet. This allows hot air to circulate under the chicken, preventing the bottom from getting soggy.
- Three shallow bowls: You’ll need three bowls for the dredging station. One for the buttermilk mixture, one for the dry coating, and one empty one if you want to double-dip for extra crunch. Wide bowls work best so you can coat the chicken easily.
- Pastry brush or spray bottle: To apply the butter or oil spray evenly over the coated chicken.
- Meat mallet or rolling pin: Optional, but helpful if your chicken breasts are very thick. Pounding them to an even ½-inch thickness ensures they cook at the same rate.
- Instant-read thermometer: This is non-negotiable for perfect chicken. You want to pull them out at 165°F (74°C). Guessing leads to dry chicken.
If you don’t have a wire rack, you can bake directly on the parchment-lined sheet, but flip them halfway through to ensure even browning. A wire rack is worth the investment if you bake often.
Preparation Method
Making Crispy Parmesan Baked Chicken Tenders is straightforward if you follow these steps carefully. The key is to work efficiently so the coating doesn’t get soggy from the buttermilk.
- Preheat the oven: Set your oven to 400°F (200°C). This high heat is necessary to crisp up the almond flour and panko without drying out the chicken. Place a wire rack on a baking sheet and line it with parchment paper.
- Prepare the chicken: Trim any visible fat from the chicken breasts. If the breasts are very thick, slice them horizontally to create thinner cutlets. Then, cut them into strips about 1 inch wide. You should get about 8-10 strips per breast. Pat them dry with paper towels. Removing excess moisture helps the buttermilk stick better.
- Make the buttermilk bath: In a wide bowl, whisk together the buttermilk, garlic powder, onion powder, and black pepper. Add the chicken strips to the bowl, ensuring they are fully submerged. Let them marinate for at least 10 minutes, or up to 30 minutes in the fridge. This tenderizes the meat.
- Prepare the dry coating: In a second wide bowl, combine the almond flour, panko, grated parmesan, garlic powder, onion powder, salt, and baking powder. Whisk these together thoroughly. You want the baking powder distributed evenly so every bite gets that lift.
- Dredge the chicken: Take a chicken strip out of the buttermilk, letting the excess drip off for a second. Press it firmly into the dry mixture. Flip and press again. Make sure the entire surface is coated. For extra crunch, dip it back into the buttermilk for a quick second, then back into the dry mix. Press firmly one last time.
- Arrange on the rack: Place the coated tenders on the wire rack, leaving a little space between each one. Do not let them touch, or they will steam instead of bake.
- Spray with oil: Lightly spray the tops of the chicken tenders with butter or olive oil spray. This is crucial for browning. The almond flour needs fat to turn golden. Be generous here.
- Bake: Place the sheet in the oven and bake for 12-15 minutes. Halfway through (around 6 minutes), flip the tenders and spray the other side with oil. This ensures even browning on both sides.
- Check temperature: Remove the chicken when the internal temperature reaches 165°F (74°C). If you don’t have a thermometer, cut into the thickest piece to ensure the juices run clear and there is no pink.
- Rest and serve: Let the chicken rest for 2-3 minutes before serving. This allows the juices to redistribute. Serve immediately while the crust is still crisp.
Cooking Tips & Techniques
I have learned a few hard lessons while perfecting this recipe, so you can avoid my mistakes.
- Don’t skip the drying step: If the chicken is wet from the package, pat it dry first. Excess water prevents the coating from sticking properly.
- Use a wire rack: I cannot stress this enough. Baking directly on the pan makes the bottom soggy. The rack allows air to circulate, mimicking a deep fryer.
- Be generous with the spray: Almond flour doesn’t brown as easily as wheat flour. If you skimp on the oil spray, your tenders will look pale and undercooked. They need that golden color to taste right.
- Don’t overcrowd the pan: If the tenders are touching, they will steam. Give them space. If you have a small oven, bake in two batches.
- Keep the oven door closed: Every time you open the door, you lose heat. This can cause the coating to collapse. Trust the timer.
A common mistake is overcooking the chicken. Chicken breasts cook quickly, and they continue to cook slightly after you take them out of the oven. Pull them at 160°F and let them rest; they will reach 165°F safely. Overcooked chicken is dry and chewy, which ruins the whole experience.
Another tip is to toast the almond flour lightly before mixing it with the panko. This brings out the nutty flavor and adds an extra layer of crunch. Just spread it on a dry pan over medium heat for 2-3 minutes until it smells fragrant. Let it cool before using.
Variations & Adaptations
This recipe is very flexible. Here are some ways to adapt it to your needs.
- Spicy Kick: Add 1 teaspoon of cayenne pepper or red pepper flakes to the dry coating. This adds a nice heat that cuts through the richness of the cheese.
- Herb Crusted: Add 1 tablespoon of dried Italian herbs or fresh chopped parsley to the dry mix. This adds a fresh, grassy note that pairs well with the parmesan.
- Gluten-Free: Use gluten-free panko or crush some gluten-free crackers for the coating. The almond flour is naturally gluten-free, so just ensure your panko is safe.
- Dairy-Free: Swap the parmesan for nutritional yeast. It provides a similar savory, cheesy flavor without the dairy. Use olive oil spray instead of butter.
- Nut-Free: If you have nut allergies, use crushed cornflakes or rice cereal instead of almond flour. The texture will be different, but it will still be crunchy.
I also like to add a little smoked paprika to the mix for a subtle barbecue flavor. It changes the profile completely and makes it great for dipping in ranch or honey mustard.
Serving & Storage Suggestions
These tenders are best served hot and fresh. Pair them with a simple green salad, roasted asparagus, or crispy sweet potato fries. A dollop of honey mustard or garlic aioli makes a great dipping sauce.
If you have leftovers, store them in an airtight container in the refrigerator for up to 3 days. To reheat, place them in the oven at 350°F for 10 minutes. Do not use the microwave, as it will make the coating soggy. You can also freeze them unbaked. Place the coated tenders on a baking sheet and freeze until solid, then transfer to a freezer bag. Bake from frozen, adding 5-7 minutes to the cooking time.
Nutritional Information & Benefits
This recipe is a healthier alternative to fried chicken. Almond flour is high in protein and healthy fats, and lower in carbs than traditional breadcrumbs. Parmesan adds calcium and protein. Each serving (2 tenders) has approximately 250 calories, 20g of protein, 8g of carbs, and 12g of fat. It is a great option for low-carb or keto diets. Always check labels for specific dietary needs.
Conclusion
Crispy Parmesan Baked Chicken Tenders are a game-changer. They are easy, delicious, and satisfying. I hope you try this recipe and enjoy it as much as I do. Feel free to customize the spices to your liking. Let me know in the comments how you like to serve them!
Frequently Asked Questions
Can I use chicken thighs instead of breasts?
Yes, you can use boneless, skinless chicken thighs. They are juicier and more forgiving if slightly overcooked, but they cook slightly faster, so check them at 10 minutes.
Why is my coating falling off?
This usually happens if the chicken is too wet or if you don’t press the coating firmly enough. Make sure to pat the chicken dry and press the mixture into the meat.
Can I make this in an air fryer?
Absolutely. Cook at 375°F for 8-10 minutes, flipping halfway. You may need to spray them more generously in an air fryer.
What dipping sauce goes best with these?
Ranch, honey mustard, BBQ sauce, and garlic aioli are all excellent choices. The savory crust pairs well with creamy or tangy sauces.
How do I keep them crispy for meal prep?
Store them in the fridge and reheat in the oven or air fryer. Avoid the microwave to maintain the crunch.
Pin This Recipe!

Crispy Parmesan Baked Chicken Tenders

A healthier, oven-baked alternative to fried chicken featuring a double-dipped coating of almond flour, panko, and parmesan for an impossibly crisp texture without the oil.
- Prep Time: 15 minutes
- Cook Time: 15 minutes
- Total Time: 30 minutes
- Yield: 4 servings 1x
- Category: Main Course
- Cuisine: American
Ingredients
- 1.5 lbs boneless, skinless chicken breasts, trimmed and cut into 1-inch strips
- 1 cup buttermilk
- 1 teaspoon garlic powder
- 1 teaspoon onion powder
- 1/2 teaspoon black pepper
- 1 cup fine almond flour
- 1/2 cup panko breadcrumbs
- 1/2 cup freshly grated parmesan cheese
- 1 teaspoon garlic powder
- 1 teaspoon onion powder
- 1 teaspoon salt
- 1 teaspoon baking powder
- Butter or olive oil spray
Instructions
- Preheat oven to 400°F (200°C). Line a baking sheet with parchment paper and place a wire rack on top.
- Pat chicken strips dry with paper towels to remove excess moisture.
- In a wide bowl, whisk together buttermilk, 1 teaspoon garlic powder, 1 teaspoon onion powder, and black pepper. Add chicken strips and marinate for 10-30 minutes.
- In a second bowl, combine almond flour, panko, parmesan, 1 teaspoon garlic powder, 1 teaspoon onion powder, salt, and baking powder. Whisk to distribute evenly.
- Remove a chicken strip from the buttermilk, letting excess drip off. Press firmly into the dry mixture, flip, and press again. For extra crunch, double-dip: dip back into buttermilk briefly, then back into the dry mix, pressing firmly.
- Place coated tenders on the wire rack, ensuring they do not touch.
- Lightly spray the tops of the tenders with butter or olive oil spray.
- Bake for 12-15 minutes, flipping halfway through and spraying the other side with oil.
- Remove when internal temperature reaches 165°F (74°C).
- Let rest for 2-3 minutes before serving.
Notes
For best results, use a wire rack to allow air circulation and prevent soggy bottoms. Ensure chicken is patted dry before marinating. If using chicken thighs, reduce cooking time slightly. To toast almond flour for extra flavor, spread on a dry pan over medium heat for 2-3 minutes until fragrant before mixing.
Nutrition
- Serving Size: 2 tenders
- Calories: 250
- Sugar: 2
- Sodium: 600
- Fat: 12
- Saturated Fat: 4
- Carbohydrates: 8
- Fiber: 2
- Protein: 20
Keywords: chicken tenders, baked chicken, parmesan chicken, almond flour coating, healthy dinner, keto friendly, gluten-free option, weeknight meals