Love this? Save it for later!
Share the inspiration with your friends
The alarm hadn’t even gone off yet, and I could already hear the chaos. My sister’s bridal shower was in four hours, and I was supposed to bring a “signature brunch dish” for twenty people. I’d said yes three weeks ago, had grand visions of a frittata with all the fixings, and then… life happened. By the time I stumbled into the kitchen at 5:47 AM, I had exactly zero groceries for that frittata. I opened the pantry, hoping for a miracle, and found a bunch of spotty bananas, a half-empty jar of peanut butter, and a canister of rolled oats. Honestly, I almost cried. But I also remembered those overnight oats I used to make in college—the ones you throw together when you’re too broke for anything else.
So, I grabbed a big bowl, mashed those bananas, and started mixing. I didn’t have time to think, let alone cook. I just poured, stirred, and prayed. I threw it in the fridge, rushed to the store for bagels (the backup plan), and went to the shower feeling like a failure. When I pulled that bowl out to serve alongside the store-bought bagels, I was embarrassed. But then people started eating it. And then they started asking for the recipe. My sister’s mother-in-law, a retired home economics teacher, came up to me with a spoon and said, “This is the creamiest thing I’ve ever had that didn’t come from a carton.” I didn’t have the heart to tell her I made it in a panic at sunrise.
That’s the thing about this recipe for creamy overnight peanut butter banana oats. It doesn’t need a fancy origin story or a trip to a specialty store. It just needs you to be a little bit desperate and a little bit tired. It’s the recipe that saves you when you have nothing else to offer. And honestly? That’s the best kind of recipe to have in your back pocket. Maybe you’ve been there—staring into the fridge at 10 PM wondering what you’re going to feed your family in the morning. This is the answer. I keep making it because it’s the only breakfast that feels like a hug, even when I’m running on three hours of sleep.
Why You’ll Love This Recipe
After testing this recipe about a dozen times (and eating the failed attempts for dinner, let’s be real), I can confidently say this is the version you want to wake up to. It’s not just another bowl of soggy oats. This one has texture, flavor, and a creamy consistency that honestly feels like a dessert you’re allowed to eat for breakfast. Here’s why this one is different.
- Quick & Easy: You need exactly five minutes of active time. That’s it. No cooking, no stirring over a hot stove. Just mix, cover, and sleep.
- Simple Ingredients: You probably have all of these in your kitchen right now. No chia seeds required (unless you want them), no weird powders.
- Perfect for Busy Mornings: This is the ultimate grab-and-go breakfast. Spoon it into a jar, toss it in your bag, and eat it at your desk. No judgment here.
- Crowd-Pleaser: I’ve served this to picky toddlers, dieting friends, and my dad who “doesn’t like oatmeal.” They all asked for seconds.
- Unbelievably Creamy: The secret is mashing the banana first. It breaks down overnight and creates a silky, pudding-like texture that regular oats just can’t achieve.
What makes this version different from the rest? It’s the balance. A lot of overnight oat recipes are either too watery or too thick. This one hits the sweet spot because of the banana. It acts as a natural sweetener and thickener all at once. Plus, I’ve tested it with different milks, different peanut butters, and even a few accidental substitutions. This is the gold standard. It’s the kind of breakfast that makes you close your eyes after the first bite, even if you’re eating it over the sink while packing lunches.
What Ingredients You Will Need
This recipe uses simple, wholesome ingredients that work together to create a rich, creamy texture without any heavy cream or processed sugars. You don’t need anything fancy here—just good, real food. Here’s what you’ll need to grab.
- Rolled Old-Fashioned Oats (1 cup / 90g) – These are the backbone of the recipe. They hold their shape overnight without turning to mush. I prefer Bob’s Red Mill or Quaker Old Fashioned. Don’t use steel-cut oats here—they won’t soften enough—and don’t use instant oats unless you want baby food.
- Ripe Banana (1 large, mashed) – The riper the better. Look for bananas with lots of brown spots. That’s where the sweetness lives. Mash it well with a fork before adding it to the mix. This is non-negotiable for that creamy texture.
- Creamy Peanut Butter (3 tablespoons / 48g) – Use a natural peanut butter with no added sugar if you can. I like the kind where the oil separates and you have to stir it. Avoid the super processed stuff with hydrogenated oils—it doesn’t mix in as smoothly. If you only have crunchy, that works too, but the texture will be different.
- Milk of Choice (1 cup / 240ml) – I use unsweetened almond milk for a lighter version, but whole milk makes it extra decadent. Oat milk is also fantastic here because it adds even more creaminess. Coconut milk (from a carton, not a can) gives it a tropical twist.
- Maple Syrup or Honey (1-2 tablespoons / 15-30ml) – This is optional depending on how sweet your banana is. I usually add 1 tablespoon of maple syrup because I like the flavor. If your banana is super ripe, you might not need any.
- Chia Seeds (1 tablespoon / 12g) – Totally optional, but highly recommended. Chia seeds add a little extra thickness and a boost of omega-3s. They also give the oats a nice pudding-like texture. If you don’t have them, just leave them out.
- Vanilla Extract (1/2 teaspoon) – This rounds out the flavors and makes the whole thing taste like a peanut butter cookie. Don’t skip it—it’s a small detail that makes a big difference.
- Pinch of Salt – A tiny pinch of flaky sea salt on top before serving really brings out the peanut butter and banana. It sounds weird, but trust me on this one.
Equipment Needed
You don’t need a fancy kitchen to make this recipe. In fact, I’ve made it in a hotel room using a plastic fork and a coffee mug. But if you’re at home, here’s what I recommend for the best results.
- Mixing Bowl – A medium-sized bowl works best. I use a glass Pyrex bowl because it’s easy to see if everything is mixed well.
- Fork or Whisk – A fork works fine for mashing the banana, but a whisk helps get the peanut butter fully incorporated without lumps.
- Measuring Cups and Spoons – I know, I know—eyeballing it is tempting. But overnight oats are a ratio game. A little too much milk and you have soup. Too little and you have cement.
- Jars or Airtight Containers – Mason jars are perfect for this. They’re cheap, they seal well, and you can eat straight out of them. I use 16-ounce wide-mouth jars. You can also use any container with a tight-fitting lid.
- Refrigerator Space – You need a flat spot in your fridge where the jars won’t get knocked over. I learned this the hard way when I opened the fridge to find a puddle of oat milk.
If you don’t have mason jars, don’t worry. Any bowl covered with plastic wrap will work. Just make sure it’s sealed tight so the oats don’t dry out or absorb weird fridge smells.
Preparation Method
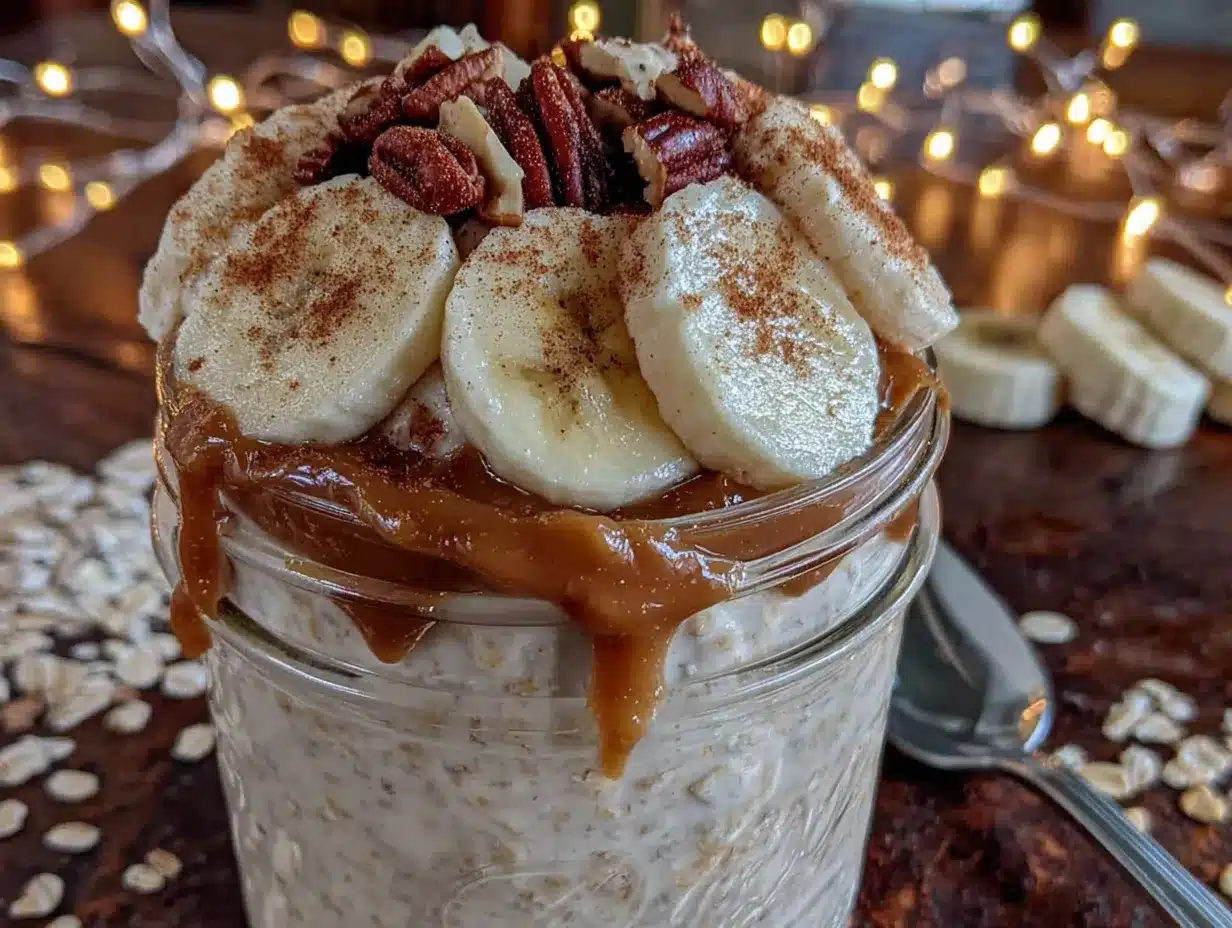
This is the easy part. Seriously, if you can mash a banana, you can make this recipe. Here’s exactly how to do it for the creamiest, most consistent results every single time.
- Mash the banana first. In your mixing bowl, add the peeled banana. Use a fork to mash it until it’s almost liquid. You want it smooth with no large chunks. This takes about 30 seconds. If you have lumps, they’ll stay lumpy overnight, and nobody wants a cold chunk of banana in their first bite.
- Add the peanut butter and vanilla. Spoon in the peanut butter and the vanilla extract. Mix it into the mashed banana until it’s fully combined. It might look a little clumpy at first, but keep stirring. The banana helps the peanut butter break down so you don’t get a glob of peanut butter in one spot.
- Pour in the milk and sweetener. Add your milk of choice and the maple syrup or honey. Whisk everything together until the peanut butter is completely dissolved. The mixture should look like a thin, tan milkshake at this point. Taste it now—if it’s not sweet enough, add a little more maple syrup.
- Stir in the oats and chia seeds. Add the rolled oats and chia seeds (if using). Stir well to make sure every oat is coated in the liquid. This is important—dry oats at the top of the jar will stay crunchy. Use a spatula to scrape the sides and bottom of the bowl.
- Divide into jars. Pour the mixture evenly into your jars or containers. Leave about an inch of space at the top because the oats will expand slightly as they absorb the liquid. I usually fill my jars about 3/4 full.
- Refrigerate for at least 6 hours, but ideally overnight. Pop the lids on and place them in the fridge. Don’t touch them. I know it’s tempting to stir them again, but let them do their thing. The magic happens while you sleep.
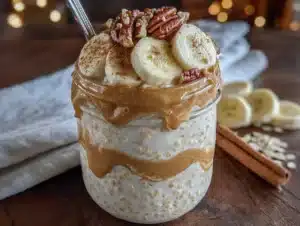
- Stir and serve. In the morning, take a jar out of the fridge. Give it a good stir. The chia seeds might have settled at the bottom, so make sure you scrape everything up. If it’s too thick for your liking, add a splash of milk and stir. Top with a drizzle of peanut butter, a few banana slices, and a pinch of flaky salt. Eat cold or microwave for 30 seconds if you prefer warm oats.
Pro tip from my own mistakes: Don’t skip the stirring before you refrigerate. I once just dumped everything in a jar and shook it. The next morning, I had a layer of dry oats floating on top of a pool of milk. Not cute. Take the extra 30 seconds to stir it properly.
Cooking Tips & Techniques
I’ve made this recipe so many times that I’ve accidentally created a few disasters along the way. Here’s what I learned so you don’t have to repeat my mistakes.
Use a very ripe banana. This is the single most important tip. A green banana will not break down overnight. You’ll end up with weird, chalky pieces in your oats. A spotty, almost-too-ripe-to-eat banana is perfect. It mashes easily and adds natural sweetness.
Don’t oversoak. Overnight means 6 to 12 hours. If you leave them for 24 hours, the oats can get mushy and the banana can start to ferment a little. I learned this when I made a double batch and forgot about the second jar for two days. It smelled… funky. Stick to the overnight window.
Adjust the liquid to your preference. Some people like their oats thick enough to eat with a fork. Others want them drinkable. If you prefer a thinner consistency, add an extra 1/4 cup of milk. If you like them thicker, reduce the milk by 2 tablespoons. The recipe as written is my happy medium.
Layer your toppings in the morning, not at night. If you add sliced banana and peanut butter drizzle before refrigerating, the banana will turn brown and the peanut butter will harden into a crust. Add fresh toppings right before you eat. It takes ten seconds and makes everything look and taste better.
Multitask like a pro. Make these while you’re waiting for your coffee to brew or while your kid is brushing their teeth. It literally takes five minutes. I’ve timed myself. Do it while you’re already in the kitchen doing something else.
Variations & Adaptations
This recipe is a blank canvas. I’ve tried so many versions, and honestly, most of them were delicious. Here are a few of my favorites.
- Chocolate Peanut Butter Banana: Add 1 tablespoon of unsweetened cocoa powder to the mix. Stir it in with the oats. It tastes like a Reese’s cup in a bowl. My kids go crazy for this one.
- Vegan & Dairy-Free: This recipe is already vegan if you use maple syrup and a plant-based milk. I use almond milk and it works perfectly. Just double-check your peanut butter—some brands add honey.
- High-Protein Version: Add 1 scoop of vanilla or unflavored protein powder. You’ll need to add an extra 2-3 tablespoons of milk to keep the consistency right. I’ve used collagen peptides and it dissolves well without changing the taste.
- Berry Banana Swirl: Layer the oat mixture with a spoonful of strawberry or raspberry chia jam. Swirl it with a knife before refrigerating. The tartness of the berries cuts through the sweetness of the banana beautifully.
- Warm Spiced Version: Add 1/2 teaspoon of cinnamon and a pinch of nutmeg to the mix. In the morning, microwave the oats for 45 seconds and top with toasted pecans. It tastes like banana bread in a bowl.
I personally love the chocolate version when I’m craving something indulgent but don’t want to bake a cake. It hits the same spot with way less effort.
Serving & Storage Suggestions
These oats are best served cold straight from the fridge, but they’re also delicious warmed up. If you prefer warm oats, transfer them to a microwave-safe bowl and heat for 30-45 seconds. Stir halfway through. Don’t microwave them in a metal lid or a jar with a metal rim—trust me, sparks are not a good way to start your morning.
For presentation, I like to top my oats with a swirl of peanut butter, a few thin banana slices, a sprinkle of chia seeds, and a tiny pinch of flaky sea salt. It looks like something from a fancy café, but it took me 15 seconds.
Storage: These oats will keep in the fridge for up to 4 days in an airtight container. I usually make a batch on Sunday night and eat them Monday through Thursday. The texture changes slightly after day 3—the oats get softer—but the flavor is still great. Just give them a good stir before eating.
Freezing: You can freeze these! Spoon the mixture into freezer-safe jars, leaving an inch of headspace. Thaw in the fridge overnight before eating. The texture might be a little more watery after freezing, so just stir in a little extra peanut butter to bring it back to life.
Flavor development note: These oats actually taste better on day 2. The banana flavor deepens, and the peanut butter gets more pronounced. If you can resist eating them on day 1, you’re in for a treat on day 2.
Nutritional Information & Benefits
This recipe isn’t just delicious—it’s actually pretty good for you. Here’s the breakdown for one serving (using unsweetened almond milk and 1 tablespoon of maple syrup).
| Nutrient | Amount |
|---|---|
| Calories | 385 kcal |
| Protein | 12g |
| Carbohydrates | 52g |
| Fiber | 9g |
| Fat | 16g |
| Sugar | 18g (natural from banana and maple syrup) |
Health Benefits: Oats are packed with beta-glucan, a type of soluble fiber that helps lower cholesterol and keeps you full until lunch. Bananas provide potassium, which is great for muscle function and blood pressure. Peanut butter adds healthy fats and protein to keep your energy stable. Chia seeds are optional, but they add omega-3s and extra fiber.
Dietary Considerations: This recipe is naturally vegetarian and can easily be made vegan, dairy-free, and gluten-free (just use certified gluten-free oats). It contains peanuts, so it’s not suitable for those with peanut allergies. You can swap the peanut butter for sunflower seed butter or tahini for a nut-free version.
From a wellness perspective, I love that this breakfast doesn’t spike my blood sugar. The fiber from the oats and the fat from the peanut butter slow down digestion, so I don’t crash mid-morning. It’s the kind of breakfast that actually fuels you, not just fills you.
Frequently Asked Questions
Can I use quick oats instead of rolled oats?
You can, but the texture will be much softer—almost like a porridge. Quick oats absorb liquid faster, so you might want to reduce the milk by 2 tablespoons. I prefer rolled oats for the best chewy texture.
Can I make this without a banana?
Yes! If you don’t have a banana, you can substitute 1/2 cup of unsweetened applesauce. The texture will be slightly different—less creamy and more fluffy—but it still tastes great. You might need a little extra sweetener.
Why are my oats watery in the morning?
This usually happens if you used too much milk or if you didn’t stir the mixture well before refrigerating. Make sure the oats are fully submerged. If it’s too watery, stir in a tablespoon of chia seeds and let it sit for 15 minutes. They’ll soak up the extra liquid.
Can I eat these oats warm?
Absolutely. Just microwave the jar (without the metal lid) for 30-45 seconds. Stir well because the bottom gets hotter than the top. You can also heat them in a small saucepan over medium-low heat for a few minutes.
How long do these last in the fridge?
They stay good for up to 4 days. After that, the oats can get mushy and the banana might start to brown. I recommend making only what you’ll eat within that window. If you want to meal prep for a whole week, freeze a couple of jars.
Conclusion
This recipe for creamy overnight peanut butter banana oats has genuinely changed my mornings. It’s the breakfast I turn to when I have zero energy, zero time, and zero desire to think. It’s forgiving, flexible, and always delicious. Whether you’re a busy parent, a stressed-out student, or just someone who wants to eat a good breakfast without waking up an hour early, this one’s for you.
I want you to make this recipe your own. Add chocolate chips if that’s your thing. Use almond butter instead of peanut butter. Throw in some shredded coconut. The base is solid, and it can handle your creativity. That’s the beauty of it.
If you make this, I’d love to hear how it turned out. Did you add something weird that worked? Did your kids actually eat it? Drop a comment below or tag me in your photos. And if you’re looking for another easy breakfast idea, you might also love my fluffy whole wheat pancakes—they’re just as forgiving and just as good for busy mornings.
Now go mash that banana. Your future self will thank you.
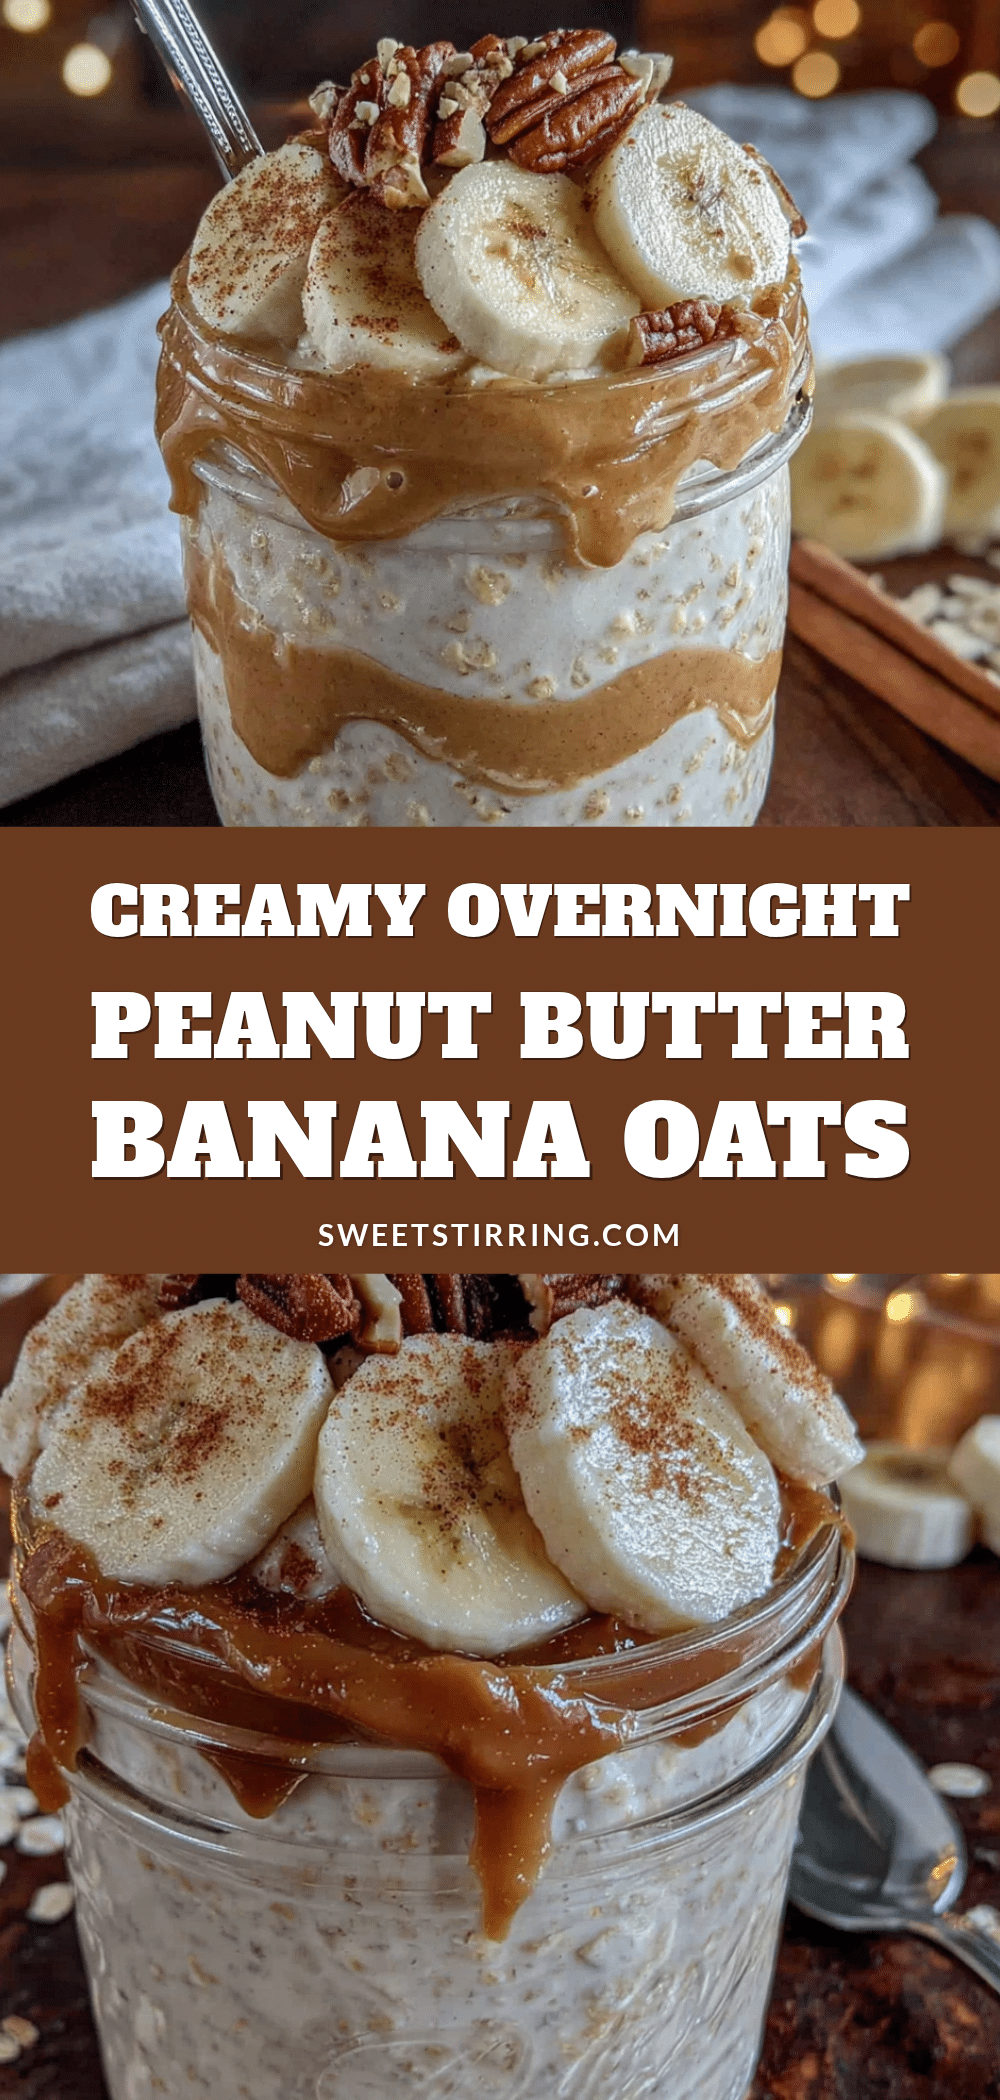
Pin This Recipe!
Creamy Overnight Peanut Butter Banana Oats
A quick and easy make-ahead breakfast that’s creamy, naturally sweetened, and perfect for busy mornings. Made with simple ingredients like rolled oats, ripe banana, and peanut butter, this no-cook recipe delivers a pudding-like texture that feels like dessert for breakfast.
- Prep Time: 5 minutes
- Cook Time: 0 minutes
- Total Time: 6 hours 5 minutes (includes overnight refrigeration)
- Yield: 2 servings 1x
- Category: Breakfast
- Cuisine: American
Ingredients
- 1 cup (90g) rolled old-fashioned oats
- 1 large ripe banana, mashed
- 3 tablespoons (48g) creamy peanut butter
- 1 cup (240ml) milk of choice (e.g., unsweetened almond milk)
- 1–2 tablespoons (15-30ml) maple syrup or honey (optional)
- 1 tablespoon (12g) chia seeds (optional)
- 1/2 teaspoon vanilla extract
- Pinch of salt
Instructions
- In a mixing bowl, mash the banana with a fork until almost liquid, with no large chunks.
- Add the peanut butter and vanilla extract, and mix until fully combined.
- Pour in the milk and sweetener (if using), and whisk until the peanut butter is completely dissolved.
- Stir in the rolled oats and chia seeds (if using), ensuring every oat is coated.
- Divide the mixture evenly into jars or airtight containers, leaving about an inch of space at the top.
- Refrigerate for at least 6 hours, preferably overnight.
- In the morning, stir well. If too thick, add a splash of milk. Top with a drizzle of peanut butter, banana slices, and a pinch of flaky salt. Serve cold or microwave for 30 seconds if desired.
Notes
Use a very ripe banana for natural sweetness and creamy texture. Do not oversoak beyond 12 hours to avoid mushiness. Add toppings fresh in the morning, not before refrigerating. For a thinner consistency, add an extra 1/4 cup of milk; for thicker, reduce milk by 2 tablespoons. Store in the fridge for up to 4 days or freeze for longer storage.
Nutrition
- Serving Size: 1 jar (about 1 cup)
- Calories: 385
- Sugar: 18
- Sodium: 150
- Fat: 16
- Saturated Fat: 2
- Carbohydrates: 52
- Fiber: 9
- Protein: 12
Keywords: overnight oats, peanut butter banana oats, make-ahead breakfast, healthy breakfast, creamy oats, no-cook breakfast