Love this? Save it for later!
Share the inspiration with your friends
My neighbor wasn’t trying to impress me. I’d stopped by to grab a package that got delivered to her house by mistake, and the smell hit me before I even made it past her front door. It was this incredible, buttery, lemony aroma with something savory and toasty underneath—the kind of smell that makes you stop mid-sentence and just breathe in. She was in the kitchen, barefoot, stirring something on the stove while talking to her mom on the phone, completely nonchalant. “Oh, that’s just chicken,” she said when I asked, like she hadn’t just created the most intoxicating scent I’d encountered all week. I stood there, holding my package, trying to be polite and leave, but honestly? I didn’t want to. I wanted to pull up a stool and watch whatever magic was happening in that oven.
She eventually shooed me out with a promise to send the recipe, and I’ll admit—I was skeptical. Could a baked chicken breast really live up to that smell? Maybe you’ve been there, chasing a restaurant-quality flavor at home and ending up with dry, bland chicken more times than you’d like to admit. I’ve definitely been there. But this crispy lemon herb chicken breast was different. It was golden, crunchy on the outside, impossibly juicy inside, and bright with lemon and herbs in a way that felt both fancy and completely doable on a Tuesday night.
The funny thing is, she didn’t even write the recipe down. She just rattled off ingredients while I scribbled on the back of an envelope. And honestly, that’s how the best recipes happen—not from a perfectly tested cookbook, but from someone who’s made it so many times they don’t even need to think about it. This perfectly baked chicken has become my go-to for busy weeknights, lazy Sundays, and even dinner guests. One bite, and you’ll understand why I keep coming back to it.
Why You’ll Love This Recipe
Let me tell you why this crispy lemon herb chicken breast has earned a permanent spot in my weekly rotation. I’ve tested this recipe more times than I can count, tweaking temperatures, adjusting herb ratios, and even burning a batch or two before I got it just right. The result? A dish that delivers on every single promise.
- Quick & Easy: From start to finish, this comes together in about 35 minutes. Perfect for those evenings when you’re staring at the fridge wondering what to make.
- Simple Ingredients: You probably have most of these in your kitchen right now. No obscure spices or special-order items—just real, wholesome food.
- Perfect for Busy Weeknights or Dinner Parties: It’s fancy enough for guests but easy enough for a random Wednesday. I’ve served it to my in-laws and to my toddler, and both gave it two thumbs up.
- Crowd-Pleaser: The crispy coating and bright lemon flavor appeal to kids and adults alike. Even my picky eater cousin asked for seconds.
- Unbelievably Delicious: The texture is what gets me every time—crispy on the outside, tender and juicy on the inside. It’s comfort food that feels a little bit special.
What makes this version different from all the other baked chicken recipes out there? It’s the technique. Instead of relying on heavy breading or frying, this recipe uses a clever combination of panko breadcrumbs and a quick pan-sear before baking. That extra step creates a crust that stays crunchy even after baking—no soggy bottoms here. Plus, the lemon and herb combination is balanced so nothing overpowers anything else. It’s not just another chicken recipe; it’s the one you’ll actually want to make again and again.
What Ingredients You Will Need
This recipe uses simple, wholesome ingredients to deliver bold flavor and satisfying texture without the fuss. Most of these are pantry staples, so you can whip this up anytime the craving strikes.
- Boneless, skinless chicken breasts (4 pieces, about 6 ounces each) – Look for breasts that are similar in size so they cook evenly. If they’re really thick, you can butterfly them or pound them to an even thickness.
- Panko breadcrumbs (1 cup) – These are larger and flakier than regular breadcrumbs, which gives you that extra-crispy texture. I prefer the Kikkoman brand for consistent results.
- Fresh lemon juice (3 tablespoons) – Please use fresh lemons here. The bottled stuff just doesn’t have the same brightness. You’ll need about one large lemon.
- Lemon zest (1 tablespoon) – Don’t skip this! The zest adds intense lemon flavor without the acidity of the juice.
- Fresh parsley (2 tablespoons, finely chopped) – Flat-leaf or curly both work. Parsley adds freshness and color.
- Fresh thyme (1 teaspoon, leaves removed from stems) – If you only have dried, use ½ teaspoon. But fresh really makes a difference here.
- Fresh rosemary (1 teaspoon, finely chopped) – Go easy on rosemary—it’s potent. A little goes a long way.
- Garlic (3 cloves, minced) – Fresh garlic is non-negotiable for this recipe. It adds that savory depth that makes the herbs pop.
- Olive oil (3 tablespoons) – Use a good-quality extra virgin olive oil for the best flavor. It helps the coating get golden and crispy.
- Butter (2 tablespoons, melted) – This is my secret ingredient for extra richness and browning. I use salted butter, but unsalted works too—just adjust your salt accordingly.
- Salt (1 teaspoon) – I use fine sea salt. If you’re using kosher salt, you might need a bit more.
- Black pepper (½ teaspoon, freshly ground) – Freshly ground pepper has so much more flavor than pre-ground.
- Paprika (½ teaspoon) – This is optional, but it adds a nice warmth and helps the chicken get that beautiful golden color.
- Grated Parmesan cheese (¼ cup) – This is another optional add-in, but it adds a salty, nutty flavor and helps the crust brown beautifully. I recommend Parmigiano-Reggiano if you can swing it.
Ingredient Tips: If you’re out of panko, you can crush regular breadcrumbs or even crushed crackers in a pinch. For a dairy-free version, skip the Parmesan and use all olive oil instead of butter. And if you don’t have fresh herbs, you can use 1 teaspoon of dried Italian seasoning—it won’t be quite as bright, but it’ll still be delicious.
Equipment Needed
You don’t need a fancy kitchen to make this crispy lemon herb chicken breast. Here’s what you’ll need:
- Large oven-safe skillet (12-inch cast iron or stainless steel) – Cast iron is my go-to because it holds heat beautifully and gives you that perfect sear. If you don’t have one, any oven-safe skillet will work.
- Meat mallet or rolling pin – For pounding the chicken to an even thickness. If you don’t have one, just use a heavy saucepan or even your fist (I’ve done that in a pinch).
- Three shallow bowls – For the dredging station. Pie plates work great for this.
- Tongs – For flipping the chicken without making a mess. I prefer silicone-tipped tongs so they don’t scratch my pan.
- Instant-read thermometer – This is the best investment you can make for perfectly cooked chicken. Trust me, it takes the guesswork out completely.
- Microplane or zester – For getting that lemon zest without the bitter white pith.
- Cutting board and sharp knife – For prepping herbs and garlic. A dull knife makes everything harder.
- Measuring spoons and cups – For accuracy, especially with the herbs and lemon juice.
If you don’t have an oven-safe skillet, you can sear the chicken in a regular pan and then transfer it to a baking dish. It’s one extra dish to wash, but it works perfectly fine. And if you don’t have a meat mallet, just place the chicken between two sheets of plastic wrap and use a rolling pin—or even a wine bottle. I’ve done all of these, and they all work.
Preparation Method
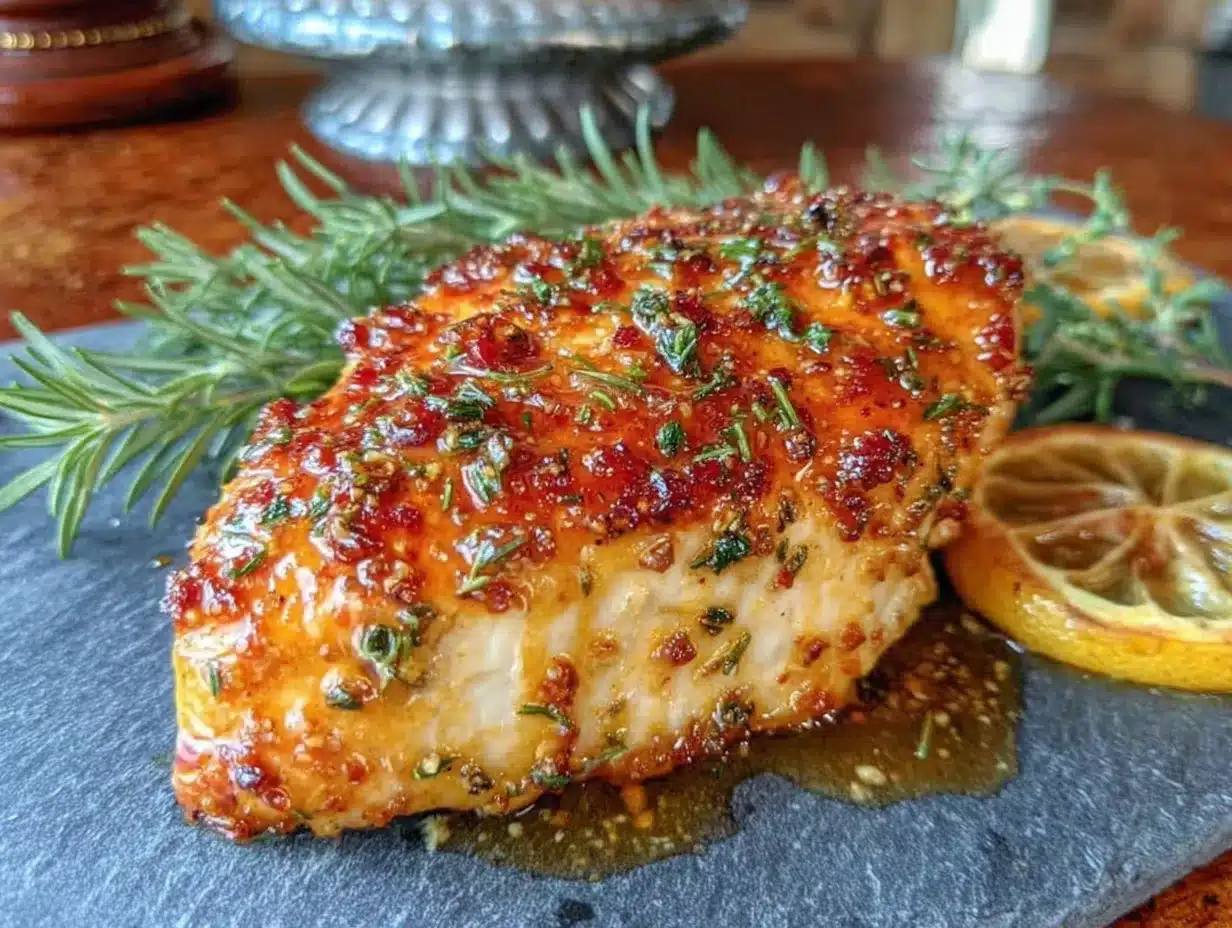
Let’s get cooking! This method might look like a lot of steps, but I promise it’s straightforward. The key is to set yourself up for success by prepping everything before you start.
- Preheat your oven to 400°F (200°C). Put your oven-safe skillet in the oven while it preheats. This might seem odd, but heating the pan first ensures a better sear when the chicken hits it.
- Prep the chicken. Place each chicken breast between two sheets of plastic wrap or parchment paper. Use your meat mallet or rolling pin to gently pound them to an even thickness—about ½ inch thick. This is crucial for even cooking. Don’t go too crazy; you want them uniform, not paper-thin. Season both sides with salt and pepper. Let them sit for 10 minutes at room temperature. This helps them cook more evenly.
- Set up your dredging station. In the first shallow bowl, add ¼ cup of all-purpose flour. In the second bowl, whisk together the lemon juice, melted butter, olive oil, minced garlic, and one of the eggs. In the third bowl, combine the panko breadcrumbs, Parmesan cheese (if using), lemon zest, chopped parsley, thyme, rosemary, and paprika. Mix well.
- Coat the chicken. Working with one piece at a time, dredge the chicken in the flour, shaking off any excess. Then dip it into the egg mixture, letting any excess drip off. Finally, press it firmly into the breadcrumb mixture, making sure it’s fully coated on both sides. This is where the crispy magic happens. Place the coated chicken on a plate while you finish the rest.
- Sear the chicken. Carefully remove the hot skillet from the oven (use oven mitts!). Add 1 tablespoon of olive oil to the hot pan and swirl to coat. Place the chicken breasts in the skillet—you should hear a satisfying sizzle. Sear for 2-3 minutes per side, until golden brown. Don’t crowd the pan; work in batches if needed. The crust should be beautifully golden, not burnt.
- Bake to perfection. Once all the chicken is seared, place the skillet back in the oven. Bake for 12-15 minutes, or until the internal temperature reaches 165°F (74°C) when checked with your instant-read thermometer. Every oven is different, so start checking at 10 minutes. The chicken should feel firm to the touch but not hard.
- Rest before serving. This is the hardest step because your kitchen will smell incredible. But don’t skip it! Transfer the chicken to a cutting board and let it rest for 5 minutes. This allows the juices to redistribute, so every bite is moist and tender. If you cut into it right away, all those delicious juices will run out onto the board instead of staying in the chicken.
- Serve and enjoy. Slice the chicken against the grain and serve with extra lemon wedges and a sprinkle of fresh parsley. The aroma alone will have everyone gathering in the kitchen.
Troubleshooting Tips: If your breadcrumb coating is falling off, you might have too much flour or egg. Shake off the excess flour before dipping in the egg, and let the excess egg drip off before pressing into the breadcrumbs. If the chicken is browning too quickly in the oven, tent it loosely with foil for the last 5 minutes. And if you’re unsure about doneness, the thermometer is your best friend—165°F is the magic number.
Cooking Tips & Techniques
I’ve made this crispy lemon herb chicken breast probably twenty times now, and I’ve learned a few things the hard way. Let me save you some trouble.
Don’t skip the resting step. I know it’s tempting to dig in immediately, but resting the chicken for 5 minutes is non-negotiable. The first time I made this, I was starving and cut into it right away. The juices flooded the cutting board, and the chicken was noticeably drier. Now I set a timer and walk away. It’s worth the wait.
Use a thermometer. I cannot stress this enough. Chicken breasts are notoriously easy to overcook, and they go from perfectly juicy to dry in about 90 seconds. An instant-read thermometer takes the guesswork out completely. Insert it into the thickest part of the breast, and pull the chicken at 165°F. If you don’t have one, you can check by cutting into the thickest part—the juices should run clear, and the meat should be opaque throughout. But honestly, just get the thermometer.
Watch your heat. When searing, medium-high heat is your friend. Too low, and the chicken will steam instead of sear, and you won’t get that crispy crust. Too high, and the breadcrumbs will burn before the chicken cooks through. I learned this the hard way when I got distracted and ended up with blackened chicken that was still raw inside. Not my finest moment.
Pound evenly. Uneven chicken breasts are the enemy of perfect cooking. If one end is twice as thick as the other, the thin end will be dry by the time the thick end is done. Pounding them to an even thickness solves this problem completely. It also tenderizes the meat, which is a nice bonus.
Let the coating set. After you bread the chicken, let it sit on a wire rack for 5-10 minutes before searing. This helps the coating adhere better and prevents it from sliding off in the pan. I started doing this after a particularly frustrating batch where half the crust ended up stuck to the skillet.
Variations & Adaptations
One of the best things about this recipe is how adaptable it is. Here are some variations I’ve tried and loved:
- Gluten-Free Version: Swap the all-purpose flour for a gluten-free blend, and use gluten-free panko breadcrumbs. I’ve tested this with Aleia’s gluten-free panko, and it works beautifully. The texture is slightly different but still crispy and delicious.
- Dairy-Free Version: Skip the Parmesan cheese and use all olive oil instead of butter. The crust won’t be quite as rich, but it’s still incredibly flavorful. I’ve also used vegan butter with good results.
- Spicy Kick: Add ½ teaspoon of cayenne pepper or red pepper flakes to the breadcrumb mixture. The heat pairs surprisingly well with the bright lemon flavor. I made this version for a friend who loves spicy food, and she asked for the recipe immediately.
- Herb Swap: Not a fan of rosemary? Use basil or oregano instead. Dill is also lovely with lemon. In the summer, I use fresh basil from my garden, and it gives the chicken a completely different but equally delicious flavor profile.
- Air Fryer Adaptation: This works great in an air fryer! Preheat to 375°F (190°C), spray the basket with oil, and cook the chicken for 10-12 minutes, flipping halfway through. The crust gets incredibly crispy with less oil. Just make sure not to overcrowd the basket.
- Chicken Thighs: If you prefer dark meat, boneless skinless chicken thighs work wonderfully here. They’re more forgiving and stay juicy even if you overcook them slightly. Reduce the baking time to 10-12 minutes since thighs are usually thinner.
Serving & Storage Suggestions
This crispy lemon herb chicken breast is versatile enough to pair with almost anything. Here’s how I like to serve it:
Serving: Serve the chicken hot, straight from the oven. I love it with a side of roasted vegetables—asparagus, broccoli, or green beans all work beautifully. A simple arugula salad with lemon vinaigrette is also a perfect match, cutting through the richness of the crispy coating. For something heartier, try it with garlic mashed potatoes or a light pasta tossed in olive oil and herbs. And don’t forget the lemon wedges on the side! A squeeze of fresh lemon right before eating brightens everything up.
Storage: Leftovers keep well in the refrigerator for up to 3 days. Store them in an airtight container. The crust will soften slightly as it sits, but the flavor remains delicious. I’ve also shredded leftover chicken and used it in salads or wraps—it’s fantastic cold.
Reheating: To bring back some of that crispy texture, reheat in a 375°F (190°C) oven for 5-7 minutes. Avoid the microwave if you can—it makes the coating soggy. If you’re in a hurry, an air fryer at 350°F (175°C) for 3-4 minutes works like a charm.
Freezing: You can freeze the cooked chicken for up to 2 months. Wrap each piece individually in plastic wrap, then place in a freezer-safe bag. Thaw overnight in the refrigerator and reheat as directed. The texture won’t be quite as perfect as fresh, but it’s still a great meal prep option.
Nutritional Information & Benefits
Here’s the estimated nutritional breakdown for one serving (one chicken breast, based on 4 servings):
| Nutrient | Amount |
|---|---|
| Calories | 385 |
| Protein | 42g |
| Fat | 18g |
| Saturated Fat | 5g |
| Carbohydrates | 14g |
| Fiber | 1g |
| Sugar | 1g |
| Sodium | 680mg |
This recipe is a fantastic source of lean protein, which supports muscle health and keeps you feeling full and satisfied. The lemon provides a good dose of vitamin C, while the fresh herbs add antioxidants and anti-inflammatory properties. If you use whole wheat panko or add extra vegetables on the side, you can boost the fiber content even more.
Dietary Considerations: This recipe is not gluten-free in its standard form, but it can easily be adapted (see variations above). It’s naturally nut-free and egg-free if you skip the egg wash and use a different binder (like buttermilk). For a lower-sodium option, reduce the added salt and skip the Parmesan cheese.
Conclusion
Honestly, this crispy lemon herb chicken breast has become one of those recipes I turn to again and again. It’s reliable, it’s delicious, and it makes me feel like I’ve got my act together in the kitchen—even on days when I definitely don’t. The combination of the crunchy coating, the bright lemon, and the savory herbs is just perfect, and it’s simple enough to make on a busy weeknight but impressive enough to serve to company.
I hope you give it a try and make it your own. Maybe you’ll add a little extra garlic, or swap in your favorite herbs, or serve it with a side that’s special to your family. That’s the beauty of a good recipe—it’s a starting point, not a rulebook. I’d love to hear how it turns out for you! Drop a comment below and let me know if you tried any variations, or tag me in your photos if you share them online. Happy cooking, friends!
Frequently Asked Questions
Can I use chicken thighs instead of breasts?
Absolutely! Boneless, skinless chicken thighs work wonderfully in this recipe. They’re more forgiving and tend to stay juicier. Just reduce the baking time to 10-12 minutes since thighs are usually thinner and cook faster.
How do I keep the breadcrumb coating from falling off?
Make sure you’re shaking off excess flour before dipping in the egg, and let the excess egg drip off before pressing into the breadcrumbs. Letting the coated chicken rest on a wire rack for 5-10 minutes before searing also helps the crust adhere better.
Can I make this recipe ahead of time?
You can bread the chicken up to 4 hours ahead and keep it in the refrigerator. Just bring it to room temperature for 15 minutes before searing and baking. Leftovers keep well for up to 3 days in the fridge.
What’s the best way to reheat leftovers without losing the crispiness?
The oven or air fryer is your best bet. Reheat in a 375°F (190°C) oven for 5-7 minutes, or in an air fryer at 350°F (175°C) for 3-4 minutes. Avoid the microwave, as it will make the coating soggy.
Can I freeze this crispy lemon herb chicken?
Yes! Cook the chicken, let it cool completely, then wrap each piece individually in plastic wrap and place in a freezer-safe bag. It will keep for up to 2 months. Thaw overnight in the refrigerator and reheat in the oven or air fryer.
Pin This Recipe!
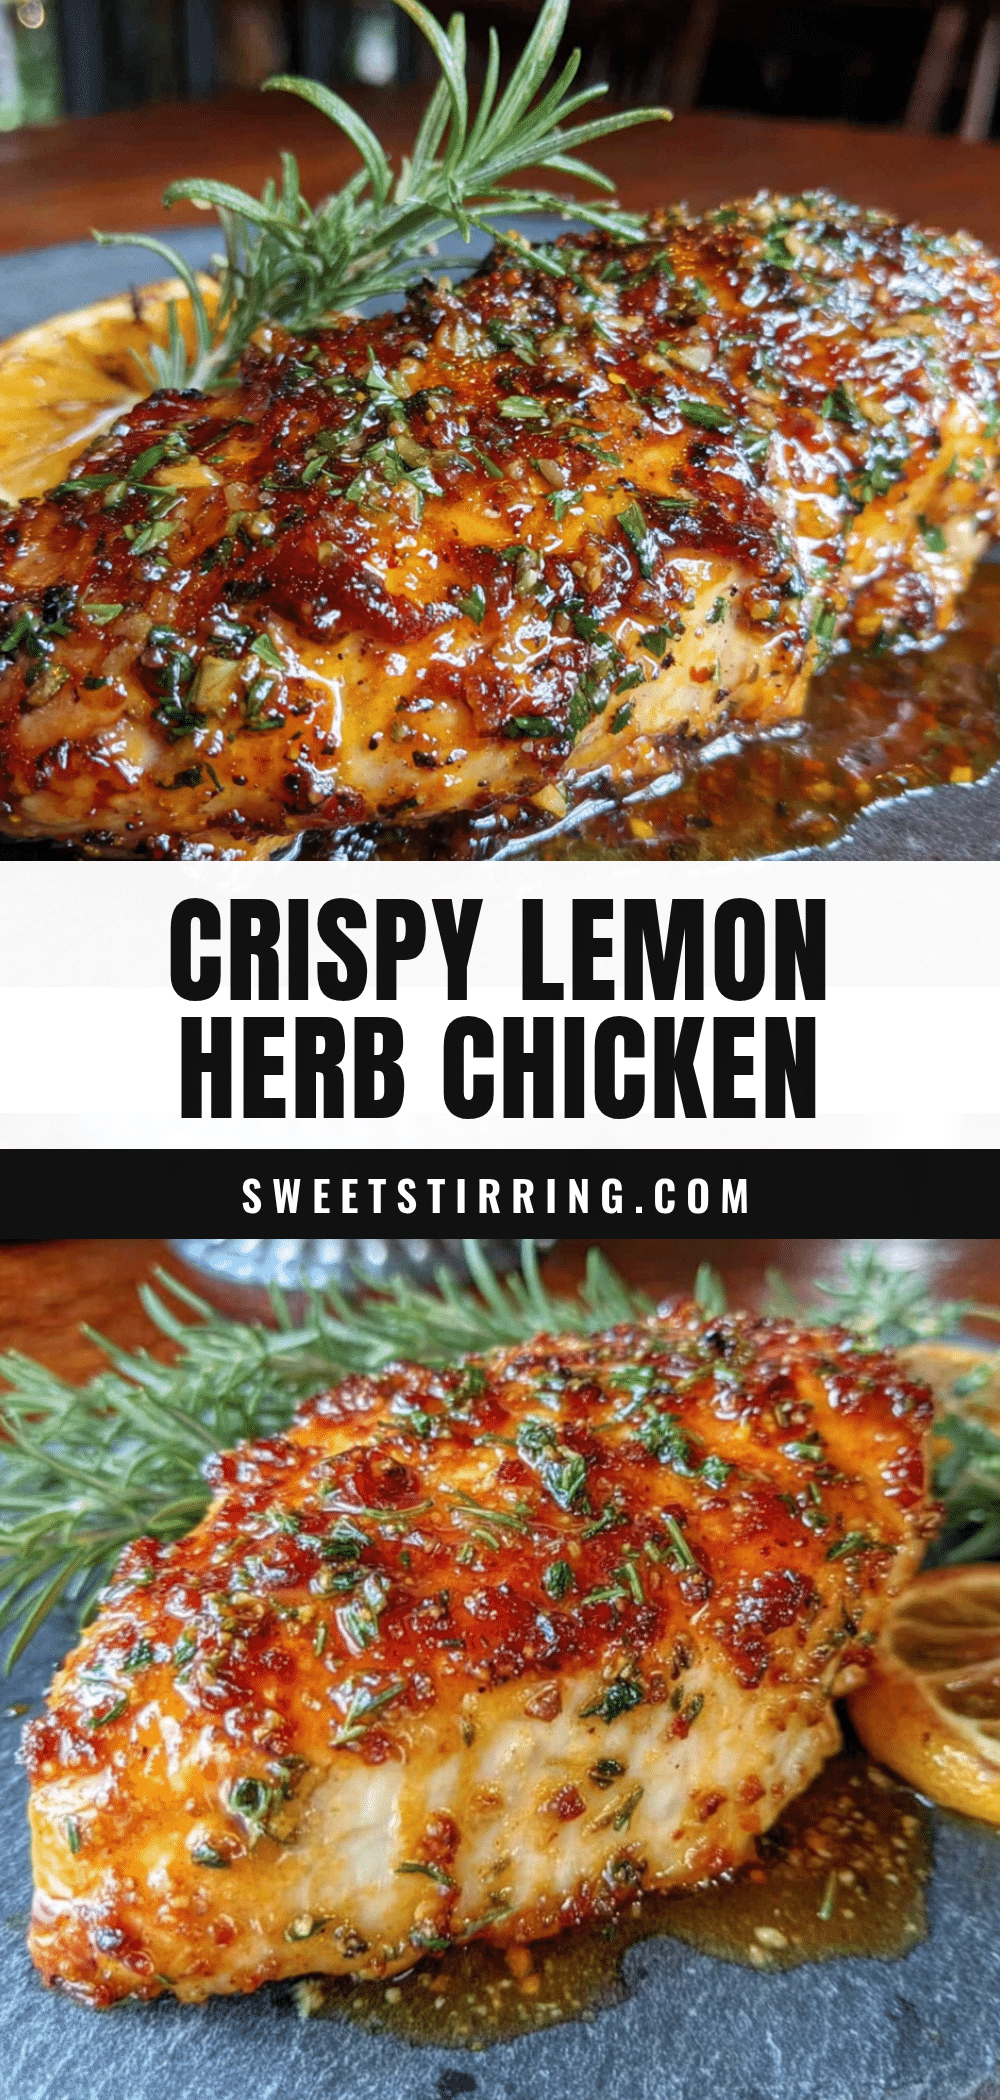
Crispy Lemon Herb Chicken Breast – Easy Baked Dinner Recipe

This crispy lemon herb chicken breast is golden, crunchy on the outside, impossibly juicy inside, and bright with lemon and herbs. It’s fancy enough for guests but easy enough for a random Wednesday, coming together in about 35 minutes.
- Prep Time: 15 minutes
- Cook Time: 20 minutes
- Total Time: 35 minutes
- Yield: 4 servings 1x
- Category: Main Course
- Cuisine: American
Ingredients
- 4 boneless, skinless chicken breasts (about 6 ounces each)
- 1 cup panko breadcrumbs
- 3 tablespoons fresh lemon juice
- 1 tablespoon lemon zest
- 2 tablespoons fresh parsley, finely chopped
- 1 teaspoon fresh thyme leaves
- 1 teaspoon fresh rosemary, finely chopped
- 3 cloves garlic, minced
- 3 tablespoons olive oil
- 2 tablespoons butter, melted
- 1 teaspoon fine sea salt
- ½ teaspoon freshly ground black pepper
- ½ teaspoon paprika (optional)
- ¼ cup grated Parmesan cheese (optional)
- ¼ cup all-purpose flour
- 1 large egg
Instructions
- Preheat your oven to 400°F (200°C). Place your oven-safe skillet in the oven while it preheats.
- Place each chicken breast between two sheets of plastic wrap or parchment paper. Use a meat mallet or rolling pin to gently pound them to an even thickness—about ½ inch thick. Season both sides with salt and pepper. Let them sit for 10 minutes at room temperature.
- Set up your dredging station: In the first shallow bowl, add ¼ cup of all-purpose flour. In the second bowl, whisk together the lemon juice, melted butter, olive oil, minced garlic, and egg. In the third bowl, combine the panko breadcrumbs, Parmesan cheese (if using), lemon zest, chopped parsley, thyme, rosemary, and paprika. Mix well.
- Working with one piece at a time, dredge the chicken in the flour, shaking off any excess. Then dip it into the egg mixture, letting any excess drip off. Finally, press it firmly into the breadcrumb mixture, making sure it’s fully coated on both sides. Place the coated chicken on a plate while you finish the rest.
- Carefully remove the hot skillet from the oven (use oven mitts!). Add 1 tablespoon of olive oil to the hot pan and swirl to coat. Place the chicken breasts in the skillet—you should hear a satisfying sizzle. Sear for 2-3 minutes per side, until golden brown. Don’t crowd the pan; work in batches if needed.
- Once all the chicken is seared, place the skillet back in the oven. Bake for 12-15 minutes, or until the internal temperature reaches 165°F (74°C) when checked with an instant-read thermometer.
- Transfer the chicken to a cutting board and let it rest for 5 minutes before serving.
- Slice the chicken against the grain and serve with extra lemon wedges and a sprinkle of fresh parsley.
Notes
Don’t skip the resting step—it allows juices to redistribute. Use a thermometer for perfectly cooked chicken. Let the coating set on a wire rack for 5-10 minutes before searing to help it adhere better. If breadcrumb coating falls off, you may have too much flour or egg—shake off excess before each step.
Nutrition
- Serving Size: 1 chicken breast
- Calories: 385
- Sugar: 1
- Sodium: 680
- Fat: 18
- Saturated Fat: 5
- Carbohydrates: 14
- Fiber: 1
- Protein: 42
Keywords: crispy lemon herb chicken, baked chicken breast, easy chicken recipe, weeknight dinner, lemon chicken, herb chicken